Our first assignment in junior high wood shop was to make a square block of wood. The edges had to be true and all four corners square. I labored on this simple task for what seemed like a lifetime. I was the last one to finish the assignment and never did get my block to the instructor’s satisfaction. He finally let me move on because the semester was passing by and everyone else had already started their class projects.
Through my practice exercises in working with brass that I shared last week, it feels like I’m back in junior high shop class relearning those basic skills. Metal is an unforgiving material compared to styrene or wood and so requires a greater focus on the task at hand.
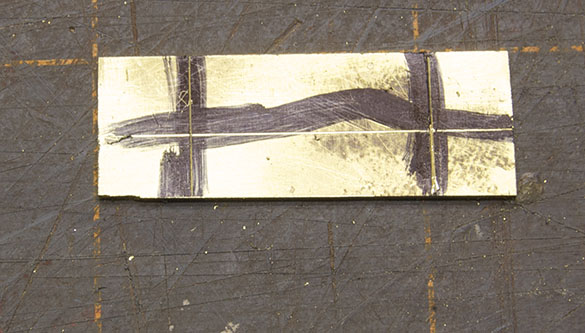
Using both hand and machine operations, this new practice piece involved making a square corner from which to set the layout lines for drilling two holes. Getting these edges true is the foundation for everything else I did with this piece. While it was frustrating due to getting one edge good, only to find the other was off; the constant back and forth of checking for squareness, filing the work and then checking for square again is the essence of deliberate practice.
Of course I could have used the factory edges for doing the layout, but as experienced craftsman learn early, factory edges aren’t always true and square either, and further, one may not always have a factory edge to work from.
Working off the reference edges, I scribed the layout lines with my calipers. I’ve done this many times in sheet styrene, so it was straightforward. Once the layout was set, I used the largest NorthWest Shortline riveting die I had to make the dimples at each intersection. These dimples help capture the tip of the drill bit and keep it from wandering off center. Simon’s suggestion of feeling your way into the lines with the punch worked well.
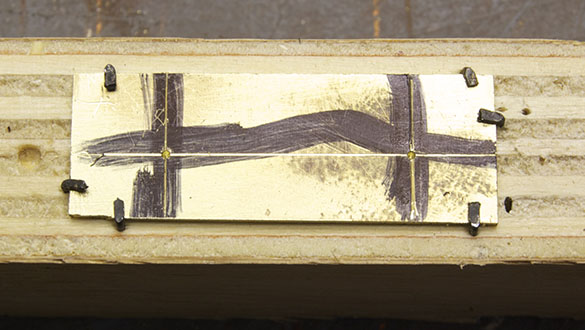
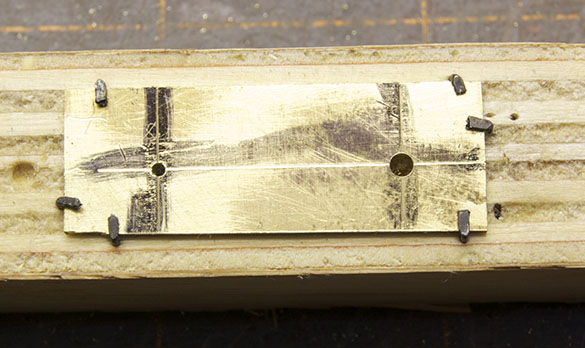
You can see these holes are more accurately placed than my previous attempts. Instead of starting with the final 2-56 clearance bit, I used a No. 61 drill as a pilot bit, frequently testing the alignment before drilling. In the photos above and below, the right hand hole is still a bit off center, while the left hand looks good.
I know this all seems elementary to you experienced readers. However, even though I’m an experienced modeler, the difference in working quality of one material versus another is surprising and this process of relearning foundation level skills serve to develop my understanding of the material. I also relearning persistence and when to back off and think through what’s happening to understand why the desired results aren’t coming. Both are needed for a deeper understanding of the craft. In sum, I’m learning how a craftsman thinks.
Regards,
Mike
Good progress, Mike!
If you are using the #61 drill in a pin vice, it is possible to correct minor errors in the “dimple’s” position by holding the vice (looks like a chuck, unlike a pin chuck, which looks like a vice) at a slight angle to begin with (pointing in the desired direction of correction), then bringing it slowly up to the vertical and perpendicular.
Simon
Thanks Simon.
Yes, good advice once again. As seen in the photos, I secured the work piece to a scrap of wood that is clamped in the vise on the X-Y table of my drill press. I brought the tip of the bit down to the piece to fine tune the position before drilling. As you suggest though, if the dimple is off slightly, it will throw the bit off too.
There are lots of ways around this and one of the best is more practice.
Regards,
Mike
Just passing on a useful lesson.
Mind you, I paid (evening classes) to learn, in the years when it was still possible to undertake such things even when there were no exams to “justify” and “validate” the course. Philistinism is nothing new…
Simon