My current work with brass started because of an AtlasO covered hopper car. As part of their Master Line it’s a nice car but suffers from the usual 3-rail concessions that are the standard in O scale mass-market products. These can be dealt with however, it raises an interesting question: how far can you go with a model?
My modeling philosophy has changed over the years. My choices today are based on a smaller layout that’s focused on individual car movements rather than big picture operations. The cameo scenes I’m modeling take full advantage of the close-up viewpoint P48 offers and here, a single car commands more of your attention. I also prefer not to copy the work of others and by default adopt their level of compromise. I’d rather limit my research to the full-size car and figure out my own methods of doing things based on what I see.
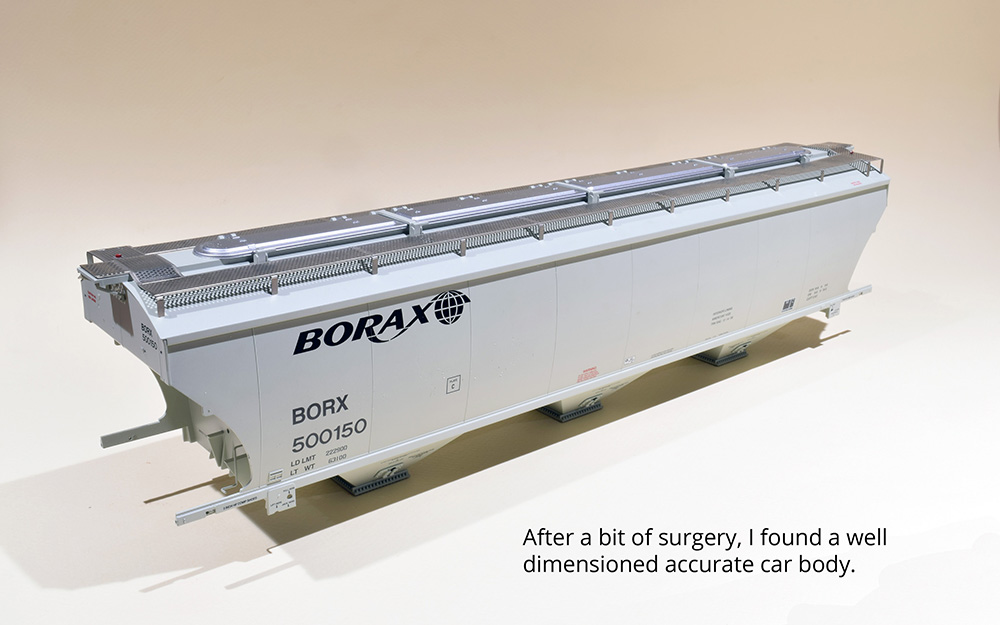
Out of the box, the Atlas car is well done with a dimensionally accurate car body. The details look good until you begin a more critical study. Replacing the body bolsters and draft gear is a given for me. On AtlasO and Lionel cars, these areas simply won’t do for P48 standards. I was going to leave the other details alone until I started looking at the full-size cars. That’s when my eyes opened up to the degree of compromise a commercial model can exhibit.
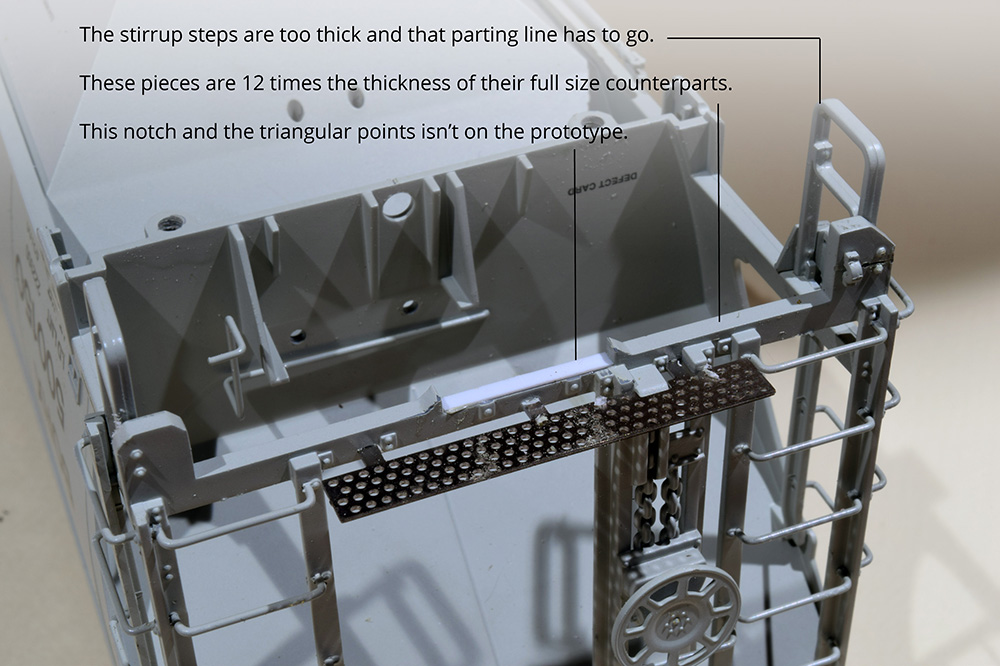
The end cage structure on the full-size covered hopper is made of quarter-inch thick (approximately) steel angles and bar stock. At the bottom of each corner post there is a flat steel plate that supports one side of the stirrup steps and the bracket for the uncoupling lever. There’s also a crossmember that each corner post and ladder stile attaches to. On the model these pieces are all oversized, as a concession to the realities of the manufacturing process. I understand the tradeoffs required in commercial manufacturing but parts that are 12 times as thick as they need to be is both unnecessary and frustrating.
I debated on how to replace the worst of the offending pieces, until I discovered that the details on this car are simply held in place with cast on pins that have a friction fit in their holes. It was a simple matter to pop these items off with a few minutes of work, which ended my debate. Even if I kept the stock parts, removing them gives better access to the car ends for working on the brake equipment and piping.
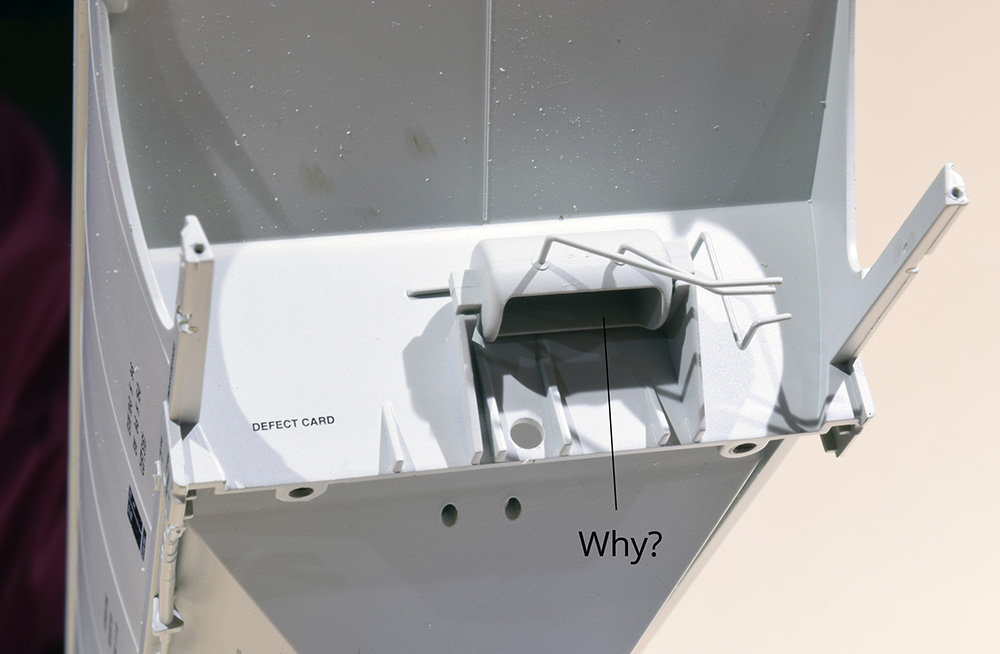
I’m more particular than ever about the amount and quality of detail on a model. It isn’t just the oversized parts that bother me, as I studied the actual car more closely, I also noticed a number of details that are missing from the model. The more I looked at my photos, the more potential I saw for adding missing pieces that would elevate the model. Replacing plastic with plastic didn’t make sense, so I decided to rebuild the end cages with brass. Daunting as that sounds, brass offers crisper detail and strength over styrene of the same thickness. It was a simple choice in the end.
If a scratchbuilt detail isn’t better than what it replaces, then why bother? For many of us, believing we can do such work is a major factor in the success of any project and I’m stretching my skills to the limit with this build. I’m approaching the work one step at a time and redoing parts until I learn the best methods of making them and getting the quality I want. It’s brass, not 24K gold, so mistakes aren’t fatal or that expensive. As I’ve written many times, my enjoyment comes from the journey, not the number of boxes piled up on a shelf.
There are more challenges and hurdles to overcome, and plenty of mistakes to ponder but growing as a modeler is the point of all this and learning from mistakes are the seeds of that growth. The stirrup steps were a good beginning exercise. I’m getting more comfortable with metalworking and developing an eye for quality issues. Each step provides another foundation block to build on for the more complicated work ahead. With each hurdle passed, my satisfaction level skyrockets and through it all I’m internalizing a body of knowledge that will serve me for life. I can’t ask much more than that. My order of trucks and couplers arrived from Protocraft, so I need to keep moving on the project.
Mike
Your skills grow, you’re maintaining standards and you’re satisfied with the results… as a retired Baltimore Orioles broadcaster used to say after a victory “put one in the win column” which is a close second to the one the broadcaster I listened to growing up would say…”ain’t the beer cold?”
These kinds of details are where brass etching stands out. Working in minority scales its up to the individual modeler to produce “upgrades” like this. I have a side project of making new etched steps for locomotives to replace overly thick plastic parts in 1/29 scale.
The beauty of smaller layouts is we get more time to do these kind of projects instead of building empires.
Craig
Jeff,
Amen to all the above. I’m really enjoying this project.
Mike
Craig,
You’re right and I love what the military guys are doing with aftermarket photo etch. I’d like to see more of that for our modeling. As for me, I spend enough time in front of the computer as it is. I could learn a drawing program and how to design my own etch, but I’d rather be at the workbench. There are guys who know far more about the process than I do and I’d rather support their efforts. I also enjoying fabricating these details by hand. It’s a blast so far.
Mike
How far to go is a question I always struggle with. Personally I often err on the side of too far, and a quick project turns into a long slog.
Another quick item while you’ve got those end cages off: you may also want to chamfer the edges of the body sides.
Enjoying the progress!
Rene
Hi Rene,
My guiding principle is simple: If I can see it on a full size car, I want to see it on the model. I’m enjoying and learning from your build as well.
Mike