Methods Of Work-1: Beginning A New Model
Making Splices Disappear
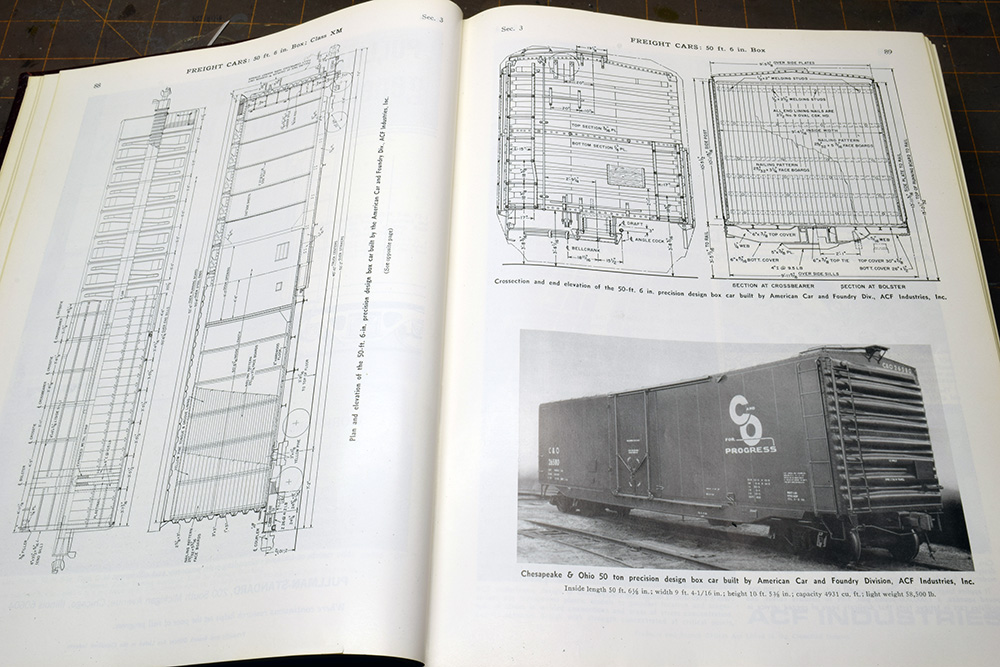
I’ve had the urge to start a new modeling project. I have three ancient Bev-Bel boxcar kits that I bought mainly to use the end and roof panels as parts for other projects. Looking through my 1966 Car Builders’ Cyclopedia I found plans for an ACF fifty-foot car that features these components.
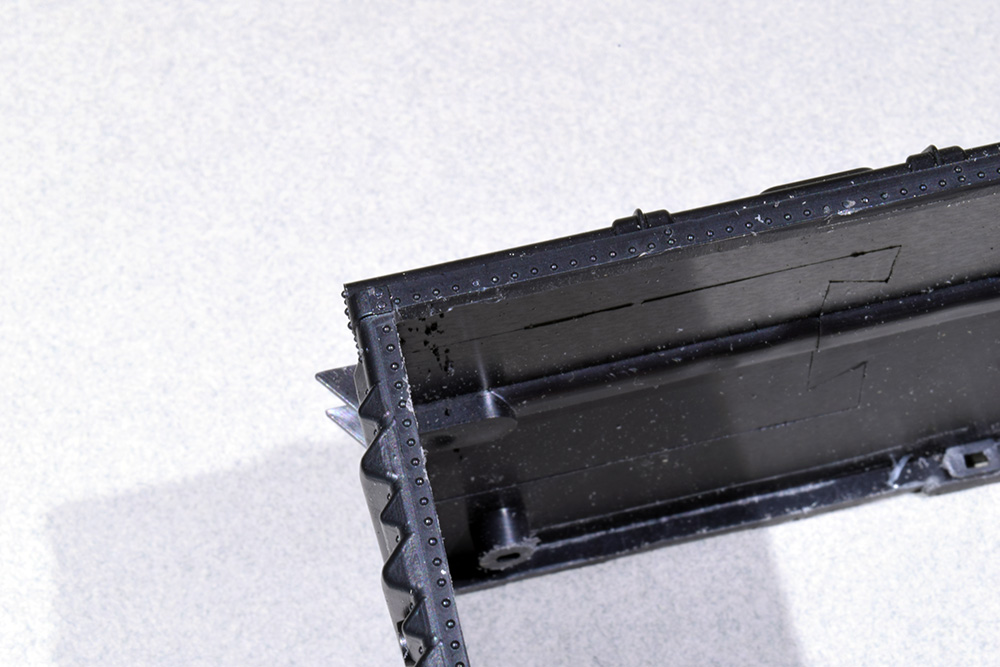
With commercial products decisions have been made for you. This ancient kit was designed as a toy in spite of the fact the end panels are accurately and nicely done. That said, I still have to deal with the giant holes and plastic warts on the end sheets. It’s a pain but comes with the territory when working in a minority scale.
Since this is a forty-foot car and the one I’m building is a fifty-footer, I have to splice two kits together. The side sheets of the kit are riveted and the door layout will be a problem. It’s simpler to just cut the sides away and make new ones. This is the first of many decisions involved in model building and it was an easy one. The value of this older kit is in the accurate end and roof panels. Welded side panels are easy to make and fit. Trying to reuse the existing sides is more work than they are worth.
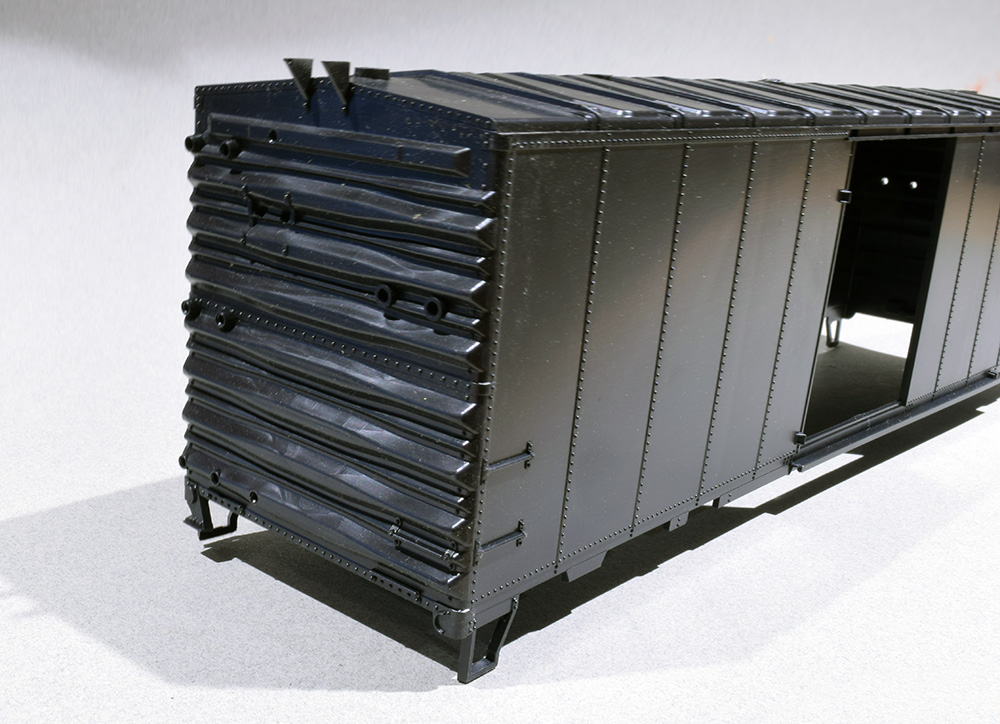
The challenge here was to preserve the rivet detail where the end sheets wrap around the corner. The plastic used is fairly soft but quite thick. I carefully scored a line where needed and hogged away the bulk of material with a rotary tool and cleaned the edges by hand. My plans do show a line of rivets along the top but not where the ones seen here are located. I need to carve these off and add more in the proper location.
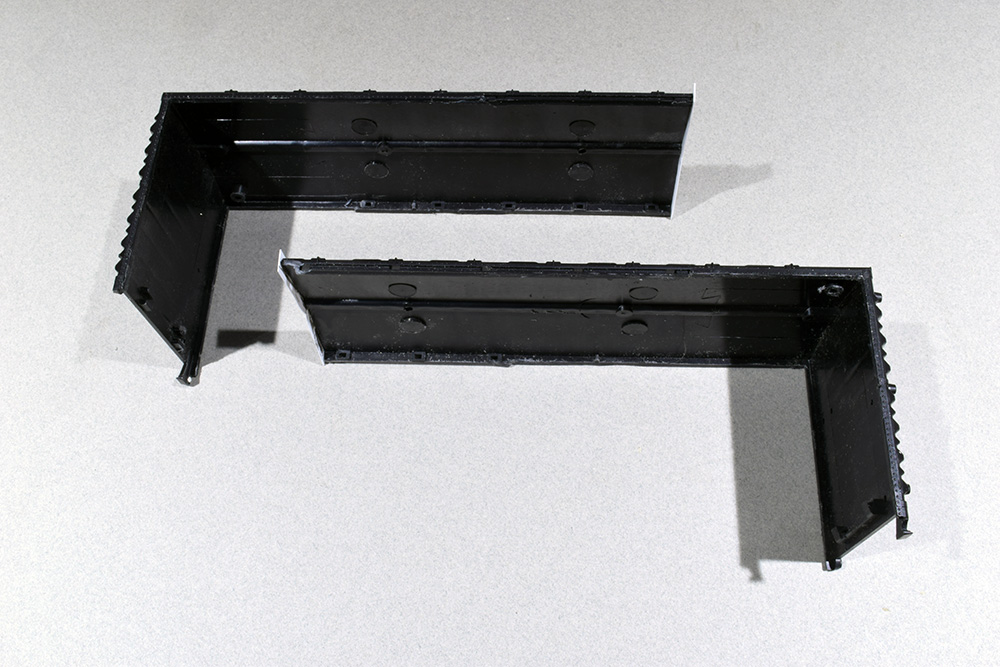
To produce these two ends with roofs required about three hours of work.
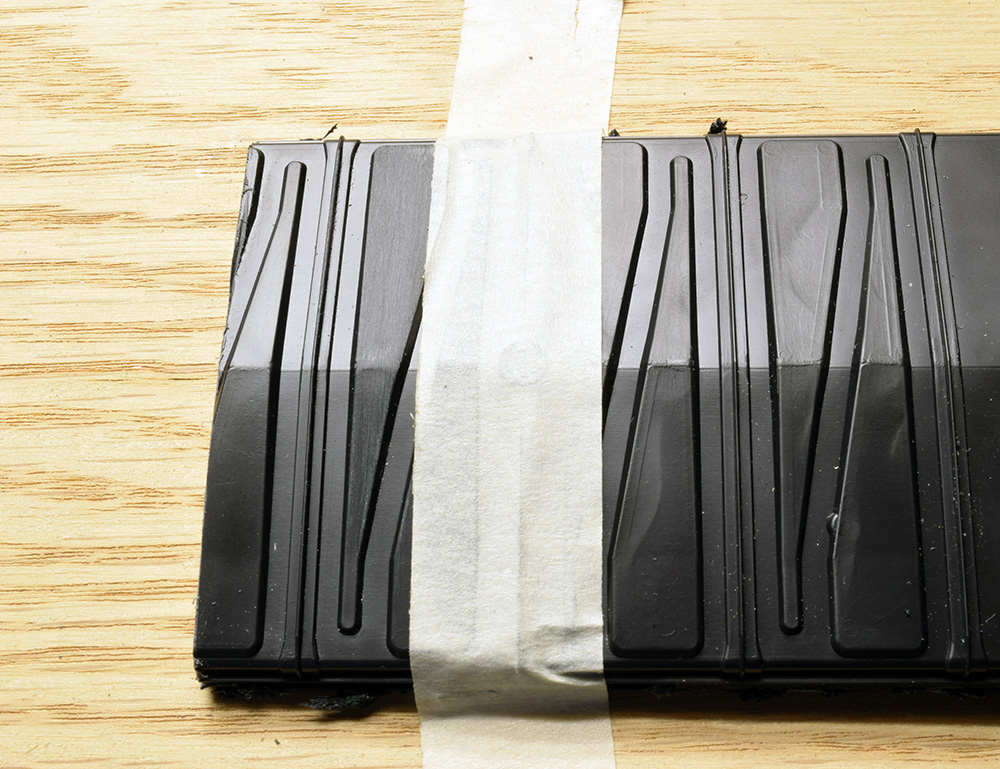
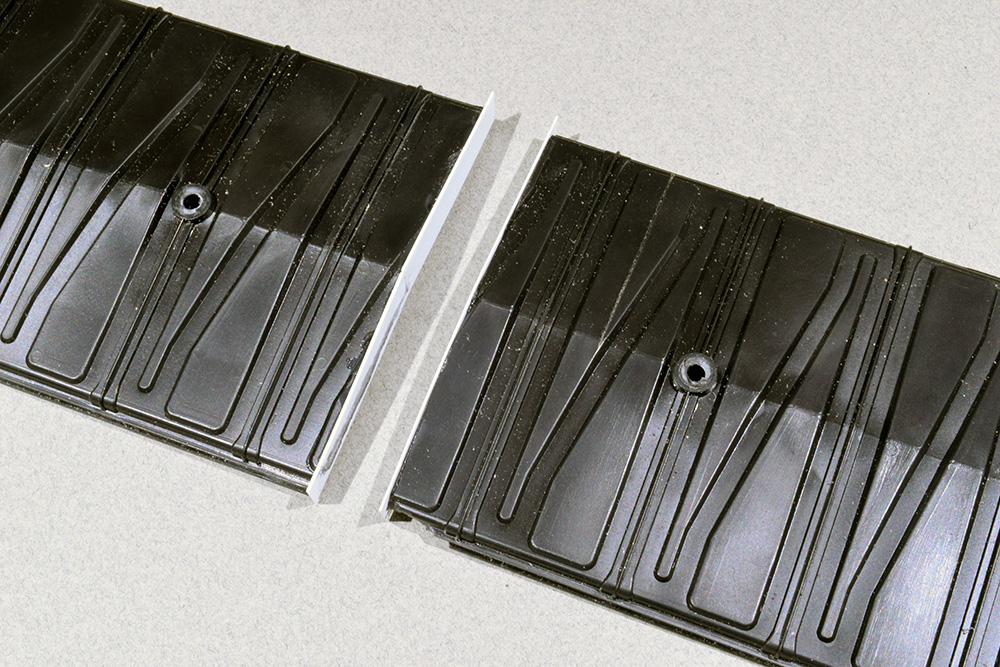
The centerline of the car fell in the middle of a roof panel where the seam could stick out like a sore thumb if I’m careless in the workmanship. Given the odd, uneven surface there is no way to hold a square or straightedge to guide the cutting tools. So how do you make this cut? I carefully measured and marked each cut and placed a piece of masking tape to act as a straightedge. (This image is a mock up of the process, not the actual cut.) I carefully scored a line with a new #11 blade and once the line was deep enough, I brought out the razor saw to finish the cut.
This worked but it was a awkward process. It was hard to hold the car while making the cuts. The resulting edges are ragged and hard to true up. You can see a score line on the first panel of the right hand section. This resulted from not paying attention to what I was doing. Fortunately some filler and wet sanding will make it go away.
The edge of the tape may be ragged, certainly not as true as the edge of a steel rule. An improvement would be to build up the thickness by layering several pieces of tape and to cut a clean edge on one side with a knife and straightedge. The thicker material will make it easier to guide the knife blade.
In making the initial pass, I used a fresh blade and only the weight of the knife to score the plastic. My fingers only guided the blade against the edge of the tape. With each pass, I applied more downward force but not much! I let the blade do its work rather than force it. I can’t emphasize enough that a sharp blade is the key to good work.
It’s important to match the profile of each corrugated panel at the seam and after my heavy handed attempts to true up the edges I realized this panel would be shorter and impact the length of the entire car. I applied a strip of 0.010″ and one of 0.015″ styrene to fill out the joint. I left the strips oversized and will trim them after the glue hardens. Even though this one panel is an inch too short, I’m happy that the filler strips bring the car to the correct length of 50′-8″ over the end sheets as noted on the plan. You pick your battles.
In retrospect, I could have taken the time to make a cradle or holding jig to secure the car. Doing so would have let me focus on making accurate cuts rather than fighting to hold everything still by hand. I’m impatient in this manner and still haven’t learned what I need to learn, or how to practice what I preach.
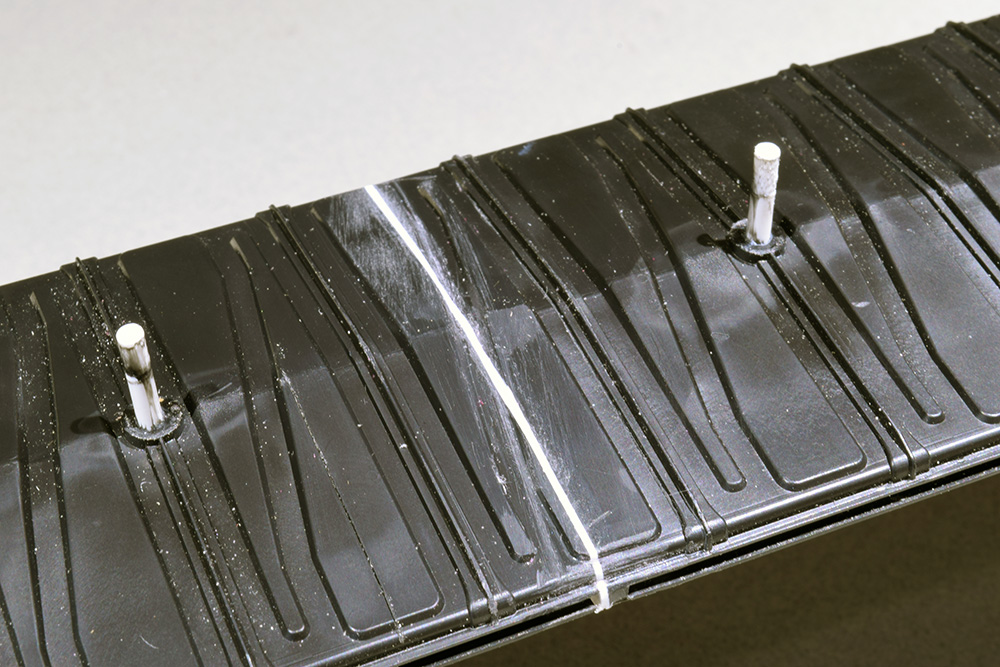
After the joint dried overnight, it was hardened and solid. Bringing the splice to form involved small files, emory sticks and a final wet sanding with water and 400 grit paper. Careful work yielded a satisfactory result, although I still have to deal with the errant scratch mark I made. My hope is that this seam will disappear with a coat of primer. Once I eliminate the plugs of the oversized running board holes I may shoot a light coat on and see what, if anything, needs to be done.
The Path
To experienced modelers this is old news. However I believe such skills and knowledge is gradually being lost. The statement can be made about who cares anymore? Given the high quality of many commercial models straight from the box, a good enough mindset and a general indifference to doing such work, why bother outlining these techniques?
I believe they are important because the assumptions I suggested above do not encompass the entire hobby. They are generalizations mistakenly presented as fact. Yes, models are better and people have many different agendas around model trains. However, not everyone works in HO or N, where anything you want is a click away. Not everyone is driven by operations, or sees model making as a waste of time.
I see an opportunity to help people find their own path by sharing the thinking behind the process. That’s what Tony’s SW1500 book is about and it’s what Detailing Track and The Missing Conversation series is about. Next time I’ll deal with all those ugly holes.
Mike
Mike,
Have you thought about investing in a small hobby table saw? Even the cheap ($150) version from Mirco-Mark might help in future cuts. I’ve been using mine now for almost 15 years and I can’t believe how its changed my approach to cutting. I almost never use a knife blade. For something like this, I would set up a depth stop for the material to be removed and cut both pieces without changing the fence.
Craig
Yes I have Craig. It’s a tool I’d love to add to my shop. The time and finances never seem right. Not everyone has the space or money for specialty tools, so I want to show how to work with what I have.
Mike
Mike,
Thanks for the comment back. I agree its a special tool, but I also think a lot of hobbyist don’t understand how useful these mini table saws are to scratch building. I personally feel that my scratch building skills have improved because I can make accurate consistent cut.
I look at the price as part of the hobby. I would rather buy a quality tool than say a piece of equipment (at this stage).
Craig
I absolutely agree Craig. I’ll add one to the shop at some point and probably wonder why I didn’t do it ten years ago.
Mike
Having spliced a number of roofs over the years, my advice, if you plan to do any more, is to make your cuts along the cap seam between the panels. The vertical part of the seam will serve as a guide for blade and if you cut on opposite sides of the vertical parts, you can easily sand them to make a clean joint.
Thanks for the tip James. Always more than one way to do something.
Mike