I admire the photography featured in aircraft and armor modeling magazines. Shot against a clean neutral background, the modeling is brought to center stage as it should be and these high quality photos add so much to the readers’ understanding and enjoyment.
I’ve shot plenty of photos at my workbench, using my beat-up cutting mat as the backdrop (photo below). It’s convenient for photos that show a technique or a particular step in a process. I move any excess clutter out of camera range but the crummy looking background is still a distraction. As I’ve mentioned before, presentation matters.
It’s adequate but I find the orange grid lines and beat up nature of the mat distracting.
I want to shoot better quality photos to illustrate my projects. To learn more, I did a Google search for “Product Photography” and found many helpful ideas and resources. If that term is unfamiliar, product photos are primarily used in advertising. The “product” can be anything from jewelry, to a car, a hamburger or a bottle of dish soap. Depending on the object being photographed, the photo setup can range from simple to complicated beyond belief. Fortunately for our purposes, a simple setup is adequate.
Looking through the search links I read about easy to use techniques that only require a few moments and simple materials to implement. Here’s what I use for my photos.
The Base
My camera is a basic Nikon D40. It’s several years old now but still does a good job. My “studio” is equally bare bones. As you see in the photo, I often use the top of a bookcase that separates the layout area from the rest of the basement. For a clean background, I place a sheet of foam core board that has a neutral colored gray or tan surface paper. These neutral colors allow me to photograph models from unpainted white styrene to dark locos effectively. I also purchased some sheets pastel paper (a special artist grade paper) in the same range of colors and tonal values. The pastel paper provides a seamless curved background if I need it.

My temporary photography studio.
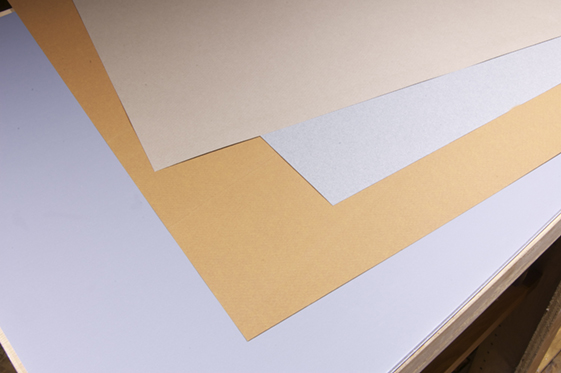
Different colored background papers gives good contrast for a variety of subjects.
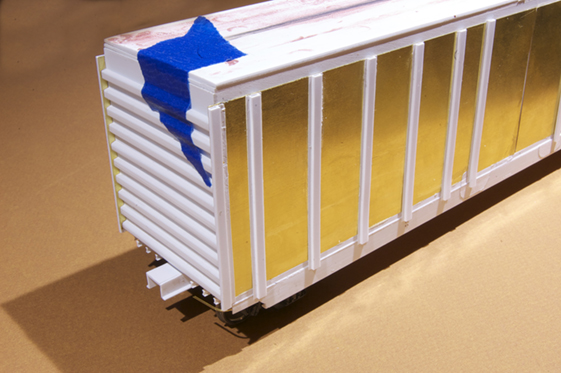
The neutral brown background compliments the brass sheets of the car.
I found these materials at Hobby Lobby for a total cost of less than fifteen dollars. Michael’s or any place that sells art supplies and does picture framing will carry these items. The mat board that picture framers use for artworks framed under glass is also useful. It comes in 32″ x 40″ sheets and can be had in 40″ x 60″ oversized sheets. Matboard comes in a staggering array of colors but once again, neutral tones in gray or tans are your best choice.
Lighting
With digital cameras lighting is less of an issue than with film but you still need to match the camera setting to the type of light used to get proper color rendering. For indoor photos it will be the fluorescent or incandescent setting. And yes photography experts, I’m well aware of how grossly I simplified a very complex subject.
Above the bookcase is a soffit with two recessed can lights that I equipped with LED Daylight (5000K) flood lamps. These are the only lights I use for my photos. The camera is mounted on a tripod and I use the timer feature for hands free shooting. My aperture setting is as high as the camera will go (f36). The ISO is set at 200 and the white balance is set to fluorescent. I shoot a few test photos and adjust the exposure compensation setting until the images are bright with easily seen details (photo below). For the bulk of my photos, that’s all there is to the setup.
The dark background makes the Photoshop added text easy to read.
If I need more intense light for shadows or increased contrast, I have a color balanced 300 watt photoflood lamp in a portable clamp on fixture, though I usually reserve this heat producing firepower for layout shots. Used carelessly, it will overheat things rather efficiently. Now that I have the LED floods, it’s time to retire the old incandescent “heater.”
Post Processing
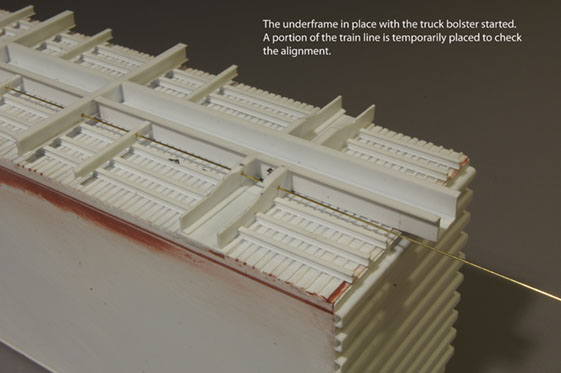
Once I have a group of photos, I load them onto my computer and do any cropping or resizing in Photoshop. If I want to add text, I can do so in Photoshop or InDesign, the program I use to produce The Missing Conversation. I realize not everyone has this high-end software but there are numerous alternatives to Photoshop available. I want to stress that I don’t rely on the software to fix a bad photo. My choice is to produce a high quality image with the camera first and foremost. For example, the photo above of the boxcar underframe is a little dark. To fix this I could have bumped up the exposure compensation in the camera or increased the brightness setting in Photoshop. As with anything, practice improves your skills.
Better quality model photography doesn’t have to be complicated or require a break-the-bank expenditure for oodles of equipment. You simply need good lighting, a place to set up the model and a distraction free, neutral background. Your imagination and some easily found, simple materials will take you where you want to go. As always, take what you need from this post. I’m doing photos for publication so my standards are high. I understand that not everyone will go to the same lengths as I do, nor am I saying you should. I do encourage folks to do their best, whatever that entails for the person. The links below will give you different ways to do this style of photography.
Noupe.com (Lots of useful tips, from simple to sophisticated, in this post.)
Another approach using slightly more professional equipment is shown in these posts from Trevor Marshall’s blog:
Cameron Photo Box Equipment Portraits No. 1 (The first of a four post series on his blog.)
Regards,
Mike
I think that’s why my interest in model railroads is at a high level. Hobby within hobby within hobby. Scenery building, photography, scratchbuilding rolling stock it just keeps getting more interesting as time goes by. There’s always something new to immerse yourself in:)
Regards
Phil
Hi Phil,
Always something to learn isn’t there.
Regards,
Mike