Why Replace These?
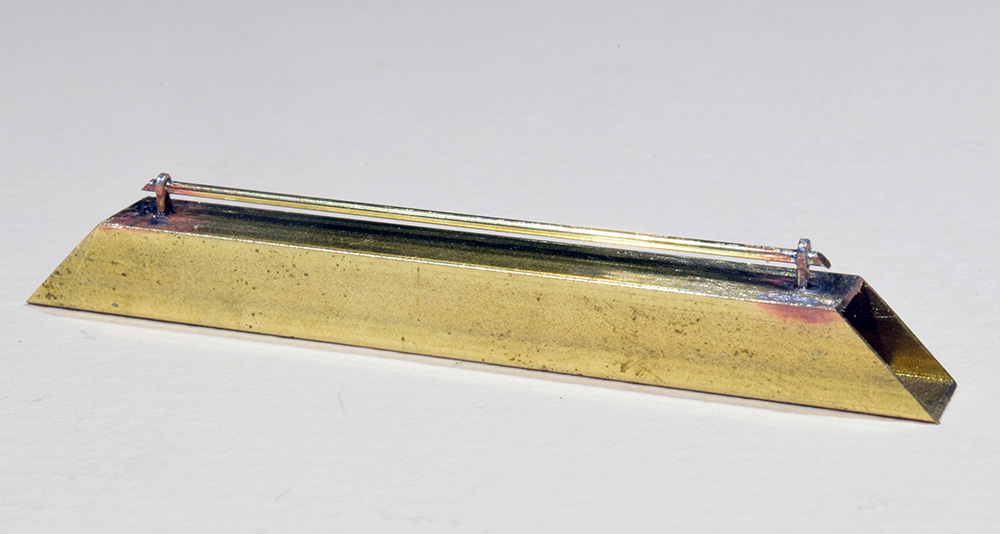
As mentioned in previous posts, I’m replacing the stock details on this Trinity covered hopper car. Along with other items the stock center sill is compromised and heavy in cross-section. It should present a straight line from end to end however, because of the built-in 3-rail concessions, this line is missing on the model. Since I’m replacing the bolsters and draft gear, I decided to correct this flaw and add other missing details. To strengthen my experience with metal work, I made the new center sill from quarter-inch square hollow brass tubing.
The full size car has a visible rod with support brackets that sits on top of the center sill. I don’t know what this does but since I can see it, I’m adding it to the model. This detail consists of lengths of 0.033” brass wire held by brackets made from 0.015” x 0.064” flat strip. I simply bent the flat strip around the wire and crimped it tight on the bottom. The tails of these brackets are trimmed and inserted into #65 holes I drilled near each end of the center sill sections. I soldered the wire and brackets in place using a spacer to ensure everything is level.
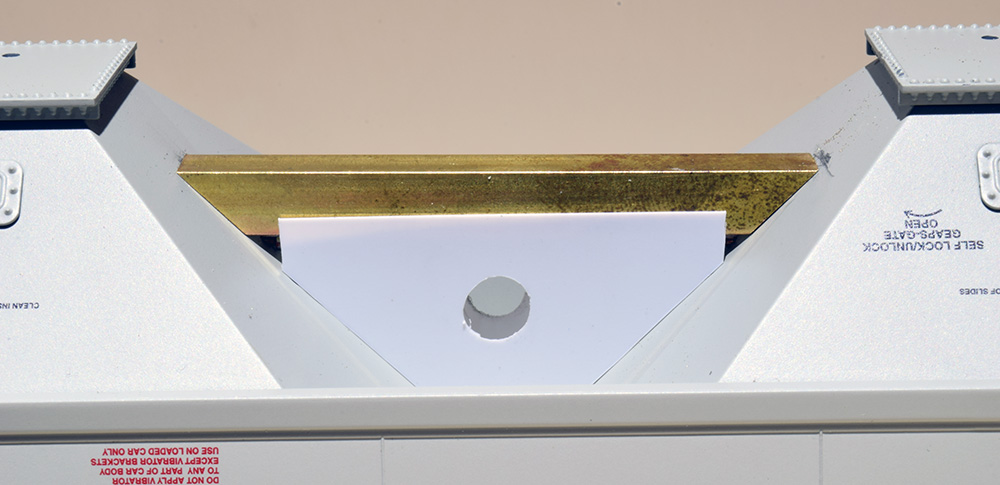
There should be a hole where this linkage goes through the discharge hoppers but there isn’t one on the model. I briefly considered trying to drill these but quickly came to my senses. Instead, I used the end profile of the sill to trim and file the linkage to the proper angle.
Welded to both sides of the center sill are two steel sheets that support the slope sheets of the hopper bays. I made these from 0.010” styrene for an improved scale thickness and appearance. The welded tabs are lengths of 0.010” x 0.020” styrene. Yes, these supports obscure the linkage I so carefully modeled, but it’s still visible where it needs to be, just as it is on the full size car.
The Tiny Work At Hand
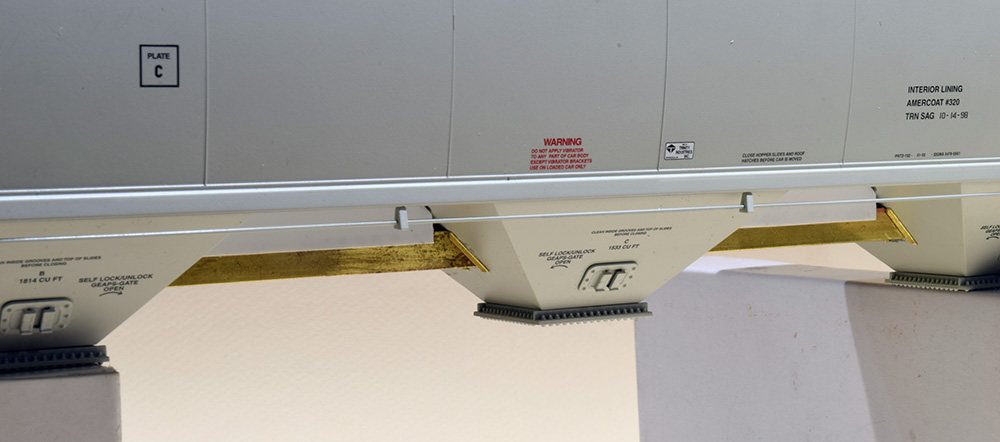
I need 12 short lengths of 1/32” brass angle to serve as corner braces for the center sill where it passes through the discharge hoppers. My photos show a brace on both sides of the sill and since they are visible from normal view, I want to see them on the model.
I start with an oversized length of angle, which is rough cut and profiled on one end. To refine the profiles and get a consistent length, I made a jig of scrap styrene. This took less than five minutes and ensures a repeatable outcome. The jig holds the piece in place and provides a template for shaping the proper angle on each end.
After the pieces are shaped, I glue them in place with gel CA. While inspecting the work I noticed a few of the angles were out of alignment, either from placing them wrongly or my careless work in making them. This would annoy me in photos, so I carefully filed the protruding end back until it was even with its companion. Pieces of tape protect the adjacent areas from getting scratched by the file. The filing motion here is gentle and light to prevent breaking the bond of the CA and bending the part. It’s another working method I picked up from the videos.

The eye can detect tiny errors like this.
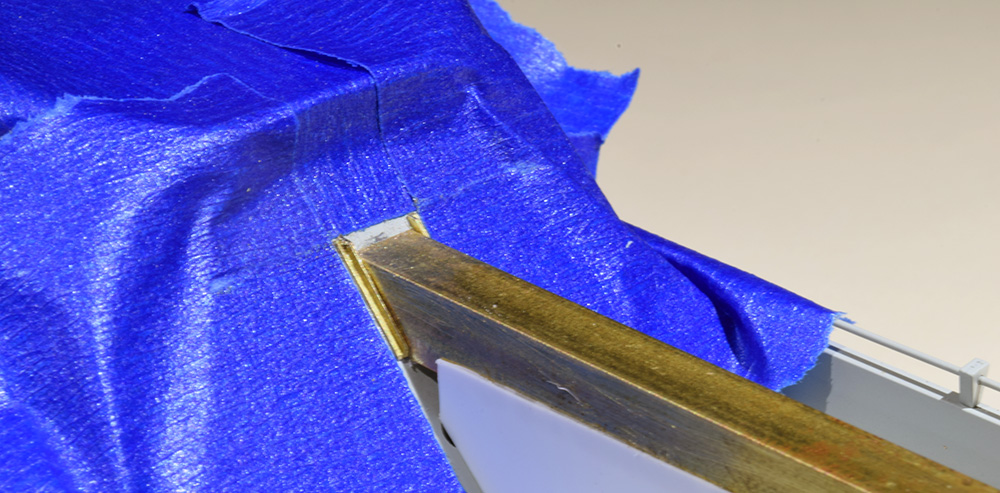
The masking tape protects the surrounding areas from getting scratched by the file.
Better.
People often question the sanity of adding detail that isn’t clearly visible. My response is that every detail, seen or not, is an opportunity to learn and grow as a modeler. In my view, that is reason enough to add them. It works for me but I acknowledge there are contrasting viewpoints.
I’m also tired of the unnecessary compromises modelers just accept without question. I’ve learned that we can build things much closer to scale without adversely affecting the operation of the model. With each detail added, the model comes closer to the image of the prototype and that’s the point of the whole exercise.
Regards,
Mike
Some people climb mountains “because it’s there” and the worst reaction is usually a mild shake of the head and nobody feels any “less” as a person.
Getting it right is just the same, but for some reason there is a minority in the hobby who feel affronted by this approach.
I say minority, I mean “vocal minority”, but sometimes it feels like the majority. Well, my professional experience and training with statistics tells me that the majority of people cluster around the average, so maybe that’s no great surprise – regression to the mean is a well-established concept, but originally the word was not mean, nor average, but mediocre.
Personally, I strive for something other than mediocrity in my life. I thrive on the challenge. But that’s just my psychological makeup: others vary, but without the “outliers” at the extremes, the average doesn’t improve. The average has improved, largely thanks to the pioneers of finescale. I wish the vocal mediocritists would at least accept that.
I’m guessing your pipe is your trainline pipe. It probably crosses from one side to the other on the end openings. I’d have to study a prototype photo to say for sure, but that’s my but guess.
And no, your not crazy…
Craig
I don’t consider myself a finescale modeler, but I DO try to make each model a detailed as I can. The eye DOES see what is there and what is not there!
Sometimes I feel like I have to apologize for the extra effort I put into my models. I am slowly learning (with the help of blogs like yours) that I am modeling for ME!
Thanks for your inspiration!
Simon you’re absolutely right that finescale and the prototype modeling movements have improved modeling and manufacturing standards across the board. Like you, I’m fed up with the many compromises that are a nothing more than a holdover from toy trains.
Mike
Craig,
Your comment has prompted me to rethink my assumptions and dig deeper. I spent time this morning scouring reference photos online and came away with more questions than answers (though I did find an answer or two). Rather than post a lengthy reply, I’ll cover the findings in the next post. -Mike
Thanks for the kind words Peter. I sometimes feel that way too and I’m done apologizing for my choices or worrying about what others think. I’m doing this work for my enjoyment, not to gather a following. I’m simply sharing a journey I’m on. What people do or don’t do with the info is their choice.
Mike,
If your not a member of the Modern Freight Car List on groups.io, I would suggest joining. That group has a huge wealth of knowledge about stuff like the part in question.
My 1st guess is brake pipe.
2nd guess something to do with the centersill/draft gear.
Looking forward to your post.
Craig
I think as one ascends in scale, the attention to details does as well. While there are some in N scale who do additional detailing, most are satisfied with the level of detail done by the manufacturer because with normal viewing angles you couldn’t see it anyway. Not so with O scaler or P48…it is right there in your face and you’re not getting away with a single brake cylinder as the sole underbody detail any more. What you’re doing is fantastic and if it brings you satisfaction then it’s even more fantastic.