Continuing work on this scene, I had the matted grass in the canal bed secured with the normal diluted glue mix and colored with a dull grayish wash of Dr Ben’s Scale Consortium Aged Driftwood* color to tone down the brightness of the sisal twine fibers.
So far so good but it looked too clean for an area recently covered in muddy water. My first thought to model mud and silt deposits was to pour a very soupy mix of plaster, let it dry and color as needed. Just one problem with that, I was out of powdered plaster. None to be found anywhere in the supply drawer and I didn’t want to get more for such a small job.
However, once in a very great while the right solution crops up early in the game. I did have a container of finely sifted dirt (the real stuff) that I used elsewhere on the layout. I applied it around the canal bed, then thoroughly rubbed it into the matted grasses with my finger tip. Looking better but still a bit dry and dusty to my eyes. Well, let’s see, I’ll need to bond this and water and dirt make…Aha!
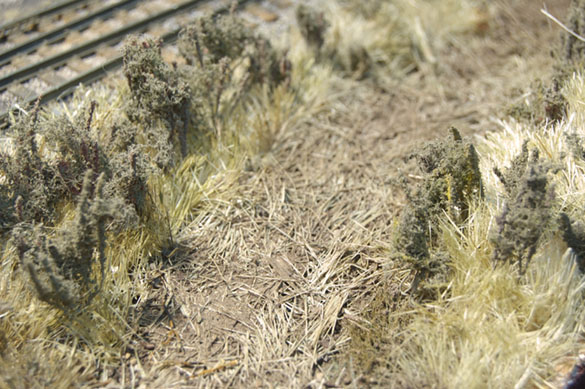
A light shower of plain water from the spray bottle and more rubbing with my finger tip turned the dirt into the most realistic mud you could want. (I haven’t played in the mud in decades!) Funny how the real stuff works so well sometimes. In addition to a nice caked appearance, the mud discolored everything it touched, which left clues about the high water mark during the fictional flash flood.
With this portion of the scene shaping up, I needed to continue the story along the rest of the modeled canal bed. This was a fun task now that I knew what I was doing. More dirt and water worked their magic around the culvert under Mill St. and around the abandoned lock next to the junction turnout.
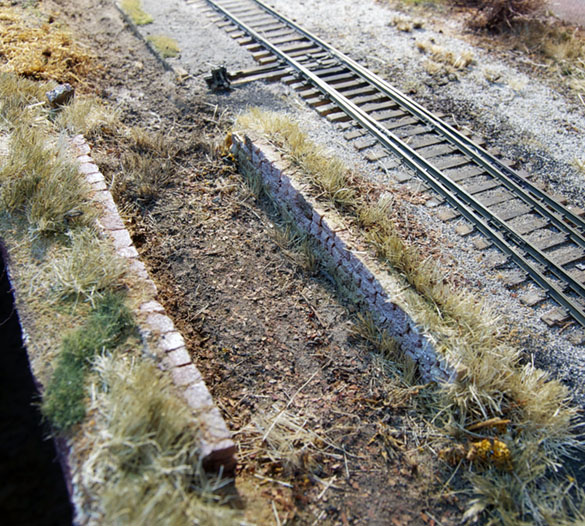
In this area I removed some clumps of older groundcover and other obstructions to show what the water had cleared.
The dirt had dried overnight and was lighter in color again. That’s not a problem because past experience has taught me that it will darken permanently after a soaking with diluted glue to bond everything tightly.
Why bother with such details? One reason, indeed the obvious reason, is these scenes are on the front edge of the layout where you can clearly see everything. Secondly and less obvious, is the amount of enjoyment I get from recreating such visual effects from the full-size world. Things are the way they are for a reason and this can be represented in miniature via careful observation.
While I evaluate the impact of the scene, it’s on to another project and time to enjoy the operations the layout provides.
Regards,
Mike
*Dr. Ben’s products are available here.
Superb work! It’s also really cool to see new shots of your elusive layout. I pretty much bounce around between you, Lance and Trevor for my modeling inspiration, but your personal layout progress is conspicuously absent ;). More please!
Jeremy
Thank you Jeremy. I’ve been in a quandary with the layout and haven’t done much work on it at all in several months. But, it feels like time to get back to it again. I will try to share more in the future.
Regards,
Mike