
C&NW 67220
I look forward to this build. These Intermountain kits are as nice as they come however, the details are a bit heavy so I plan to upgrade them with aftermarket parts from Chooch, otherwise this build will be straightforward.
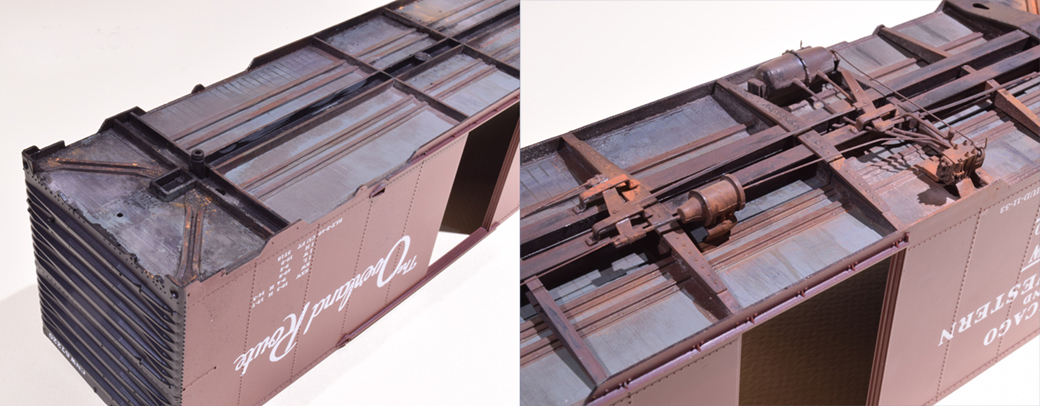
The first thing to consider is what condition the finished model will represent. Will it be an older car with heavy weathering or one recently updated to comply with the new safety regulations introduced in the 1960s, that required the removal of roof top running boards? I plan to represent an older car still sporting full height ladders and running boards, even though it would be close to thirty years old in the mid-sixties era I’m modeling. The railroads had a grace period of several years to update their cars and I have photos from that era showing many box cars still in their original configuration. As for weathering, I need to look through my photos from the sixties and see if I can find a suitable reference photo because I plan to pre-paint and/or weather as I build. Let me give an example.
The kit has a basic black underbody that most modelers would leave as is. I see an opportunity to up the ante by painting the floor boards and floor stringers before adding the center sill and brake gear. It is much simpler to do this now than attempt to slop paint around and between those items (photos below).
I’m aware of all the arguments for why it’s a waste of time to detail the underside of a car. My view is that this is a good place to practice painting and weathering techniques or learn how to exercise more care in fit and assembly.
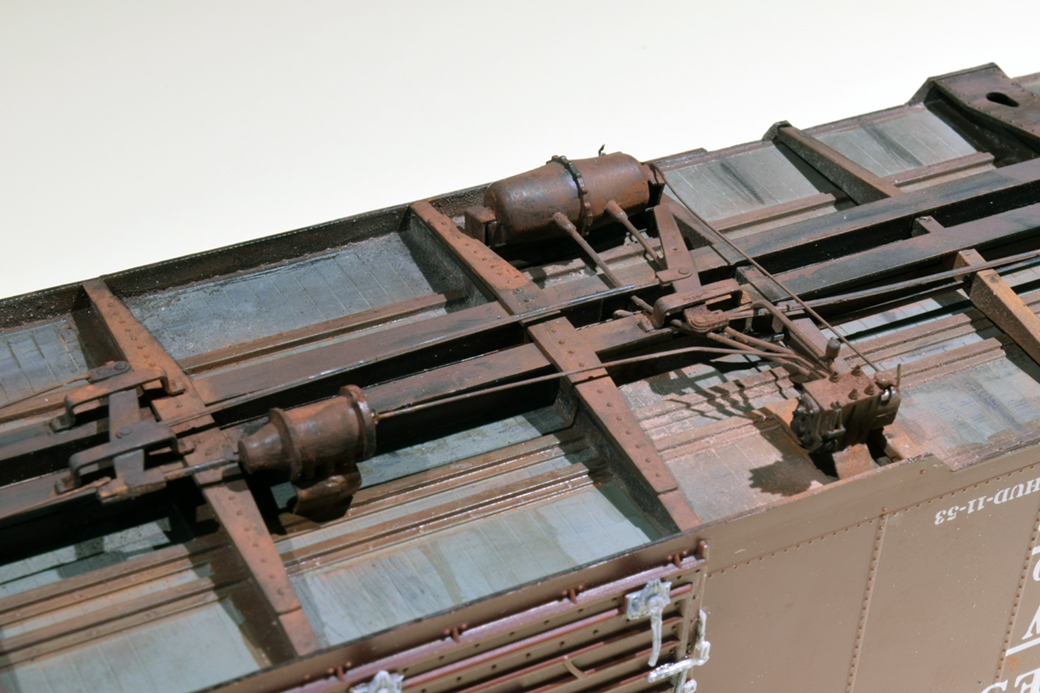
I replaced some of the piping and brake linkage with 0.010″ and 0.015″ wire because I broke the plastic parts trying to clean up the flash and sprue nubs. Otherwise, the underframe was a straightforward build. The kit didn’t include the bleeder linkage from the triple valve, so I added it using a length of 0.010″ brass wire.
After I shot the photo of the finished underframe and posted it on Facebook, a friend pointed out I had missed the parting flash on the brake cylinder and air reservoir. He’s right, so I worked it off with the tip of a No. 11 X-acto blade. This wasn’t hard and resulted in an improved appearance. I also felt that the bright orange color of the rust was off. A car that old would likely have a ton of grime and much darker rust areas. Since I had to touch up the paint on the brake cylinder and air reservoir, I also toned down the rust color (photo below).
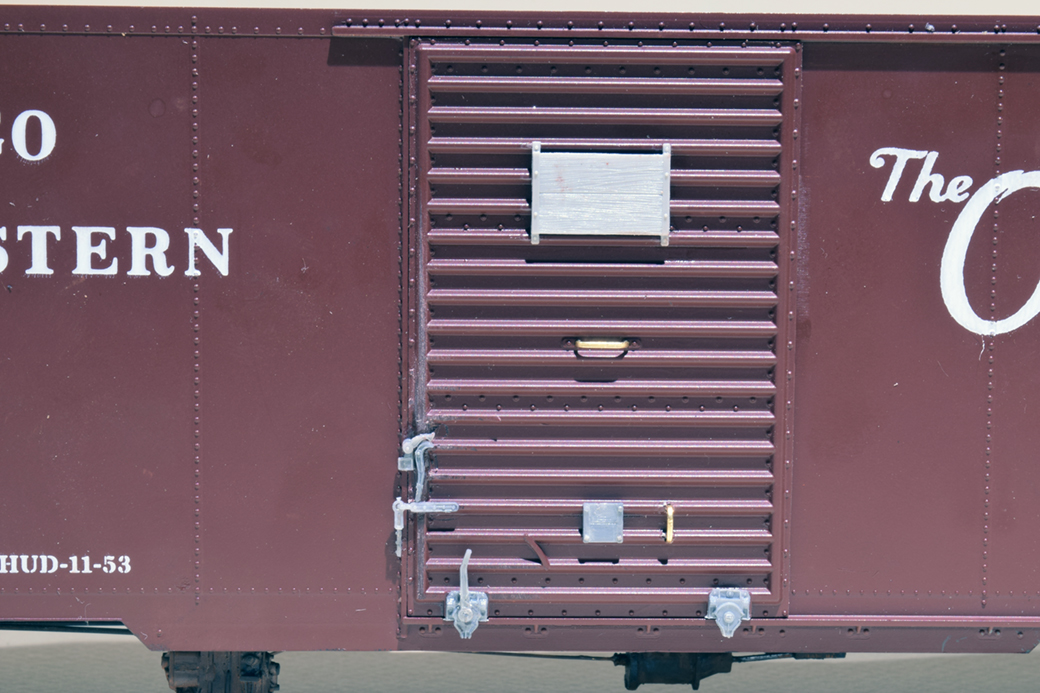
Satisfied with the underframe, I moved on to the doors. I’m impressed with how much the Chooch details add to the appearance of the model. The sprue with the door hardware included two types of Camel door rollers in addition to the route boards (the small ones) and tack boards, door handles and the locking mechanism.
Before now, I seldom paid much attention to these items but seeing how much improvement could be had with these parts, I hit the books again looking for reference photos. Locating most of them was straightforward although I had to think about the door latches. I’m not at all certain I have them correctly oriented.
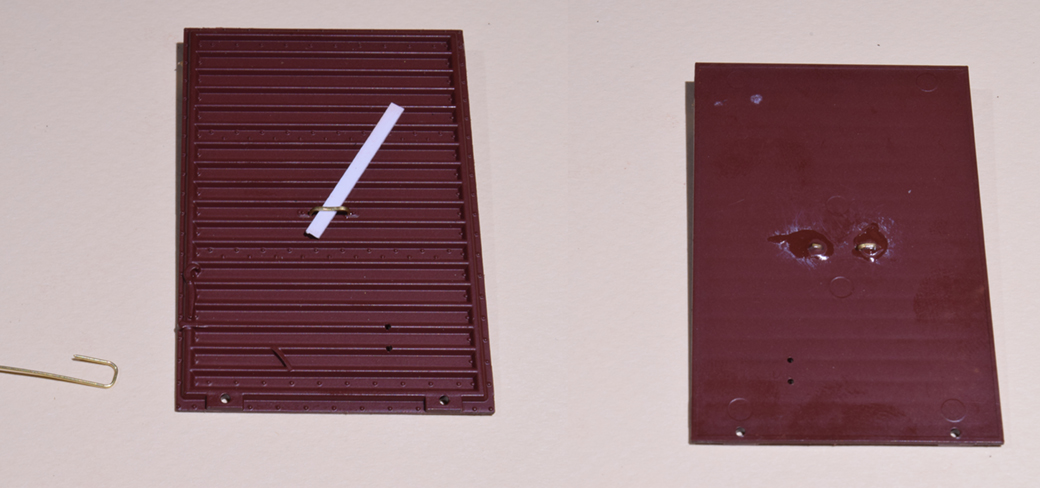
There were two sizes of door handles on the Chooch sprue and they are so delicate that I decided something more robust was needed. I replaced them with pieces of 0.015″ x 0.024″ flat brass wire. The handles have a simple shape that is easy to form and I left the legs long so I could bend them over on the inside after applying a dab of gel CA. I spaced them off the door with a strip of styrene (photos below).
So far this has been a satisfying experience and a relaxing change from a total scratch build. I need to reorder the ladders because I ordered the wrong style initially. That’s not a big deal as there are plenty of other things to do until the new ones arrive.
Working with high quality parts is enjoyable and I enjoy fabricating details that aren’t available commercially. This is why I enjoy model building so much.
Regards,
Mike
Mike,
Have you looked at Car Builder Cyclopedia’s for information? They typically have a lot of good information about different options available for railroads. If you really wanted to get fancy with details you could model the correct boxcar floor such as a nailable steel floor…
Craig
Hi Craig,
I have a 1966 Car and Locomotive Cyclopedia along with many volumes of the Railroad Prototype Cyclopedia.
As you’ll recall, I also went to some length to correctly model a nailable steel floor for the recent PS 5344 project.
Regards,
Mike