
Everything Speaks
Last week I mentioned I wasn’t happy with the storm grate I made. There’s nothing really wrong with the grate itself, I just did a lousy job of installing it.
As mentioned in one of the comments, I didn’t bother looking for a commercial product, reasoning that a), one wouldn’t exist and b), it would be poorly made or the wrong style. Instead I simply did a bit of online research and found the dimensions needed to scratch build one.
I cut two pieces of 0.015″ x 0.042″ brass strip extra long so I could solder the ends together for stability when I clamped the pair in the vise of my drill press. I marked the three-inch spacing for the 0.015″ diameter holes I wanted, then drilled away. The X-Y table made this an easy chore. That said however, the spacing on a couple of the holes is off because I couldn’t see my markings clearly, regardless of how I positioned the drill press in relation to the bench lights. I should have blackened the material with a marker pen before scribing the marks. In addition, I experienced quite a bit of drift with the delicate bit no matter how I positioned it in the chuck or how slowly I advanced it. While not perfect, the results are acceptable.
Once the holes were drilled, I separated the two pieces and inserted the 0.015″ wire, again leaving everything extra long for ease of handling. The photo below shows the work jigged up and ready for soldering. The spacing jig is nothing more than bits of 0.125″ and 0.080″ styrene held in place with tape. These two pieces give me the scale 10.5″ spacing needed for the outer bars.
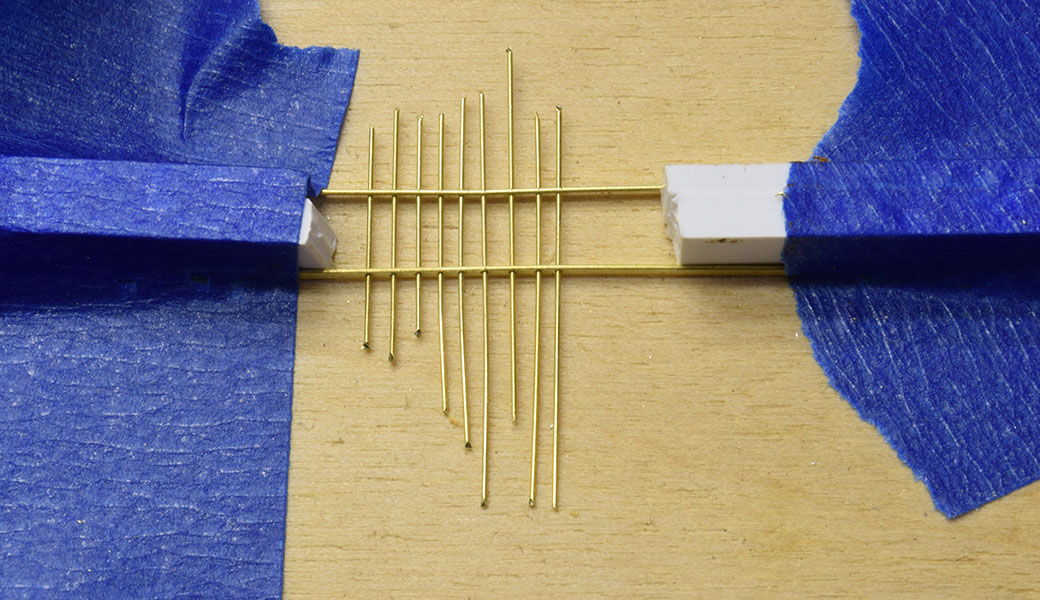
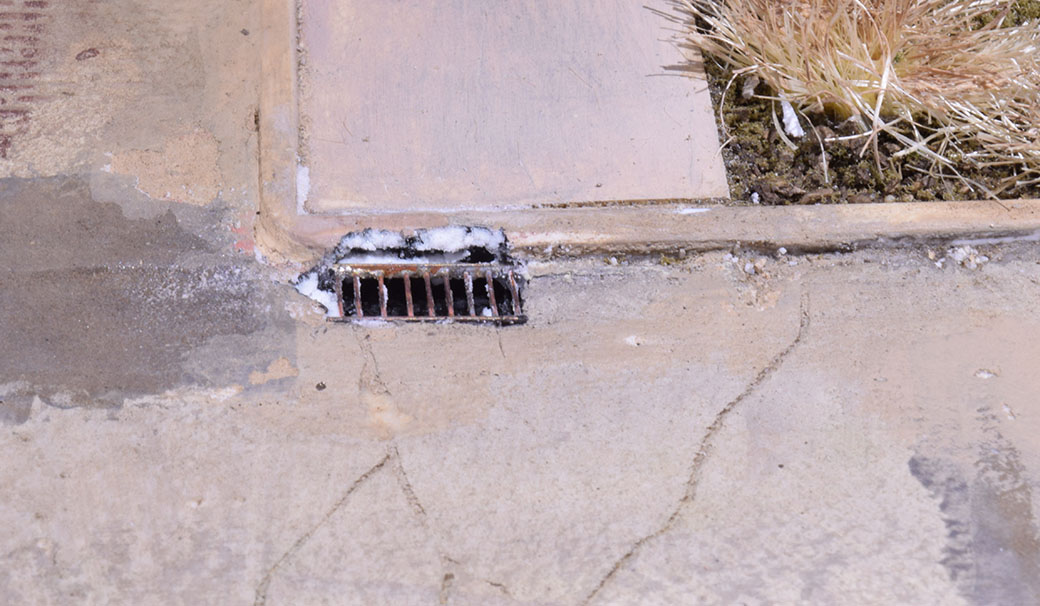
Soldering was straightforward, even with such small pieces. I nipped off the excess wire and filed the nubs smooth on each side. To cut the grate to the proper length, I clamped the assembly in my vise and carefully sawed away the extra material. After clean up I dipped the finished grate in Blacken-It then installed it in the scene.
This is actually the third storm grate I’ve made and the second one installed. Why go to all that trouble for such a minor detail that few are likely to even notice? Because it’s my belief that everything speaks: our actions, our choices, what we pay attention to and what we ignore. It all speaks volumes if you know how to listen. It’s true in life and it’s true about our hobby, from the quality we expect of products to the behavior we tolerate or don’t. From the words we use, the ideas we embrace and how we present the work; it all speaks to our view of the craft and our part in it.
Regards,
Mike
If I may, how long did that take? I ask as it would be all too easy to spend more time online searching for a ready made or kit version than it would to make it.
Simon
Hi Simon,
That was my thought too. The first one took slightly more than an hour, which included rummaging through my stock of materials, setting up the drill press and cleaning up the finished grate. As I filed away, two of the bars broke because I didn’t apply enough solder, so I made the second one. I had the procedure down by this time and the third one seen in this post took around forty-five minutes. The bulk of the time goes into the setup and layout for drilling the holes. With careful soldering, clean up is straightforwad.
Mike