Modeling Track, Part Two: Crossties
In this craft we accept a massive degree of compression and reduction without a second thought. According to my track charts, the siding I photographed in Part One is 1,893 feet long. Reduced to quarter-inch scale, that distance is 39.4375 feet. Take it down to HO and the distance is just over 21 feet. Bear in mind that these dimensions don’t include the turnouts at each end or any approach track. I’m only speaking of the length of the siding itself. From just under 1900 feet down to less than 40 or 21, that’s how much of a reduction we accept. Indeed we take it further because few would model a lowly passing siding to full scale length. For most of us that would be an indulgent luxury rather than a short run-around to sort out cars for switching.
This degree of reduction impacts everything about the way we model a scene, from linear dimensions to how much texture and surface detail we see. For example, the texture we apply to weathered wood.
This degree of reduction impacts everything about the way we model a scene
I’ve noticed certain modeling genres take on their own unique standards. Narrow gauge and logging layouts seem encrusted with detail applied to every square inch of space or surface area. In many cases, wood textures border on utter decay, far exceeding what one would see at full scale. I speculate that our focus on modeling techniques drives much of this mindset. We exaggerate textures and weathering so they will stand out and be noticed rather than render them more to scale. Which, finally brings us to our topic of modeling crossties.
Working in HO scale, I never gave ties much thought. Even with handlaid track I simply sanded the wooden ties level and applied the coloring of choice, usually thinned layers of black or brown paints. With flextrack I went a bit further by nipping the tie ends for a ragged edge along with cutting the plastic webbing underneath so I could alter the spacing. At the time, I was satisfied with the outcome of both techniques.


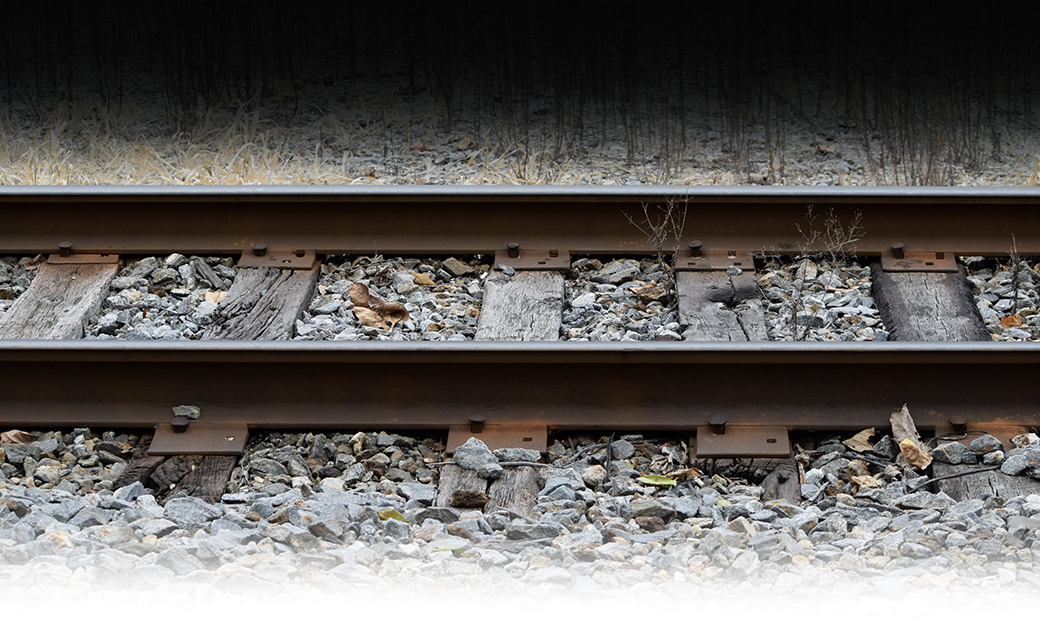
The top photo is a portion of the N scale Modutrak Group’s layout seen from the typical helicopter perspective. At this scale and from this distance any wood grain texture on the ties is a moot point. You simply wouldn’t see much if any of it. Here, color carries more weight in establishing the realism of the scene.
The second photo from my former Indiana & Whitewater shows the difference scale and viewpoint make on our perception. With the larger scale and at this close range, more details and textures are evident. Modeling scale and viewing distance matter in decisions about how much and what types of details to focus on. We get in trouble when we believe the strengths of one scale apply universally to all of them. That mindset is a recipe for disaster.
In quarter-inch scale, the viewpoint is closer and I eventually understood that more surface texture and detail was called for. I’ve outlined my procedure for imparting wood grain, splits, checks and other abuses here on the blog and in my book, so I won’t belabor it again. I enjoy modeling very decrepit track and I prefer a chest level layout height, which for me is 56-57 inches. From this vantage point my gaze can linger on small areas for as long as I wish. Therefore, I tend to go heavy on details and textures you wouldn’t notice as much from a greater distance. However as I study real track more closely, I now believe I go overboard with the amount of texture I put on my ties.
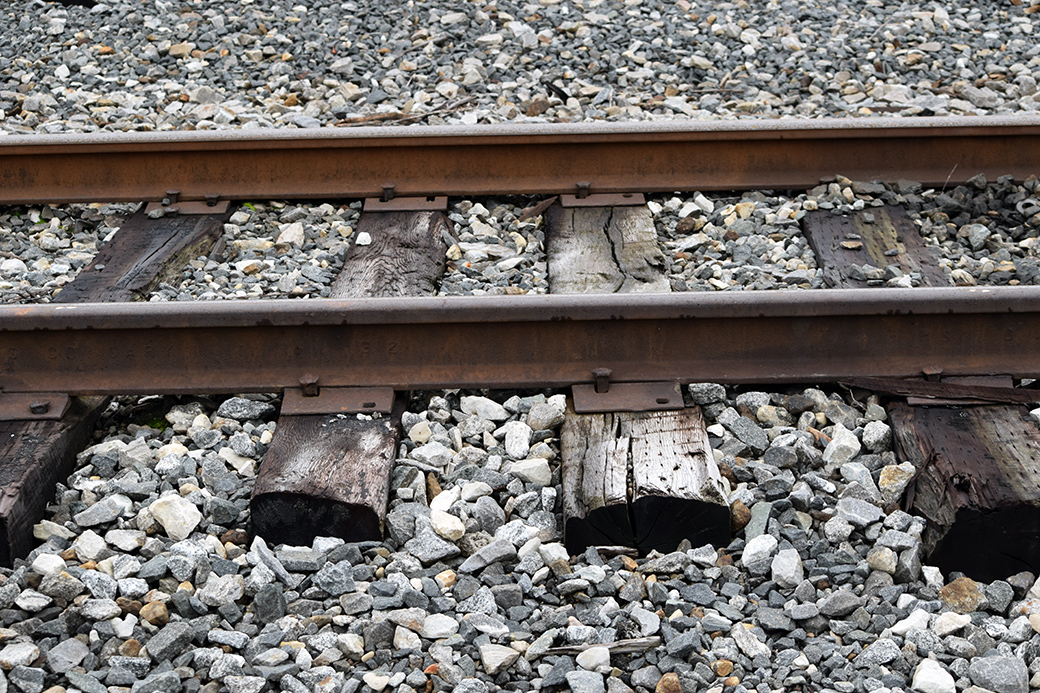
The ties in this photo are weathered but not decayed or rotted by any means. Beyond the large checks caused by shrinkage as the wood dries the grain isn’t that obvious, even from this short distance. Modeling this to scale would only involve the large checks with a minimal amount of other textures. Previously I tended to go nuts with the ties and the effects were too coarse. Of course it depends on what one is modeling but unless the track is truly deteriorated, I feel that I could get by with less graining even for older track.
Adding texture effects is straightforward and not hard to learn. For me, though, the color of weathered wood is my Achilles’ Heel.
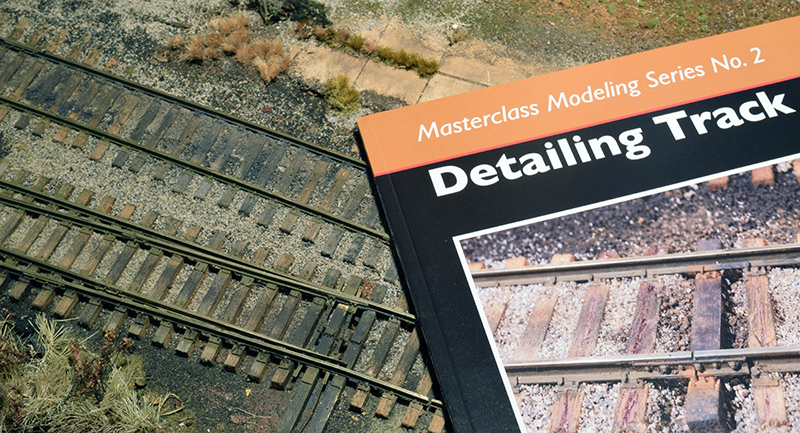
This section of track is an old display I decided to use as a demo for this post. It’s simply code 100 rail on basswood ties. I weathered the ties by scraping them lengthwise with a coarse razor saw. The larger cracks were created with a modified dental scraper and various other tools. My techniques are haphazard at best. I simply grab whatever is handy and see what it does. From the lack of contrast in the image it’s hard to see the texture but it’s there.
A couple of things still need attention here. Foremost is the wood fuzz created by the scraping action of the razor saw. It’s a distraction that ruins the realsim of the scene. I’ve tried several methods to get rid of it with varying degrees of success. In the photo it’s most obvious on the third tie from the right edge.
I already put down the light yellow brown color on the right, which is Minwax Golden Oak wood stain straight from the can. I’ve used this as the base color from the beginning but have grown disenchanted with it. It’s too brown and warm in tone even though I layer other colors over it.

Recently I’ve been using washes of acrylic paints, both the inexpensive craft paints (covered in this post) and, as seen here, Tamiya military colors. I like the impact the washes make. The gray tones are closer to the color of full-size ties. I’ve found that a dead flat finish is key to blending the track into the surroundings and I want to dust on some dirt and dry pigments to tone down the ties even more. This will alter the color again and I’ll make a final determination about it then.
I like the technique, even though it can be laborious and it’s tempting to hurry things along, especially where a lot of ties have to be covered. Normally, I would color the ties before laying the rails but since the rails were already down I had to work the brush around each tie, making certain I covered all sides. Even with this small piece, I had to fight the urge to rush the work.
I often speak of the craft as a way to meet challenges and improve and this is a case in point. About a third of the way into the process, I became bored and wanted to quit. It’s my usual manner of doing things and I was irritated with myself for being so impatient. I had to settle down and found that simply staying with the task and focusing on the outcome I wanted helped. So did taking quick breaks to stretch or move around. I needed the photos for this post and I had to rework the tie color before I could shoot them. That was the motivation I needed to push past my internal boredom.
The other point is about how small details come together to create the final result. Color can greatly contribute or detract from the appearance of your track. It’s one of those aspects we tend to gloss over in the rush to do other things. Yet we shortchange ourselves from the compromised results of our own haste.
I take my modeling this far because I enjoy the result. Others will have a different outcome for their track and that’s as it should be. Even though I wrote a book on the subject I don’t consider myself an expert. In fact I dislike the term altogether. It implies that one knows all there is to know and that’s hardly the case for me. I hate the idea that there’s nothing else one could learn about a subject. I’m still learning about track and eager to push my modeling further. That’s the point of this series. Coming next time, turnout modeling.
Regards,
Mike
Advertisement
Learn to love the process.
Detailing Track, available from OST Publications
0 Comments