Soldering Small Parts-2
The striker plates are the heavy metal pieces that protect the ends of the center sill from damage. They can be a single casting, or individual components. With the addition of the striker plates on the front of the center sill, I’m calling the bolsters done. The work could be cleaner and the material choices feel a bit heavy on reflection however, I’m pleased they turned out this well, given the typical mishaps in getting to this point. I’ve never made this detail before and frankly, it’s one that I’ve dreaded because of the tiny pieces and delicate assembly involved. However, it was time to just plunge into the deep end.
Making the parts started with the U-shaped channel on the bottom. My first thought was to use 0.080″ styrene channel and CA. I backed away on that idea because I wasn’t convinced the styrene and glue would be durable over time. There is little surface area for glue and bearing in mind that this is a scale model that will be treated with care and not a hockey puck, things do happen.
Making these pieces from 0.005″ brass sheet was far simpler than I imagined (Photos 1-2).
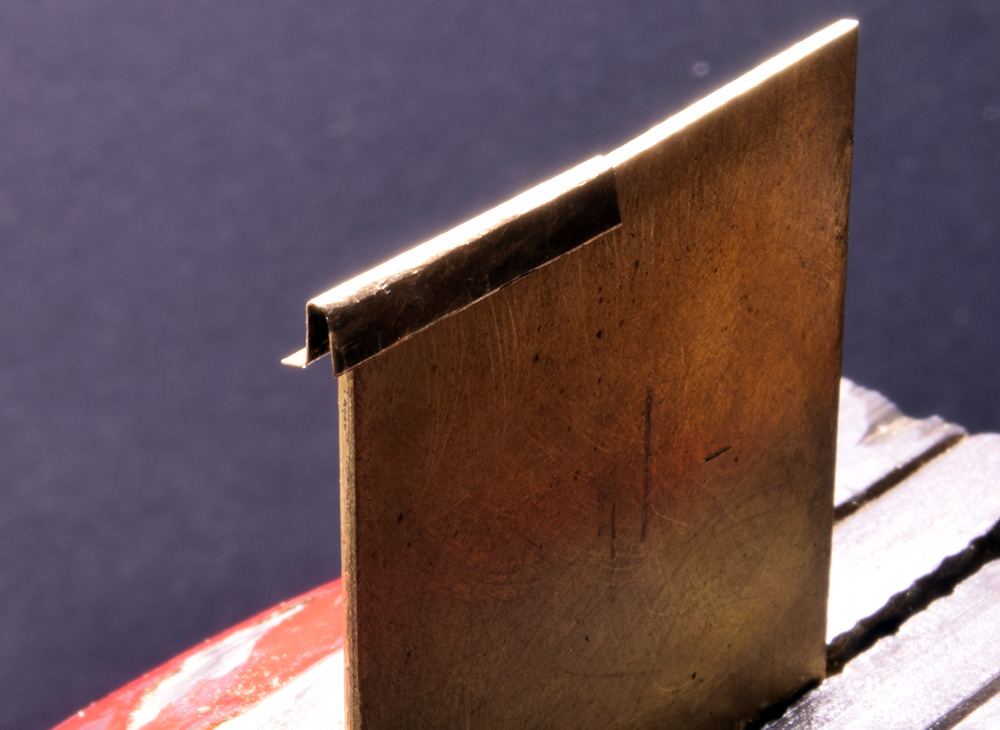
I scribed a line four scale inches wide and made the first bend with wide jawed metal working pliers. With that done, I formed the U shaped channel over a piece of 0.032″ thick brass to provide the spacing and depth. From the top of the channel, another four inch line was scribed and the small flange on the rear face in the photo was bent and excess material was trimmed away. The raw edges throughout were cleaned up and brought to dimension with files.
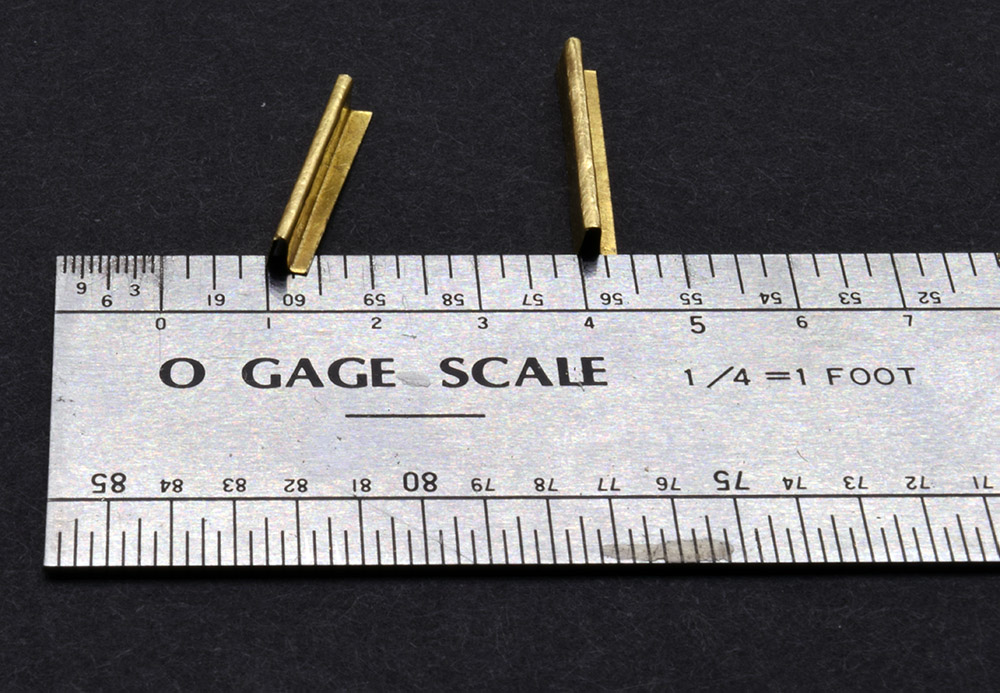
I made the pieces extra long to make handling and assembly easier. They were taken to final dimensions after being soldered in place. Here are the oversized pieces with a scale rule for size reference.
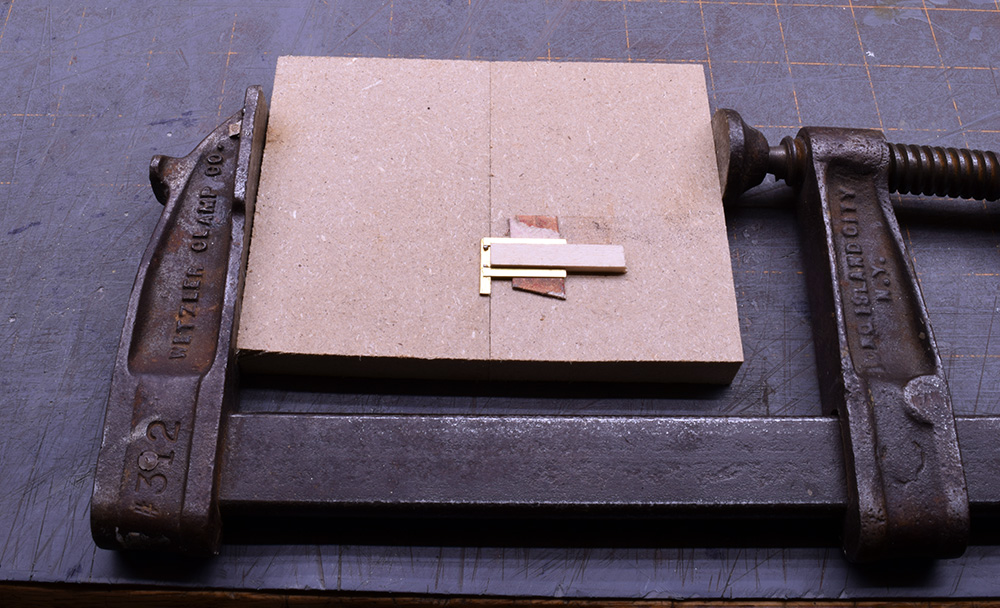
Photo 3: This simple jig made assembly much easier. The two uprights needed to be spaced a quarter-inch (actual) apart to fit around the sides of the center sill. A quarter-inch wide piece of strip wood glued to one of the blocks provides that spacing. I glued two pieces of an emory board to support the uprights level with the thickness of the U-channel. The channel’s flange is captured by two MDF blocks that are clamped together, holding the channel in place.
In Photo 4 below, the pieces are positioned and fluxed, with two tiny bits of solder in place waiting for heat.
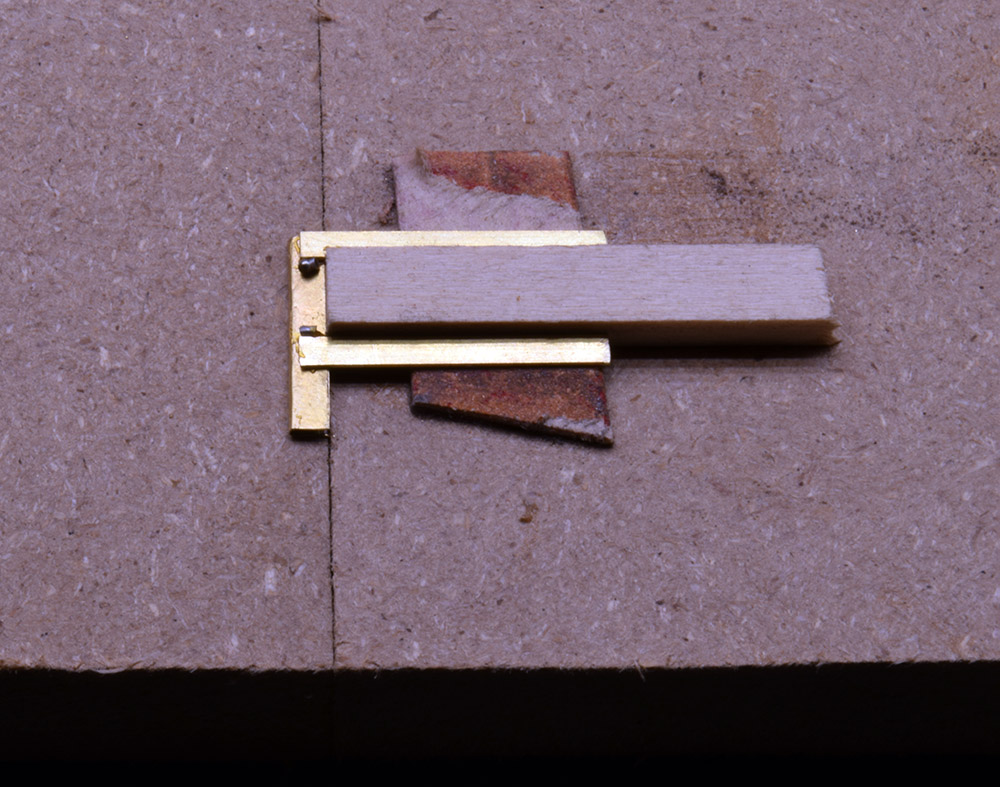
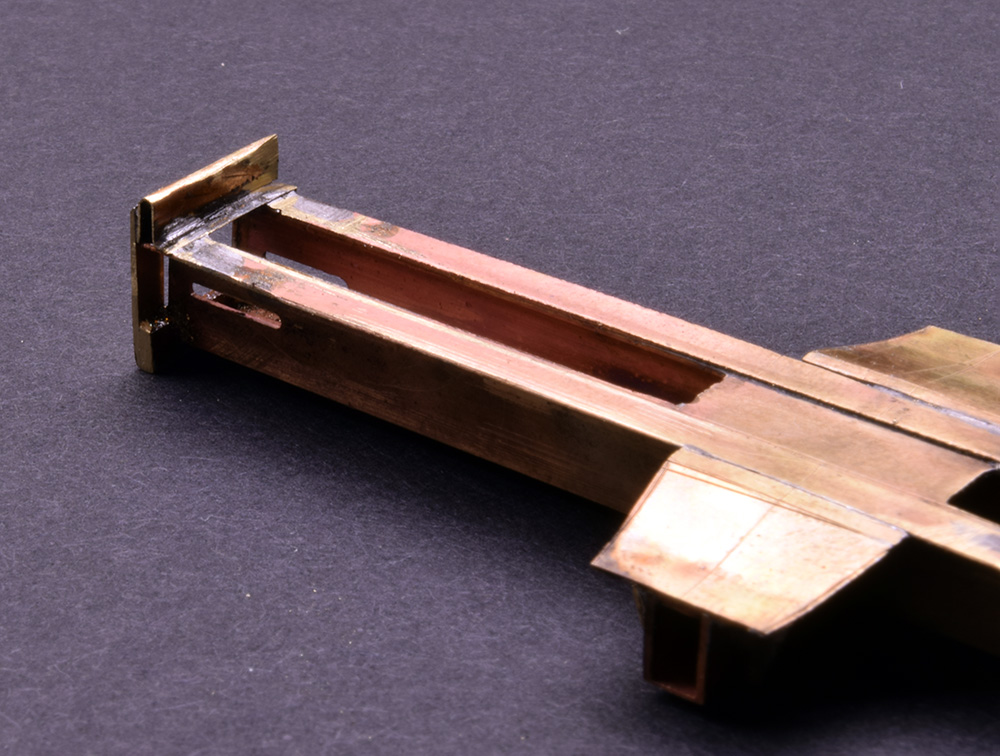
The small flange is not part of the actual striker plate. I formed it to attach the striker to the center sill by soldering as seen in Photo 5 above.
Stuff Happens(ed)
Making the strikers was a straightforward process. In spite of my precautions however, parts came loose while soldering the assembly to the center sill. I was able to rescue the work with some effort and learned a lesson that you can never be too careful with such delicate work.
I was applying too much heat from an oversized iron, which quickly loosened previous soldered joints. I have a smaller soldering iron but at only 18 watts it is too small and doesn’t produce enough heat. It’s intended for doing circuit boards and other delicate work. I purchased it for that reason and am hoping it will work for the ladders and grab irons of the end cages.We’ll see in time.
I quickly discovered the key to success in these tiny assemblies is in holding the pieces in place. The thin brass heats up very fast, easily melting previously soldered connections. Clamping everything you can in place while soldering adjacent areas makes the task easier. I’ve also learned when and where to use solder with different melting points. I use high temperature solder for the major pieces with lower melting solder for the smallest. Using wet paper towels to protect critical joints is also a best practice.
The Real Work
Too often we focus on the final result only, believing that how we get there is irrelevent as long as we get the desired object, be it a car, structure or trackplan.
The real lesson for me has been the understanding that I’m actually learning a series of processes that produce a result.
I’m learning how to think critically and analytically. How to observe more closely and see what is important in those observations.
I’m learning that soldering, or forming materials is a process that can be developed and improved upon over time. I’m learning to think sequentially and how to look ahead and consider the right order in which to do things.
These skills are not just for scratch building but may apply to any aspect of the craft. My focus is shifting toward treating each aspect of the build as a complete process of its own. This makes the build manageable instead of overwhelming. There is a sense of accomplishment with each step completed, and that helps keep motivation high. I’m discovering that if I focus on the process, the outcomes I desire take care of themselves.
I wanted to pass on a quick note. There may not be a second post this week as I will be down for a couple weeks. I hope to get back to the regular schedule soon after. Thanks for reading and I hope the post proves worthy of your time.
Regards,
Mike
0 Comments