Staging has become such a given of layout design that often times the volume of staging track exceeds the amount of visible track on a layout. With a cameo design like Mill Road, where operations focus only on a handful of car movements, I don’t need a ton of staging track.
My original intent was that the scene was somewhere in the middle of an assumed railroad, so I planned staging tracks on both ends. I’ve changed that concept and Mill Road now represents the end of working track for the Indiana & Whitewater. With that change, the staging is confined to just one end and consists of two short sections of track that represents the industry spots and the rest of the line. As with the layout itself, I focused on the minimum amount of staging track to begin with. The modular design makes it easy to extend one or both tracks if needed.
What Do We Need From Staging?
I’ve discovered that it’s important for a train to leave the scene on a small layout even if it only goes a few feet. It’s the transition from on-stage to off that gives a sense of going somewhere, not the actual distance traveled. I’ve also questioned the assumption that the starting point of an operating session has to be the arrival of the train. With modern industrial railroads, it’s perfectly acceptable to stage a locomotive almost anywhere until the work resumes.

The Trick Happens In Plain Sight
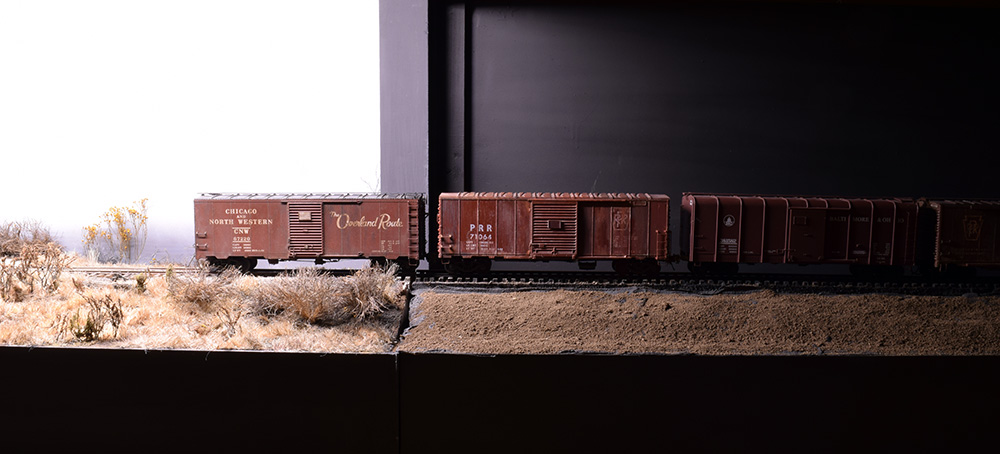
My second need is for a place to spot cars at an unspecified industry. I don’t have room to model the actual buildings so I simply extended the siding into the staging area. Doing this means a cut of cars often bridges the zone between on-stage and off. This isn’t a problem in my mind because these cars simply fade away visually into the unlit staging area. I didn’t attempt to hide the entrance point other than reducing the intensity of the scenery colors before transitioning to the all black staging module. The absence of light and gradual color change eases the eye from one zone to the other.
It’s A Matter Of Opinion
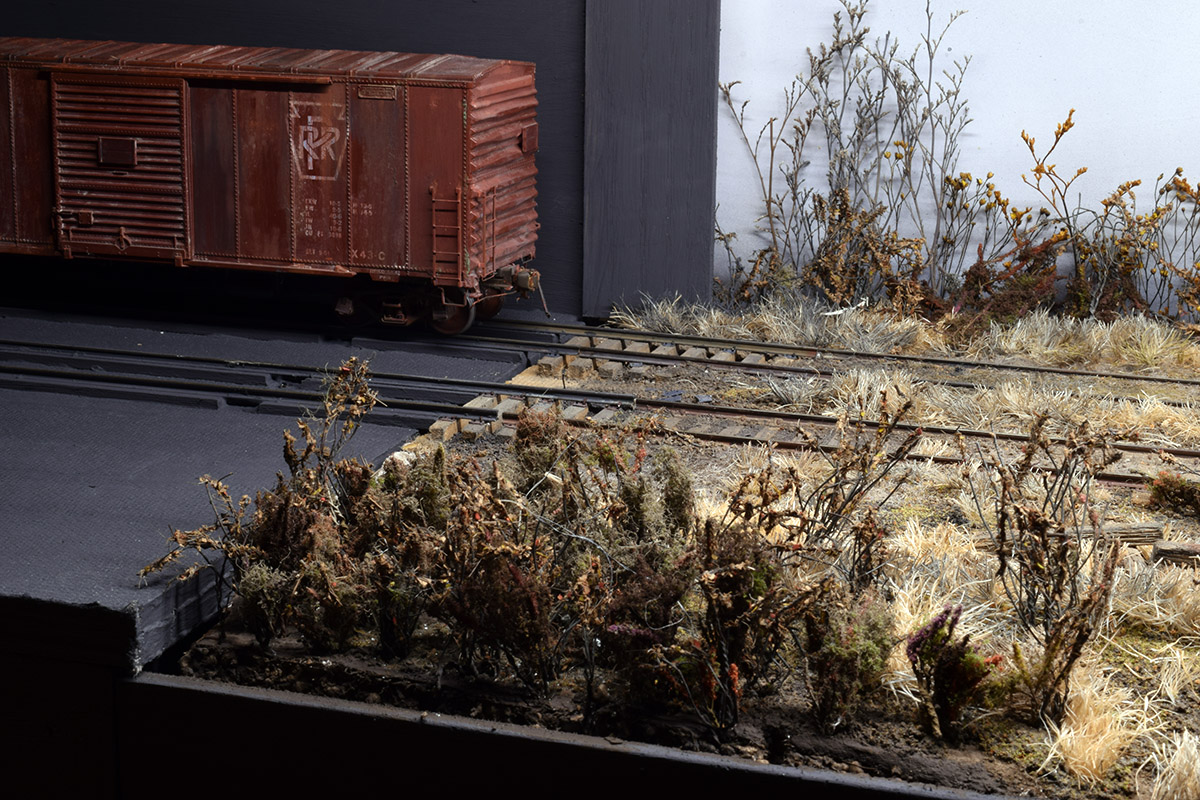
Not everyone agrees with this idea though. A photo I posted on Facebook generated push back from people who insist that a physical barrier of some kind is needed to disguise the entrance/exit. Everyone is entitled to an opinion, but in my view a physical view block tends to draw more attention. Our eyes are drawn to brightness, a strong color or contrast. You don’t want the eye looking at this spot and by reducing the saturation of the scenery colors and their texture, the transition from full scenery to a bare staging area is simpler. In my opinion this treatment is less jarring than the typical hole in the sky surrounded by trees or buildings.

In the photo above I brought the color of the staging module onto the finished scenery of the layout but left a hard edge where they meet. This is effective but I wondered if more could be done to ease the transition between the two areas.
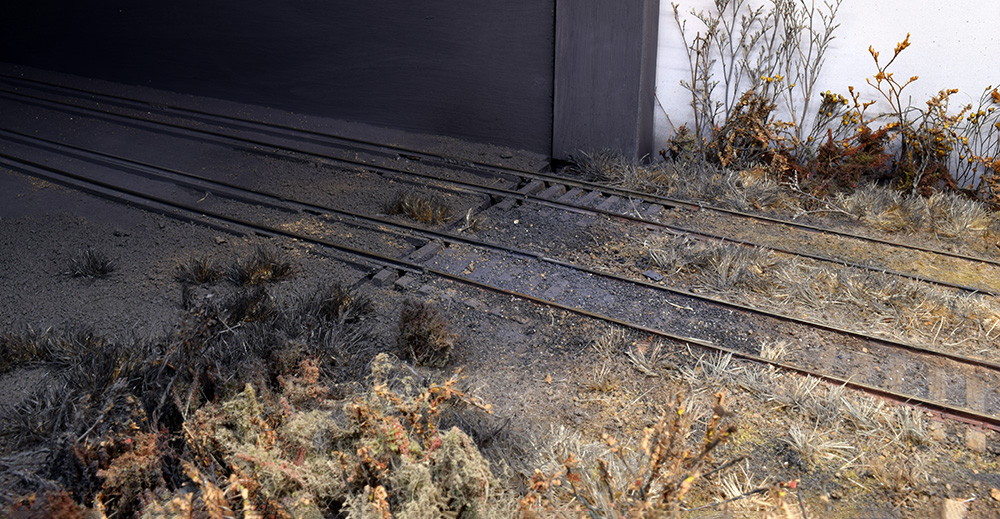
Below, I added some patches of dirt and clumps of grasses to the staging module but painted them the same dark color. The purpose is to bring the color and texture of one area into the other and blend the two, rather than have a sharp cutoff between them..


In the photo above the room lights are off and the only light is from the cameo. You see how this light falls off across the next module. I will carry the finished scenery across this module as it represents the switch lead for the siding and the end of track for the railroad. However, I will keep the dark background and gradually decrease the level of scenery detail to nothing at the other end to move the eye back toward the central scene. I plan to play with the amount of light on this module until I’m happy with how it looks. It’s important to treat the lighting as a whole because even a minor change in one place impacts the rest of the layout.
Staging like layout design itself, should be customized to your needs. My initial design had eight-foot long staging tracks on each end. As the scene developed I realized that was more than I needed. I saw that a long string of cars would overpower the layout and look odd. I beleive the amount of rolling stock needs to be in proportion to the visible scene and this will influence the amount of staging track needed. I’m always wondering about the design and tactics used on Mill Road and asking if they the best ones or just a stopgap way to move on from a problem? In the end, my answer to the question of how much staging I need is simply enough to do what I want to do with the layout.
In closing, these ideas are just that: a handful of ideas to play with. My experience with them is positve and I feel they fit the layout without overpowering it. I offer them as fuel for thought for your own needs.
Regards,
Mike
Hi Mike,
I like your transition from scene to staging, especially what you’ve done to blend the two in the 2nd to last photo. I’ve got no problem with the transition being completely visible – especially for modelling such an open landscape.
The last photo makes me think of what in strategy computer games like Civilization or Starcraft is called “fog of war”.
If you’re not familiar, it’s where you can only see the parts of the game map where your character has travelled to. All other, unexplored areas are hidden by darkness. And, once visible areas will become dark the longer your character doesn’t return to them. Try a google image search for “Fog of war Civilization or Starcraft” for examples.
In a comparable way, your transition is from an on-scene daytime to an off-scene that isn’t nighttime but is an area the viewer has not traveled to. Your lighting and colour choices are very effective to give this impression.
I wonder, as you’ve already starting to blur the transition at the ground plane (2nd to last photo), if you’d consider doing the same on the backscene? Maybe painting a gradient at the point of transition on a spare board. I think this might be an interesting look coupled with your current lighting.
Cheers,
Kev.
Hi Kev,
I’m not familiar with computer games but I understand the ideas you’ve shared. Varying the light levels according to the activity of the train is an interesting idea. I think we’ve a long way to go with lighting a layout.
I think that fading out the backdrop would call more attention to it. It’s hard to convey what you’d see in person with the layout with just photos. Our eyes are far more sensitive than a camera, even with all the digital tech at our disposal. I find the sky of the main cameo is a visual magnet for my eyes. Even with all the lights off, that white area draws attention. I feel that bringing a lighter color into the staging areas, no matter how small the amount, would defeat the purpose of the other treatments I’ve described here. I find that plain dark background very effective at redirecting the eyes back where I want them. I guess it’s a matter of taste.
Mike
Mike, I really like your idea, I’ve been pondering something similar rather than the old “overpass tunnel” trick. I’m also really intrigued by your test of extending darker material into the lit space to create a bridge.
I know the impression of the final photo will vary for every viewer–or the photo could be highlighting things not as visible in person. My eye is snagged on the two vertical shadows on the background. Putting my finger over them, the gradation of light from the scene to staging is softer, less confusing. I wonder if removing those with a continuous background would help, as you’re planning to do with that cut in the scenery. Oddly, the gray vertical edge of the staging area doesn’t bother me as much.
Hi Dave,
Isn’t it strange what you notice in a static photo that you wouldn’t in person? Those shadows aren’t obvious in person because you’re moving and looking around at everything. Could be too, that I’m just used to them. I will say the right hand module isn’t the final one. I need a longer tail track for switching and plan to build another, longer module to match the cameo in both form and color. I’ll still treat the scenery as mentioned in the post but will have to play with the lighting and its intensity. More to come for this area at some point.
Mike