In his forthcoming book, Tony Sissons speaks eloquently about using photos of in progress models as a way to improve his work. Here’s a sample from the text.
If you hang your hat on the concept of prototype modeling, then a camera will be one of your most important tools. Using photographs at every stage of the build helps me achieve a greater degree of accuracy. The lens misses nothing and shows where I must focus. Photographs not only show misalignments but dings and dents, surface deviations and fingerprints far better than one would think. This allows me to go back to the problem and correct things while there is still time to do it easily.
I’ve used this technique off and on and can state that it works. Indeed it works so well that I should make it a regular practice. After working for two to three hours, our eyes get accustomed to the work and we stop seeing our mistakes. Looking at a photo or viewing the work backwards in a mirror changes the context, allowing one to see things with a fresh eye. Mistakes are easily spotted this way.
I decided to photograph the current project at various stages to double check the work. I’m always surprised by what I find and how easily I can overlook obvious flaws in workmanship. Here are a few of the more embarrassing examples.
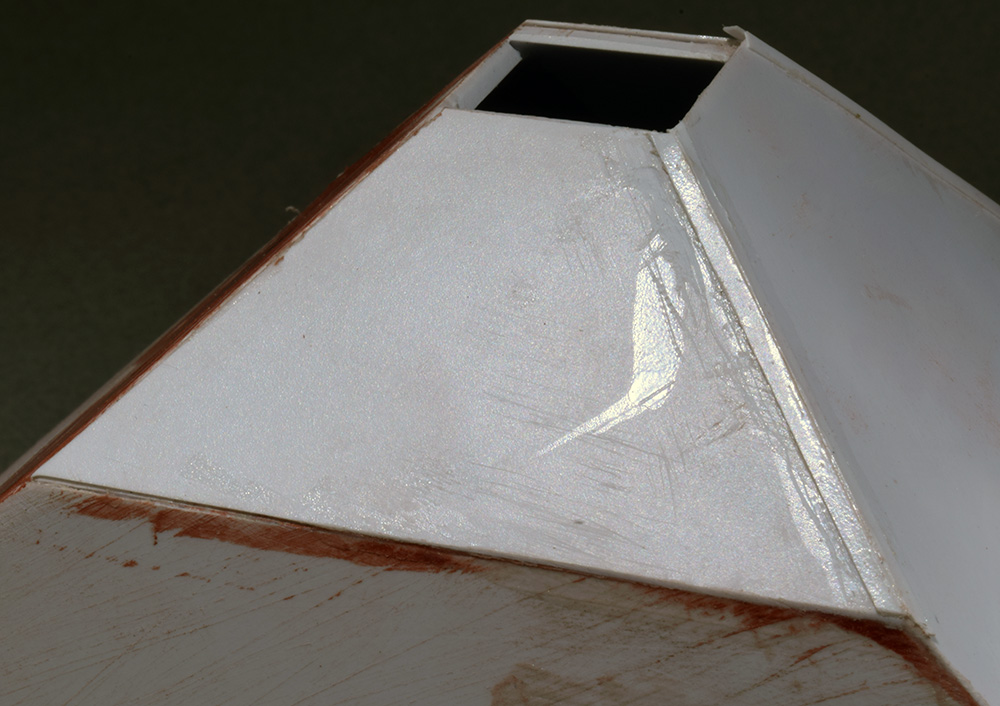
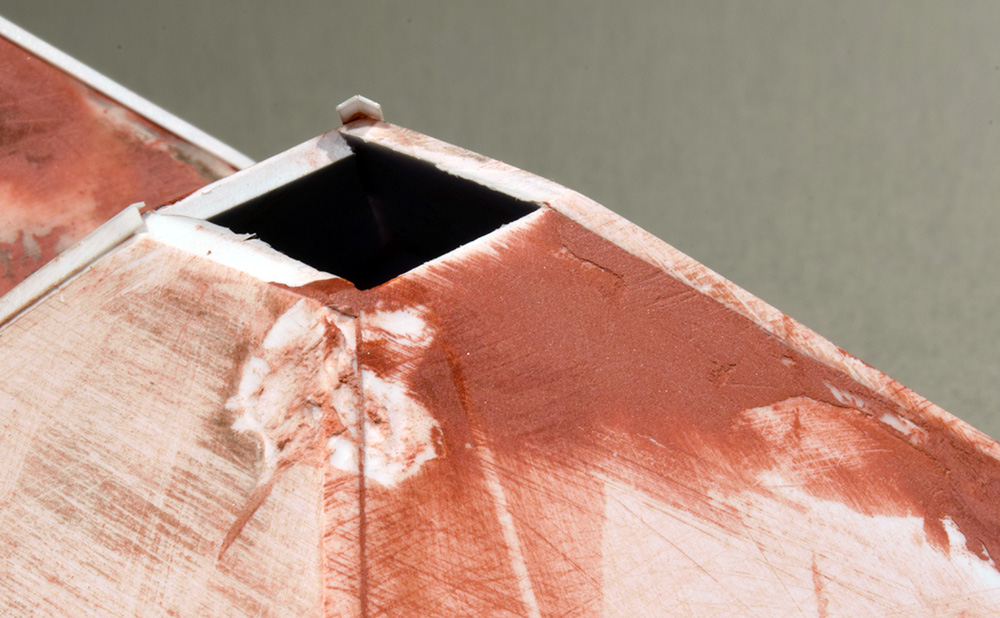
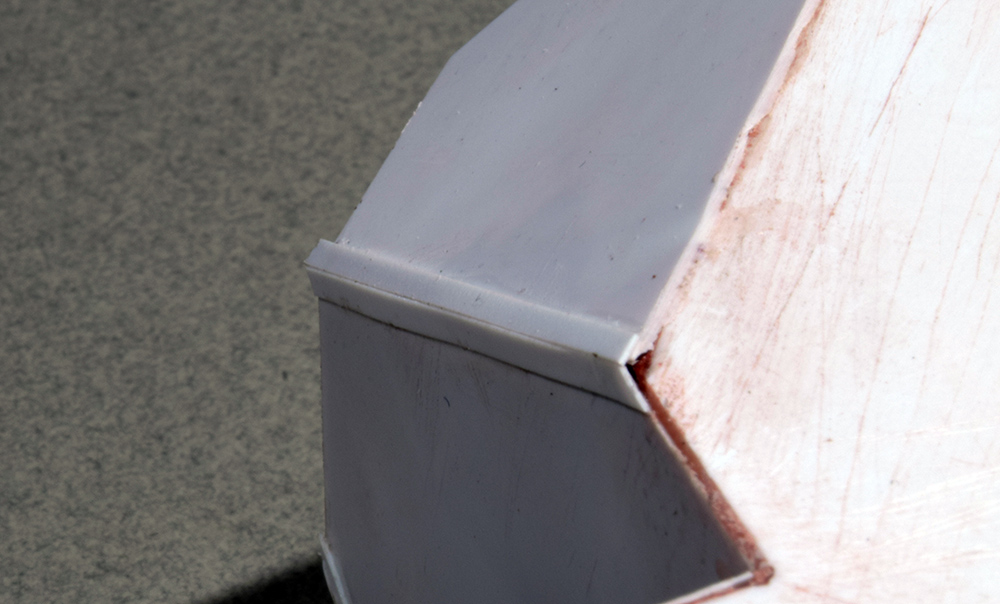
I have a set of drawings in my Car Builder’s Cyclopedia that I’m working from. While they show the construction in some detail, I misread the cross section drawing. Looking at numerous photos online didn’t yield conclusive answers either, since the chutes in most of them are in deep shadow. A few images had a clearer view but were low resolution in quality. Enlarging them to any degree only produced a pixelated image that told me nothing. After studying the drawings at length I realized my mistake and stripped them off of the models. The Lionel covered hopper has them and it’s a perfect example of why I no longer trust commercial models to have the correct details. I can’t really fault manufacturers, they are stuck in a no-win situation of damned if they do and damned if they don’t. In all honesty the Lionel car isn’t marketed as a scale model even though it is spot on in many ways. That said it’s still a 3-rail product full of the significant compromises that market demands. It’s wishful thinking to expect otherwise.
My preference is to work solely from original sources whenever possible, whether that’s builder’s documents, other verified sources or my own first-hand photos and observations. In doing this, I develop a stronger sense of what a particular subject actually looks like. I become more aware of the materials, the dimensions and the interrelationships of the components throughout the car.
This is what accurate modeling requires. It’s often a slow process that can test your will and patience. There’s no room for complaint here. This is a choice I freely made and this is what it takes to adhere to the standards I’ve set for the work.
This series isn’t about an obsessive desire for perfection as some may think. It’s about developing a mindset that sees opportunities instead of obstacles, and solutions rather than problems. It’s also about making a commitment to do the work involved. Lastly, it’s about developing your aesthetic intelligence. I’ll expand on that idea next time.
In an era where people just expect items to show up at the click of a button, we’re losing these sensibilities. I don’t know what this craft will look like in the future but I’m very confident that people will still be making things regardless of the technology involved.
Regards,
Mike
Good stuff as always Mike. Like Tony’s excerpt I take progress shots all along. Then some when I think it is “done” or very close. Using it the same way the pictures dont lie. Sometimes things show up that may not be noticeable in normal viewing but with pictures there is a chance to fix those. Usually I will share with a couple fellow modelers and my dad (also a modeler who doesnt care about my feelings HA) I count on those guys to let me know if they spot anything glaring. Then I will post on a forum or two hoping for the same. The critique is how to improve a model. That being totally different then just negativity from someone who doesnt like the subject matter. Being to proud to listen to critique will lead to mediocrity. Sharing photos along the way will help eliminate touch ups and do overs near the end. My hyper competitive athlete wife also says the best athletes practice what they ARE NOT good at. Modelers can do the same wheter it is assembly, painting, decals whatever.
Another idea I use from a figure model I met long ago is looking at a model in a mirror. Like taking photos it helps show details that we may overlook or become snowblind to in the midst of long term project. It may even help call out the forgotten..”I’ll get that later”
I gave up on true perfection long ago. But improvement with each model will always get me closer. My youngest boy is building models and we recently bought two of the same B 17 kits. We built one and he enjoyed it. We talked about what looked good and what needed work, what order we should assemble parts, what to paint first. Now this week we will build the second so we can see the improvement. I hope that if by some chance he sticks with modeling this will be a step toward building the best possible, no matter the age. With that making a more enjoyable finished product.
Hi Steve,
I’ve discovered the real value of photographing the work as I go but, I’ve given up on public forums and social media since most people don’t know how to give genuine feedback. Instead I see a lot of opinion about how they would do something or why you’re an idiot for trying something different. I prefer to share the work among a small group of modelers who understand what I’m attempting and are willing to help me improve. With these blog posts, I’m not looking for feedback, I’m simply sharing my thought process, knowing full well there are a dozen ways to do a job. My real message is to model in a way that is true for you and works for your temperment.
I’m glad to hear you’re working with your son. Even if he doesn’t pursue modeling on his own, that time will be invaluable for both of you over the years.
Regards,
Mike