Before going further with the end cages, I need to complete work on the car sides and roof.
Car Side Details
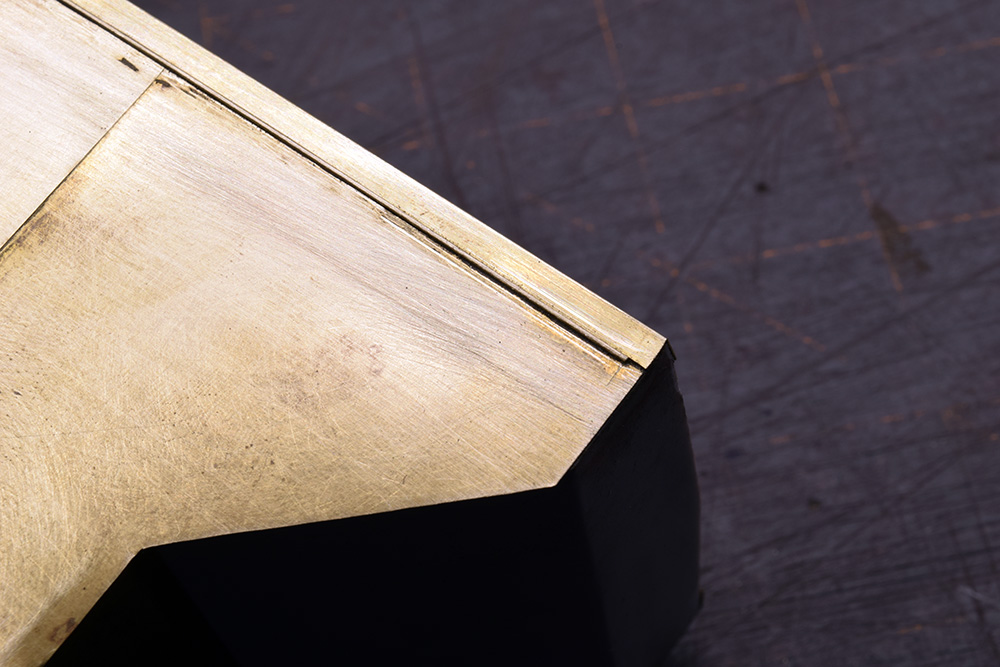
Near the top of the side panels there is a distinct shadow line that is clearly visible in most of my reference photos. As far as I can tell this is a large weld bead rather than an overlap of one component over another. Without firsthand observation of an actual car though, I can’t be 100% certain. In any case, a decision has to be made about how to render this detail.
The original model just had a ridge of thick plastic that was supposed to represent a piece of sheet metal that overlapped the side panels. I milled it off at the beginning of the project along with everything else that was cast onto the car body. Once the model was down to bare plastic, I applied sheets of 0.005” brass for the side panels running them from top to bottom.
The thin brass gives the properly delicate thickness where the side sheets overlap the slope sheets on each end. For the bottom detail I made an L-shaped angle to replicate what I believed was on the full-sized car. However, the more I looked at the images, the less certain I was this detail is correct for the top.

The plans in the Car Builders’ Cyclopedia seem to contradict my photos of in service cars on this matter. In the end, it boiled down to going with my best interpretation of the info at hand, knowing I could be wrong.
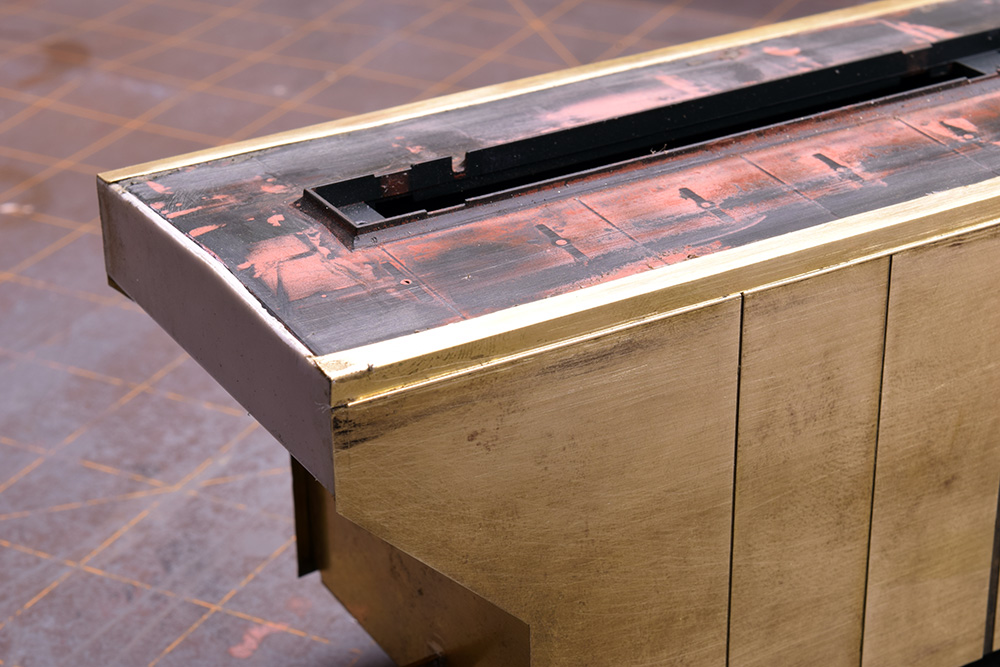
I decided to mimic this bead using a piece of 0.019” brass wire. I had to modify the side panels by removing a short section near the top so I could sandwich the wire between the side panels and a new cap angle. I was uncertain about how to do this without destroying months of work. I could have left things alone but felt this was the right solution. In the end, it was simpler than I ever dreamed it could be.
I scribed a line on both sides of the car where the weld bead needed to be and positioned a straight edge on this line. Because the plastic of the original model is so thick, I could insert the roof panel to brace the sides and clamp the both straight edge and model to my workbench for stability while I cut through the thin brass with a fresh blade in a utility knife. I took extreme care using many strokes with light pressure rather than trying to plow through the metal. I had attached the brass sheets with full strength rubber cement and, much to my surprise and delight, once I cut through the brass, I could remove the unwanted portions and clean off any cement residue with relative ease because I placed the panels while the cement was still wet instead of letting it tack over as ususal. That was the only reason this stunt worked.
Admittedly, this was a gamble and I got lucky. If the process failed, I didn’t have a backup plan and the model would likely have been scrapped. I’ve lost track of the times I’ve changed my approach on this project because I’d do something and then discover a better technique or realize I misinterpreted something. So far, each revision has been successful. The question becomes: Is this any way to build?
It depends.

The L angle cap finishes off the sheet metal for the side panels. The original roof piece is permanently in place now and needs its own brass panels and other details like the hatch covers and running board. In modifying the car sides I took a risk that could have ruined the project. It was worth it.
As I’ve said often, this model is one grand practice piece for learning serious metal work. I expect to finish it but am in no hurry. Every step, every change of plan or procedure is a deliberate choice on my part. This one step forward twelve steps back routine is clumsy but it works for me in learning what I want to learn. The final step for the side panels is to add the exterior posts and the assembly that forms the bottom of the end cages. Once that work is done, the major construction is over. Everything else is jewelry.
Regards,
Mike
Is this the way to build?
If the end product is better than anything you made before, or the learning process makes that more likely next time, then yes.
Hi Simon,
I agree with both sentiments (obviously). It was more of a rhetorical question that acknowledges the mindset of doing the minimum amount of work to get by on a project. We have this mentality that a model just falls together in an effortless linear step-by-step manner. I’m sharing the reality of this journey (good, bad and otherwise) so that folks can see what’s really involved.
Mike