Modeling Oil Soaked Track
Crud, that oily, gritty mixture of grease, diesel fuel and dirt that sticks to everything near fueling racks or places where locomotives are stationary for long periods. It’s an effect many people seem to struggle with and maybe this post can help demystify the art behind the process.
I salvaged several sections of track from the old layout and rather than strip off the rail, I decided to use them for show displays or small dioramas. In the absence of a larger layout this is a good way to keep your skills up and satisfy the urge to build.
Your Mileage Will Vary
I’ll state up front that I tend to work in an ad-hoc manner, and rework finished areas many times as I try out different ideas. Even if I knew where I would use a technique, I’m not certain it would make that much difference in my methods. Everyone is different, so do what works for you. Because this is a multi-step process using natural materials and there are no guarantees, I strongly suggest you practice the techniques on scrap sections of track and gauge the results you get before trying it on your layout.
For this demo, I used a small section that seemed perfect for a tabletop display at RPM meets (Photo 1 below left).
Getting Started
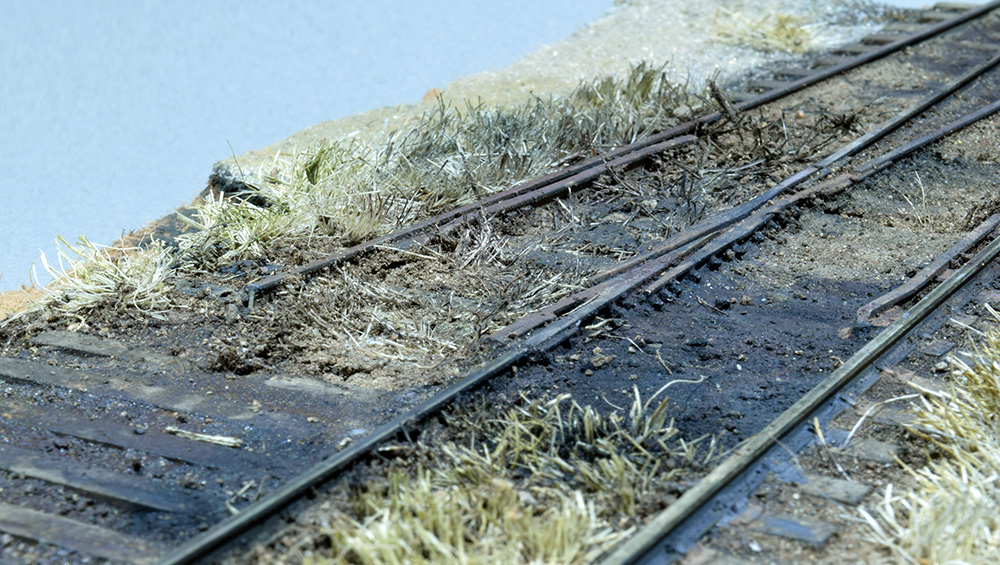
The track seen here was built with conventional materials and methods. This is quarter-inch scale of course, so the rail is code 125 that represents 100lb rail on the prototype. The tie plates are from Right-O-Way and I cut my own ties from basswood strips. The ballast is Woodland Scenics fine in a homemade custom blend, and bonded with the ancient diluted white glue and water mix. It’s all pretty straightforward stuff that most of you know.
To begin the weathering process, I sprinkled ordinary dirt that I sifted and dried onto the track and rubbed it in with my fingers (Photo 2). You could also use a brush with short stiff bristles. The amount of dirt varies according to how much oil soaked crud buildup I want in an area. The dirt does several things. It gives a dead flat dusty appearance to any surface and is easy to build up a thick coating if desired. The rubbing action breaks down any larger particles and embeds the dirt into the nooks and crannies of the ballast and track. Sweep up any loose large particles.
The dirt in my region has a fair amount of clay in it and this gives it a staining quality that is also useful. At this point everything is dry and needs to be bonded (Photo 3).
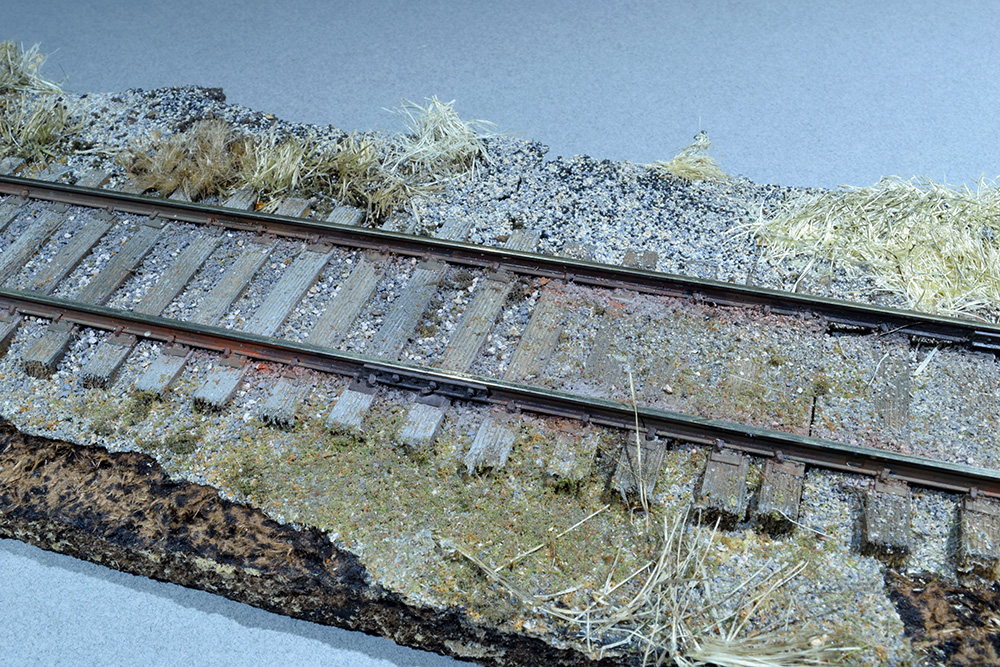
Photo 1. Plain track can be reworked and this is the starting point for the demo.
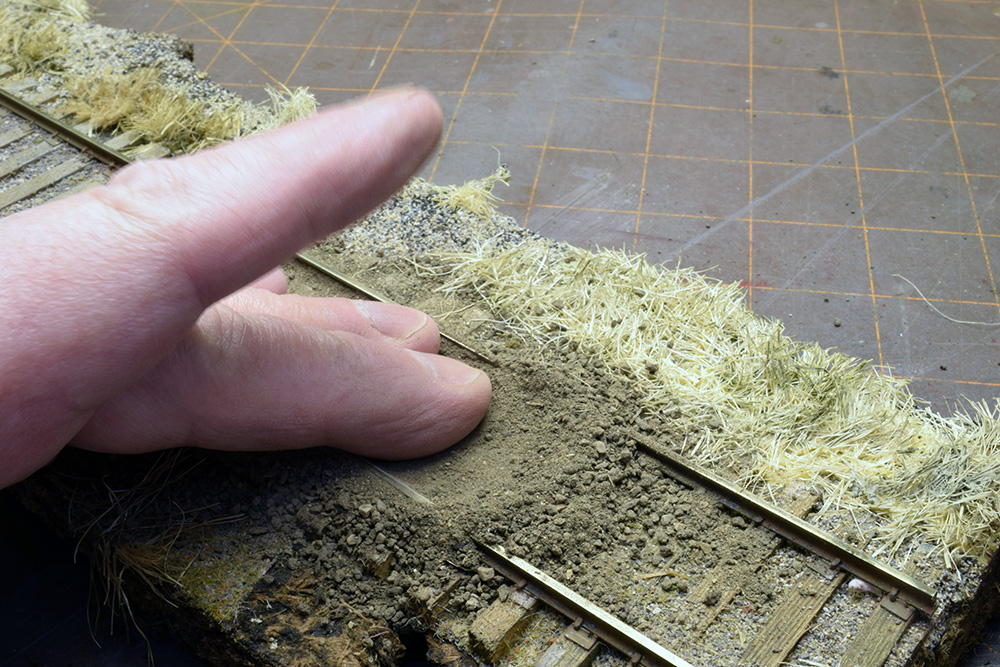
Photo 2. Sprinkle on sifted dirt and rub in thoroughly.
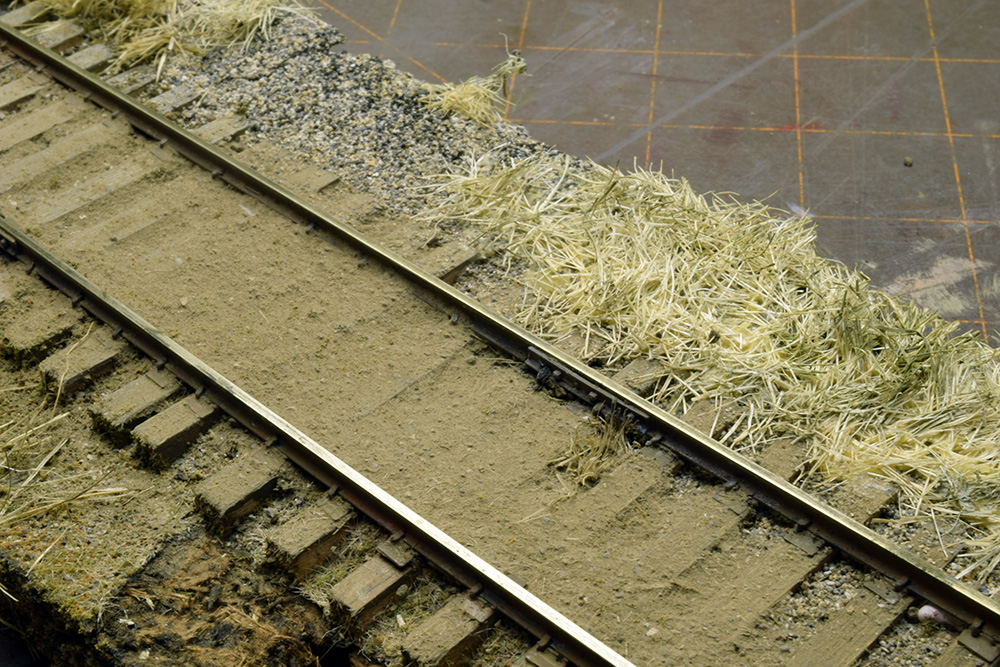
Photo 3. You’ll create a texture like this, which looks good in its own right.
Once I had the track covered and was happy with things, I sprayed it with denatured alcohol from a pump bottle, thoroughly soaking any thick areas of buildup (Photo 4). The alcohol will immediately darken the dirt and in my experience it will not lighten up when dry. In this case that isn’t a concern as there is more to do. I bond the new material with more diluted glue just like I would with ballast. I’m not concerned about the moisture breaking down the ballast because everything will be rock hard again once it dries.
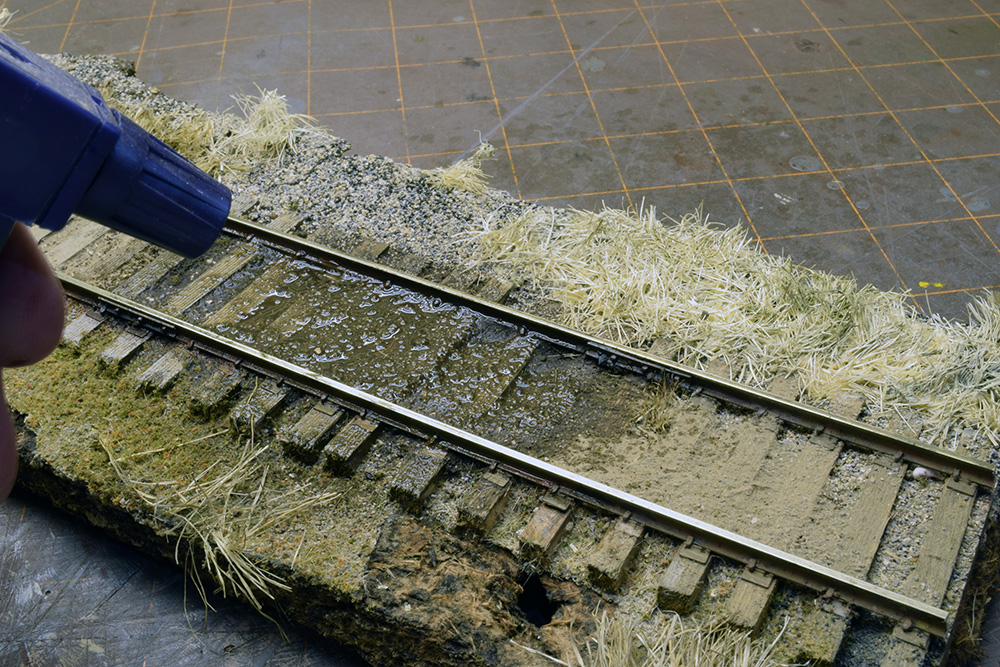
Photo 4. A good soaking with denatured alcohol comes next.

Oops!
I wasn’t happy with the amount of dirt buildup, so I went back and added more. I rubbed the extra into the wet dirt and it wasn’t the disaster I thought it would be. Never be afraid to experiment.
The Fun Begins
While things are still wet, I take pieces of black and dark gray pastels and scrape them with a knife or razor blade to dust the area I’m working on. I put on a thick covering and make certain the sides of the rails are covered (Photos 5-6. I’m not worried about the rail heads at this point, as I will clean them off before drizzling on the diluted glue. This step and the following steps are subjective and rely on your own judgment and feeling for what looks good.
Moisture and dirt make mud and after dusting with the chalks, you could let the mess dry and stop if you like what you see. I went further because the close-up viewpoint quarter-inch scale provides suggests that more visual impact is possible.
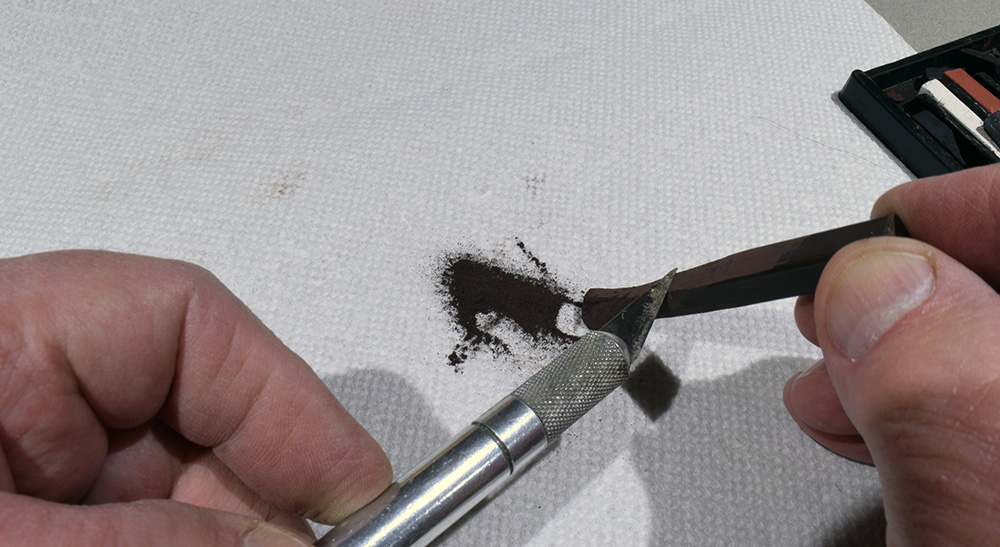
Photo 5. I make my own weathering powders by scraping a pastel stick with a knife blade. I this case I used a black and very dark gray for the greasy/gritty texture in the next step. You could use commercial weathering products if preferred.
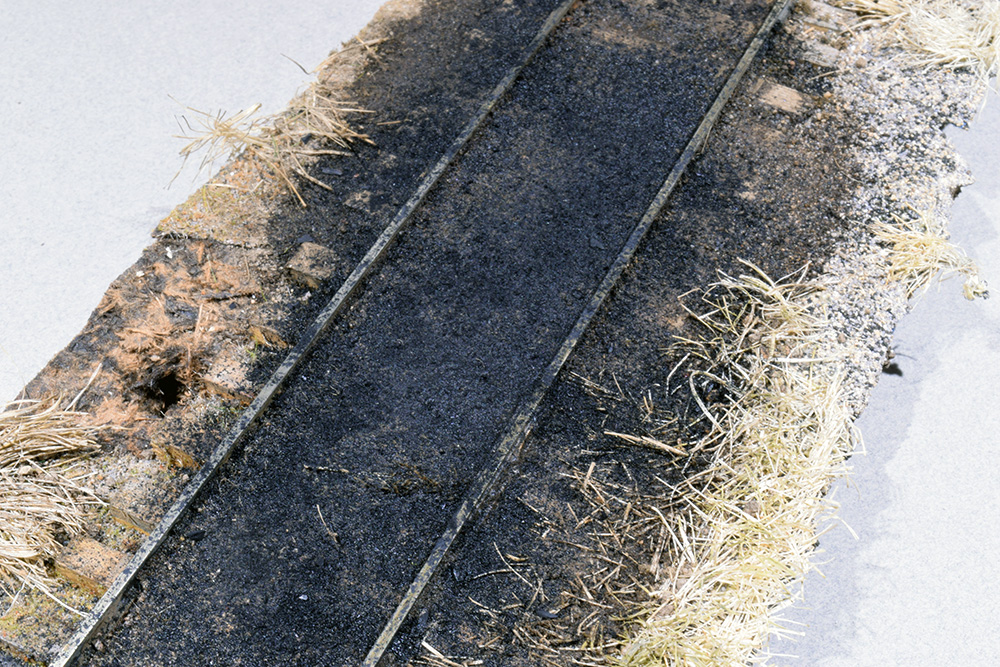
Photo 6. It makes a fine mess. I simply wipe off the rail heads with a stick or piece of toweling being careful not to smear the crud below.
On To Paint
I applied washes of Tamiya acrylic paints using flat black and German Gray (a charcoal like color). You could use any brand of paint as long as it’s compatible with the other materials (Photo 7). This is the most subjective part of the process and I just went at it with abandon. The washes ranged from almost full strength to very thin. I wanted the color to flow readily off the brush and to wick freely through the materials. Because the track and mud is sopping wet now, you don’t want to use any kind of brushing motion, as that will create a bigger mess. Instead, simply touch the tip of a loaded brush to the surface and let the paint flow on its own (Photo 8).
I dip the brush into the paint first and then into a container of thinner, I very lightly swish the brush to thin the paint until it drips or flows easily. There’s really no simple or clear way to describe this. Five minutes of practicing the technique on scrap materials will be more useful than pages of text.
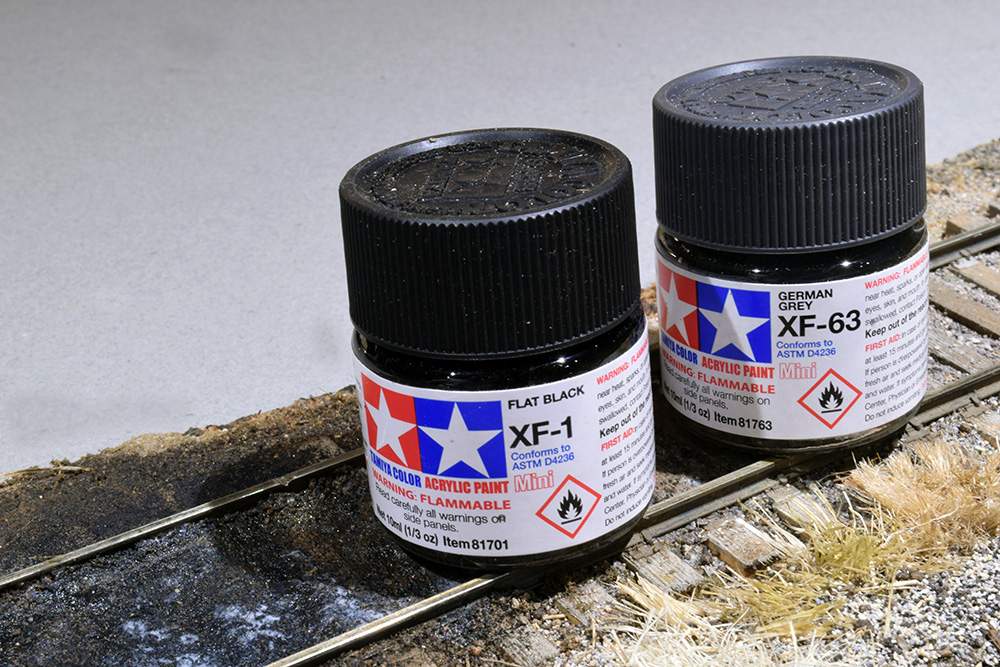
Photo 7. These are my primary colors for this job.

Photo 8. Dip the brush into the color and then into the thinner. You want a mixture that flows freely from the brush. To apply, just touch the brush to the wet surface and the paint should flow easily.
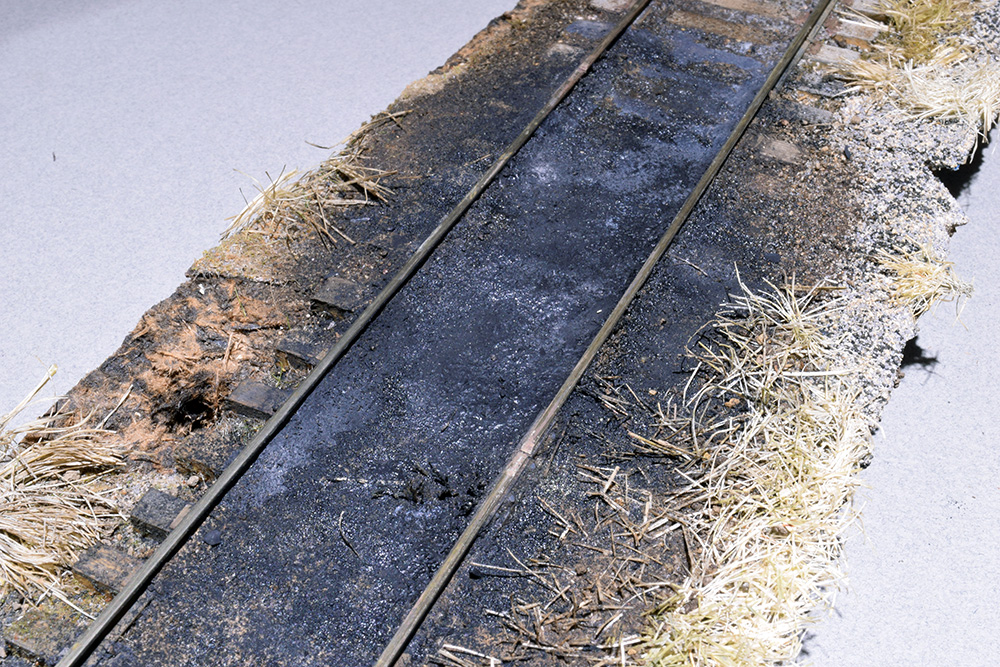
Once the color is to your satisfaction, you have a choice of letting everything dry, or adding more chalk dust to build up the greasy texture along the rails. I added another dusting of chalk here for such effect and called it quits for now. I’ll let this section dry thoroughly and see what, if anything, it needs. So far, I’m pretty pleased with the outcome (Photos 9-10 below). Photo 11 shows my original experiment after it dried overnight. The color did, in fact, lighten ever so slightly. I like what I see here.
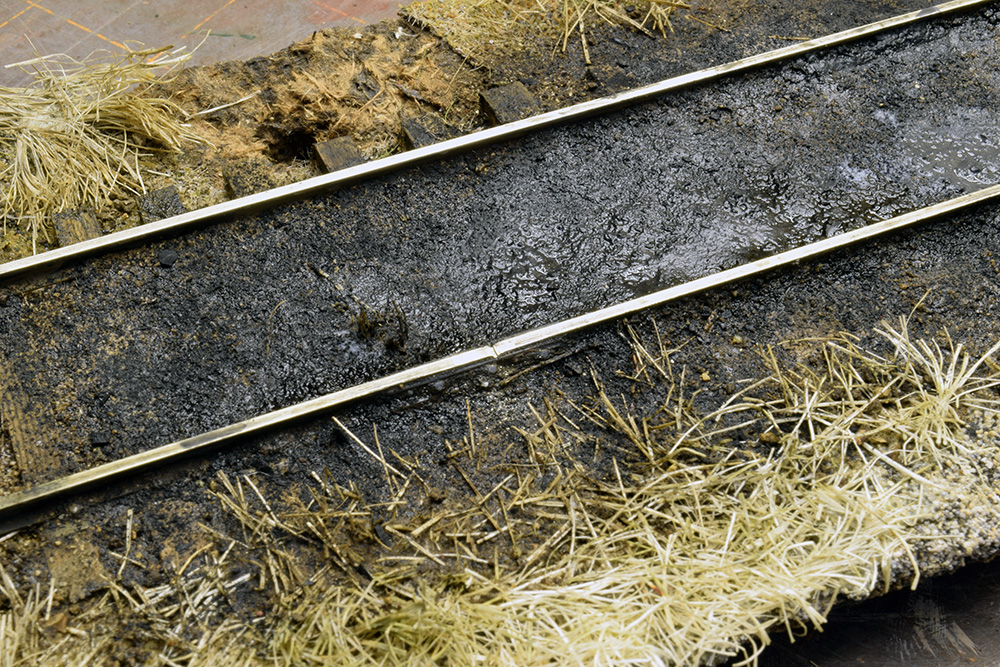
Photos 9-10. The track is very wet in these photos and it’s time to stop, let things dry and then see how it looks. I’m happy with the results at this point.

Photo 11. My first experiment has dried overnight and the colors did lighten just a bit. I’m pleased with this outcome.
There really isn’t a right or wrong here. The techniques aren’t that difficult and your own eye is the best judge for whether you succeeded or not. You can go nuts with this technique but it’s one of those things that can be overdone and look contrived if placed carelessly. And, if your era is the 1990s to present day, you might want to back off since stricter environmental regulations really took hold during this period.
There’s a lot you can do with this method. You could skip the grease and oil effects for track buried in dirt for example. With a shift in color and more attention to the textures, this might work well for the fine cinder dust in a steam engine terminal. As always, A willingness to experiment and real world reference material is your best guide.
Some Cautions
My use of actual dirt was a choice I made and haven’t regretted. However, be aware that there are some concerns and precautions. Dirt is an organic material made up of a lot of things like metallic particles and microorganisms. I sifted and completely dried my material before using it on the layout. I haven’t had any issues with it fouling drive trains or getting into motors. I bond everything on and around the track, so I’m confident with the methods. However,if you have any concerns then use common sense and find a substitute material you feel more comfortable with. Once again, I stress the importance of practicing on scrap materials first.
I hope this is useful.
Regards,
Mike
Looks fantastic ,great explanation on how to do it . Thank you .
Mike,
Thanks for sharing this: nothing complicated, just observation of the real thing, composition of the scene and patient execution.
Are photos 9 and 10 of the test bed whilst still wet, or after it had dried?
Simon
Thanks Simon. The area is still wet in Photos 9-10. If I wanted a wet look, I would go back with a gloss color or finish top coating.
Regards,
Mike
Thanks Richard. Glad it was helpful.
Regards,
Mike
Nice job! I love the look.
I need to do this on my own layout in a couple spots and you’ve raised the bar for me.
Thanks,
Ken Thompson
PS: It was nice to see some of the old layout!
Thanks Ken. I’m just playing around at the bench and having fun.
Regards,
Mike
Mike, is the grit texture is perfect for O scale, do you feel this would work as well in HO?
I see no reason why not Michael. Just pay attention to how fine or coarse the texture is. In HO you would want a finer texture to the materials used.
Good luck.
Regards,
Mike