Our desire to create suggests we have something to say about the subject; that there is a connection we feel and wish to express in a tangible form.
I like the process of shaping a material to form and dimension. I purchased the mill because my desires for the work exceeded what simple hand tools let me do.
I enjoy the process of setting up the machine for a specific task; of learning ways to secure the work safely and the smooth feel of the hand wheels as I feed stock through the cutter. I find satisfaction in all of this and, also, discover the craft I desire as well as who I am as a modeler.
These are among many choices I make during a project. These choices work for me, yet I well understand that they aren’t universal. Not everyone has such tools or the desire and temperament for learning to use them well. It should be said often and emphatically that there are many ways to achieve an outcome.
Along with machining, I also like handwork. It’s often said that hand tools let you make mistakes slowly, while machines let you make them faster. My own experience confirms this wisdom.
Hand tools put you in touch with the material and process in an intimate way. With time and practice, you develop a sensitivity of both sight and touch that guides the tool. Working by hand encourages a quiet atmosphere in the shop that helps me focus on the task.
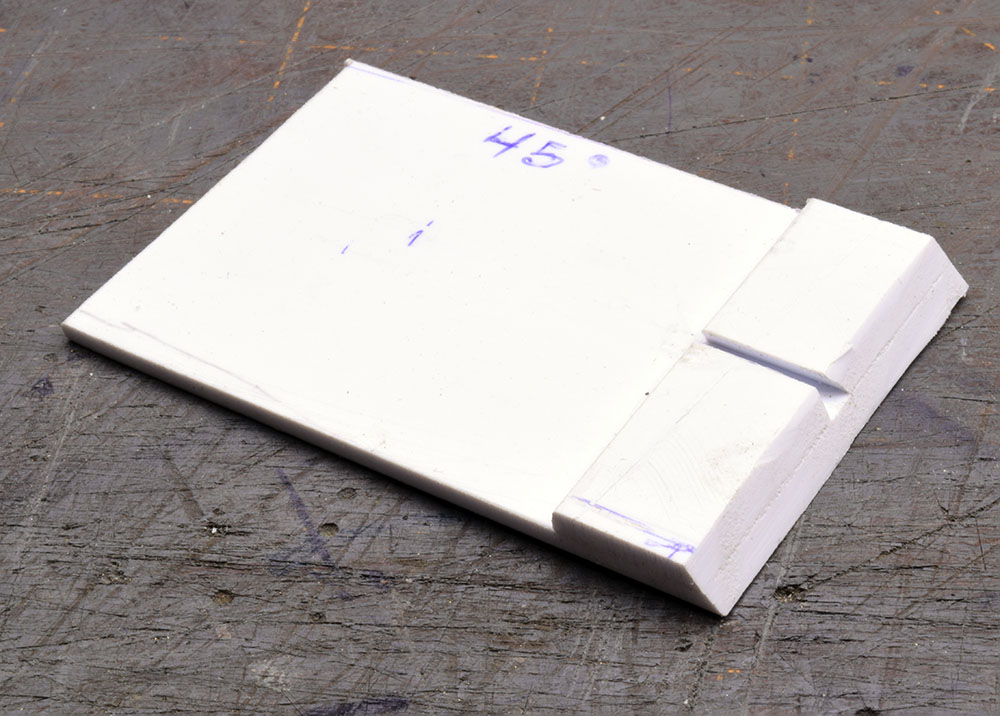
(Above and below)
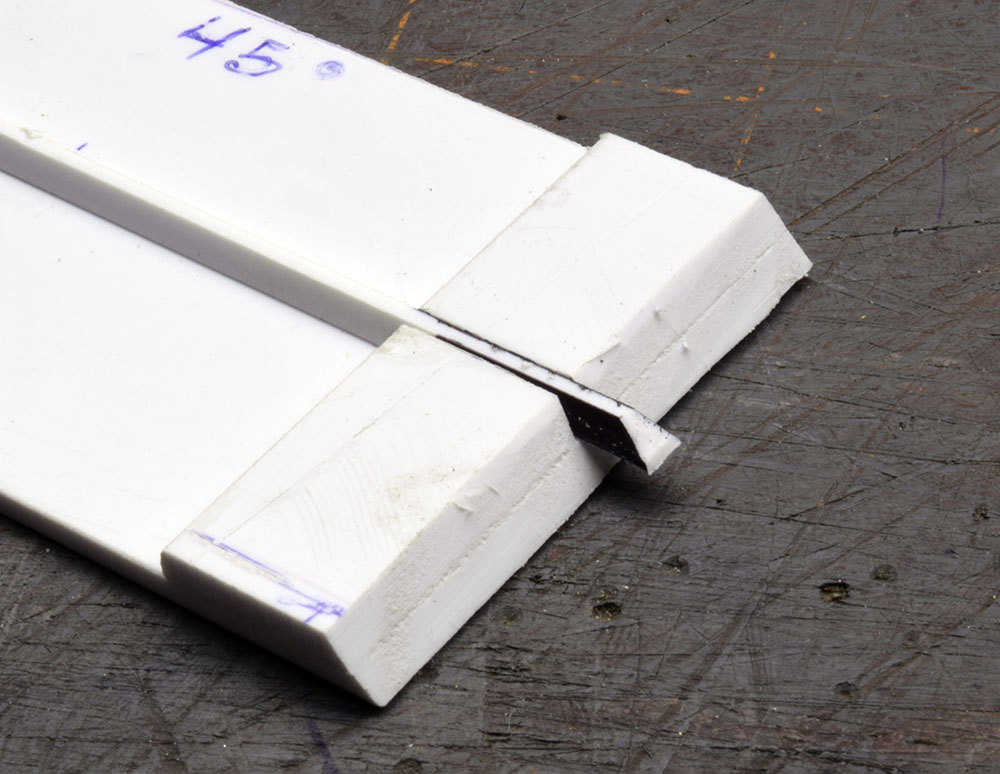
A simple jig made from two layers of 0.080″ thick styrene scraps. The guide slot in the middle has a thirty-degree bevel cut on the inside edges that match the angle of the Plastruct triangular strip stock I used for the side posts of the covered hopper. The forty-five degree angle on the right edge acts as a guide for my X-acto knife. While I show a forty-five degree angle, you should determine what angle you actually need and make your jig accordingly .
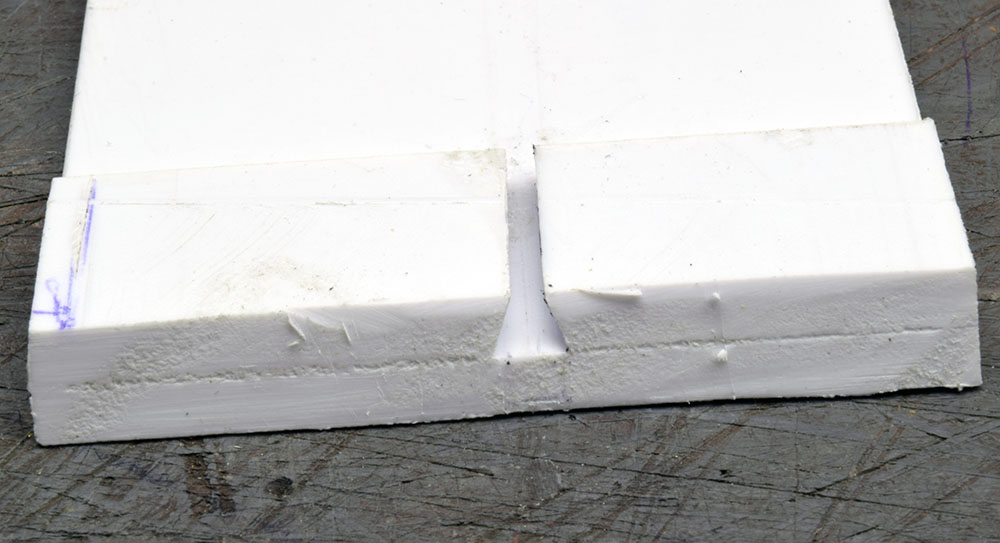
It doesn’t have to be pretty but it does need to be accurate. The guide slot needs to be exactly ninety degrees to the beveled edge of the jig.
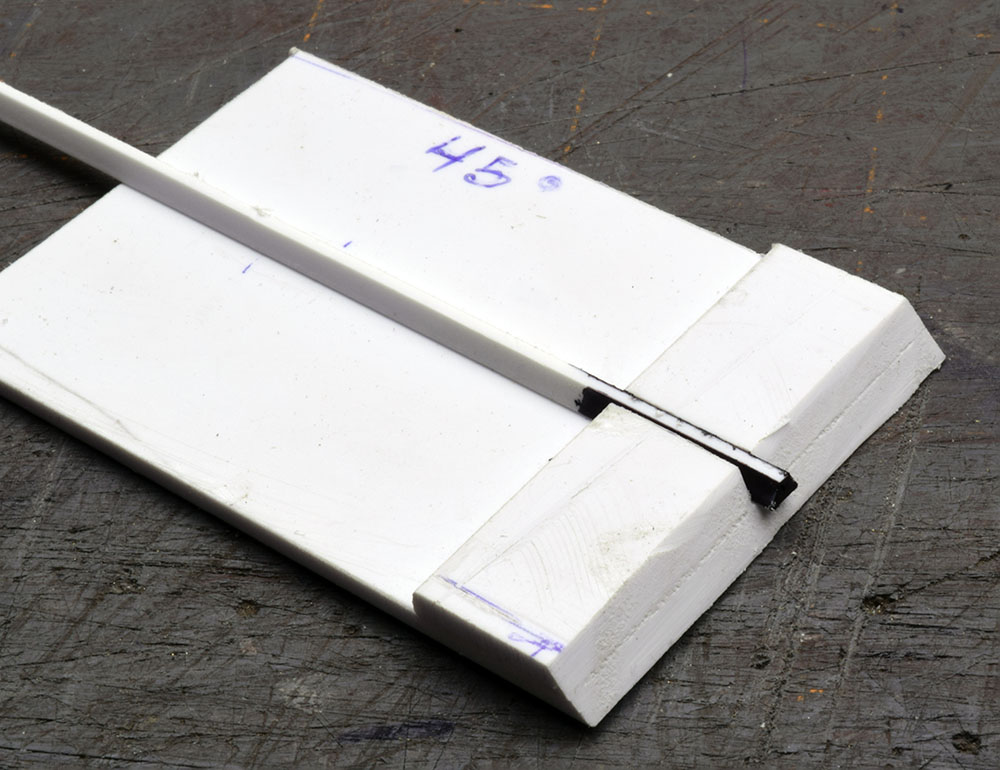
(Above) I’ve inserted a length of strip stock with the milled flat on the top. I usually line up the end of the strip with the bottom of the guide blocks. Here, it sticks out a little farther for the camera. Also note the snug fit in the jig. This helps hold the stock in place against the cutting action to come. As in the photos in the last post, the black coloring is only to provide contrast for the camera.
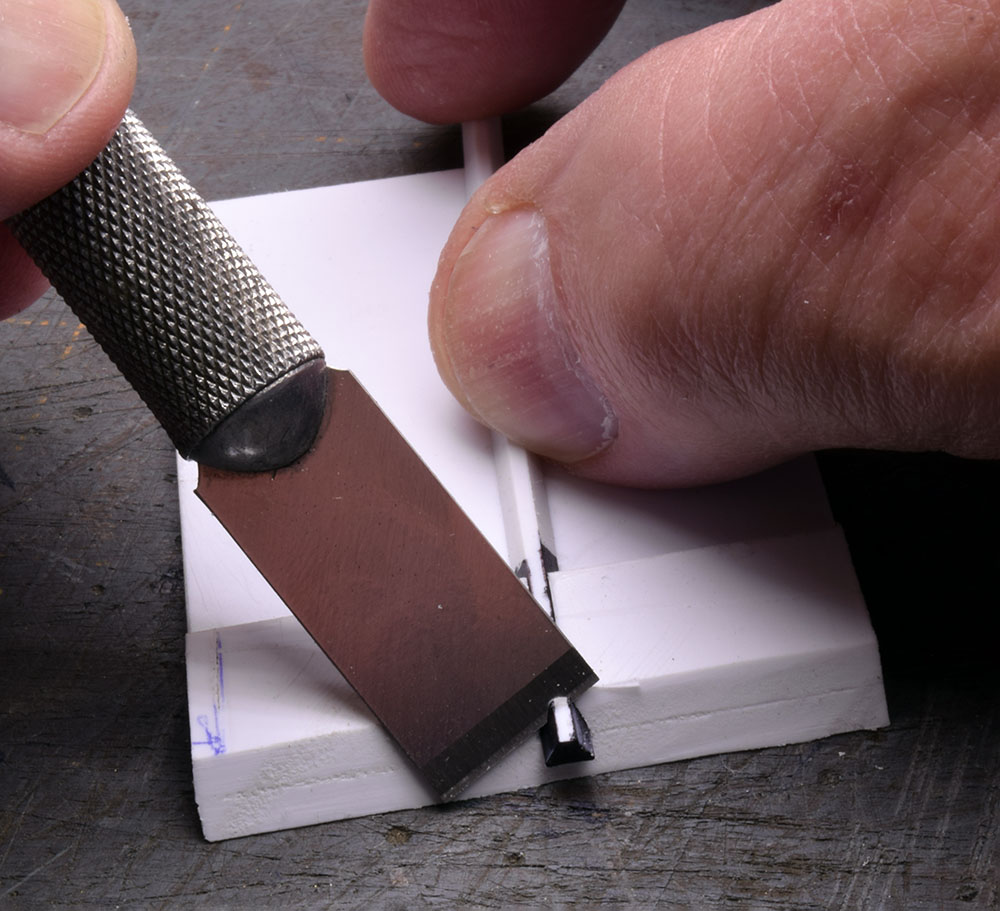
(Above) I’m holding the jig and workpiece steady with nothing but hand pressure. I’m also working at an awkward angle for the camera. (I would normally turn things around.)
I hope you can see how the back of the knife blade rests on the angled edge of the jig. You can make a series of light cuts to slice off the excess stock and then make a very light clean up pass with a file or emory board. If you do, be careful not to get too aggressive and alter the angled face of the jig.
The finished post end profile. You can cut the strip to final length, then simply flip it around and repeat the process for the other end, or cut things to rough length and sneak up on the finished dimension as you shape the opposite end. It’s up to you.
As an alternative to the milling set up described in the last post, I made a simple jig that allows me to accurately and consistently shape the bevel on each end of the side posts with nothing more than a modelers’ knife. My model maker’s table saw made short work of cutting the various bevels but these could also be filed or sanded by hand with patience and determination.
The slot on top secures the post blanks with a friction fit. As mentioned before, the Plaststruct strip stock varies slightly in size, so some pieces may be too tight and others too loose. You want the strip held in place with no side-to-side wobble, which would make cutting the bevel harder and less accurate.To trim the bevel, I position a strip of material in the slot until the end just sticks out. Using a large flat blade like a No. 17, I rest the backside of the blade on the beveled edge of the jig and roughly slice off the waste stock by letting the knife follow the angle. If you have a good fit of the strip stock in the slot, there’s enough friction that you can hold things in place easily by finger pressure.
I typically clean up the cut edge with a second and lighter cut until it matches the angle of the jig. The photos show the process more clearly than words can describe it. Each cut takes less than a minute and with practice, you can process material quickly.
These working methods or technology are nothing more than a choice you make. The hands on working methods I prefer seem old fashioned to many now that 3D printing, laser cutters and CNC routers are the new darlings of the hobby. It’s good to remember that one day, these fancy digital tools will be replaced by even fancier stuff that pushes us further from the first hand experience this craft offers. In one of his more eloquent blog posts, Chris Mears pointed out that there is no right or wrong way to practice this craft, only variety of choices that suit your needs and preferences. Amen Chris. Amen.
Regards,
Mike
0 Comments