Last week I was under the weather a bit and didn’t get much of anything done. So no new progress to show on the box car project. However, Greg Amer wanted to see more details about the jigs I referenced, so here we go.
I’m a fan of building jigs to make up for my lack of skill. Jigs make consistent results over multiple parts a simple thing to do. If I know I’ll need to produce similar parts or do an operation across many projects, I’ll make a jig for it. Jigs also make working around spinning blades and cutter bits safer by keeping my fat fingers away from sharp teeth and also by holding the work steady in place of said fingers.
My woodworking experience taught me to run the work past the cutter or blade rather than moving the tool across the material. I have a small drill press and X-Y table from Micro-Mark that I’ve adapted into a mini-mill for working with styrene. The X-Y table has a lot of wobble in the lengthwise movement, which can be problematic where accuracy is needed. That’s one reason I prefer to design a jig with the required amount of travel built into it like the one I made for milling coupler key slots. This detail adds a lot to the appearance of a car and proved simple to do, once I figured it out that is.
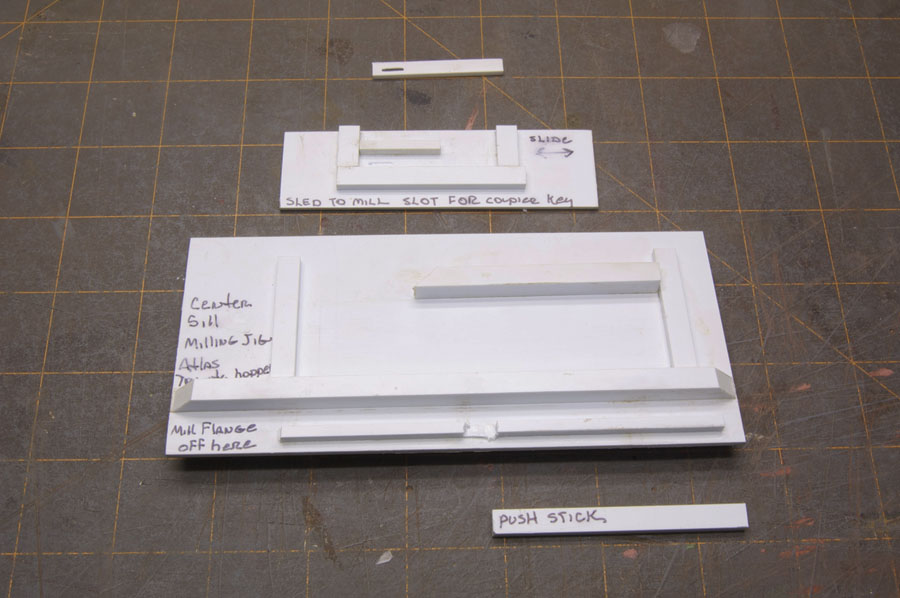
The jig has a base of 0.100″ thick styrene with a runner on the bottom that fits into the T-slots of the X-Y table. The top side consists of various bits of styrene strip stock, usually 0.125″ by 0.250″, or whatever is needed to guide and/or hold the parts to be milled. Here I laid out a series of strips to guide a secondary sled that actually holds the finished part, as you can see in the photo above.
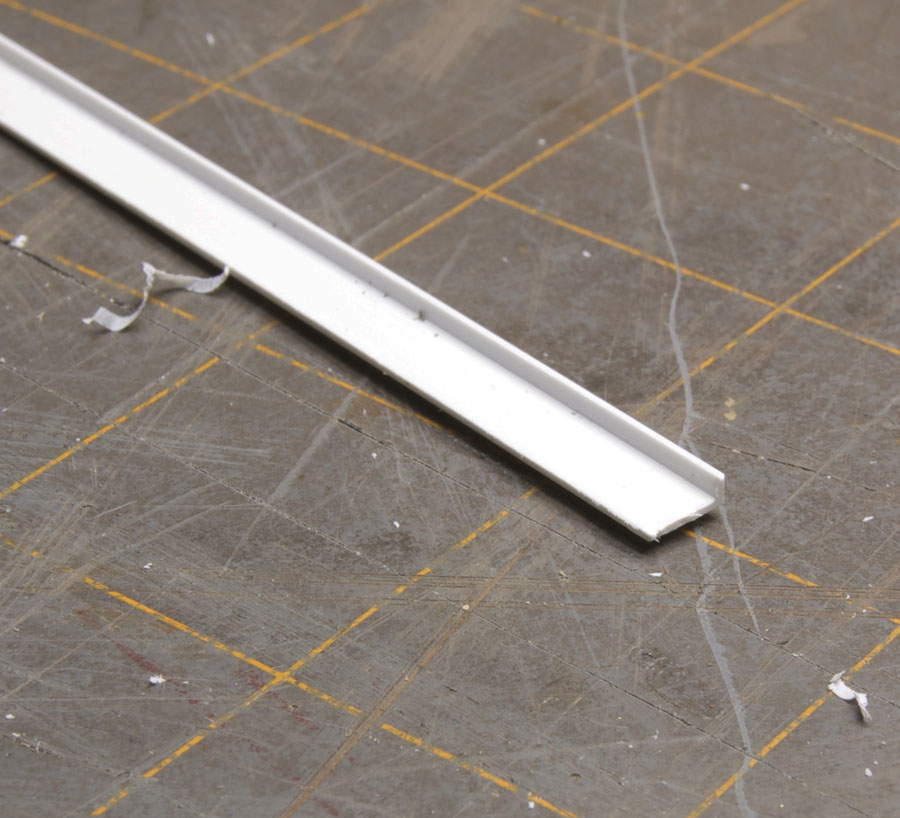
In a rare moment of clarity, I realized I could also use this base to make a jig for milling off one flange of the 0.250″ channel I use for these extensions. It’s simply more strip stock acting as guides for feeding the channel stock past the cutter head (photo below). The machine is off in this photo but I think you get the idea of how it works. I use a push stick to keep the channel stock tight to the base while I push and pull it through. After a bit of minor cleanup, the end result is seen in the second photo.

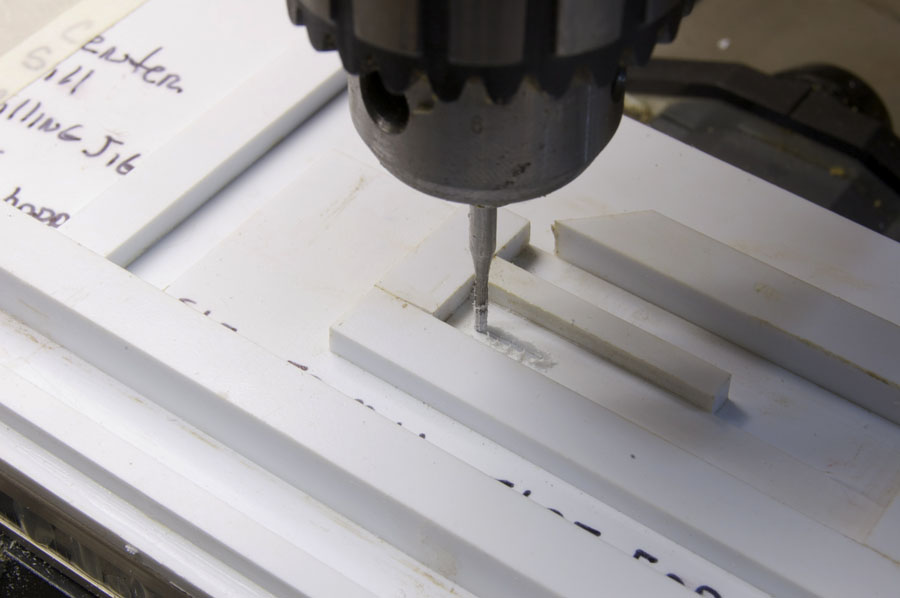
Milling the key slots simply involves cutting the channel stock to length and fitting it into the sled. First order of business is aligning the cutter with the jig.

The sled is placed in the base and pushed to one side, tight against the stop (not shown in this photo). Then I aligned the milling bit to the jig, adjusting the bit and the table as needed. I leave the bit a bit high so I can slip the piece to be milled into the sled. Once everything is set to my satisfaction. I mill the slot. (I’ve already milled the slot in the photo and repositioned the sled back to the starting place.)
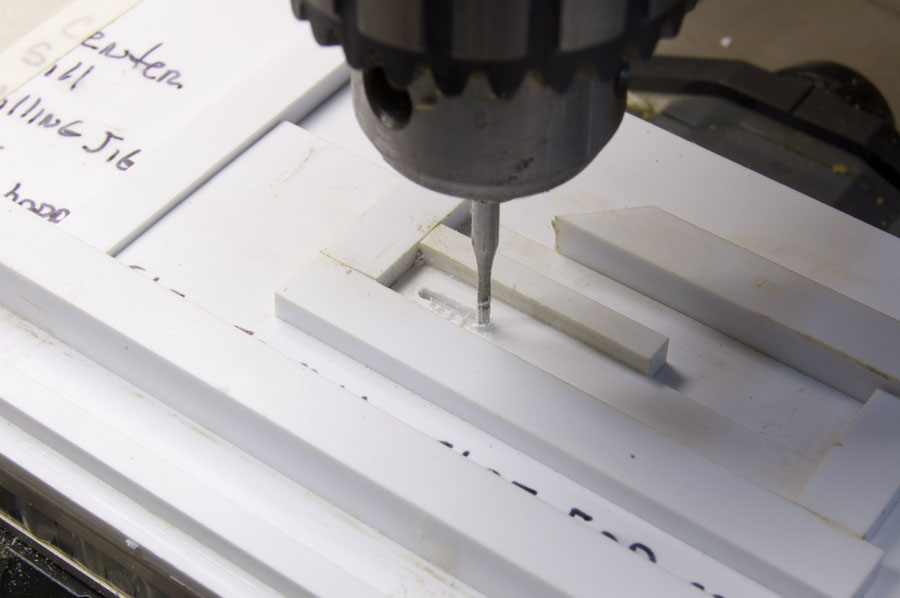
You’ll notice in the second photo how the sled slides to the left until it meets the other stop. This is what ensures the slots come out the same length. It’s kind of hard to see with all the glare from the white styrene, but compare the two photos above and you’ll hopefully understand the process.
These pieces are right and left handed. To do that I simply place the remaining flange on the top or bottom of the sled as it faces me.

Milling the opposite side. The remaining flange is on the top of the sled in this photo. It was on the bottom in the prior photos
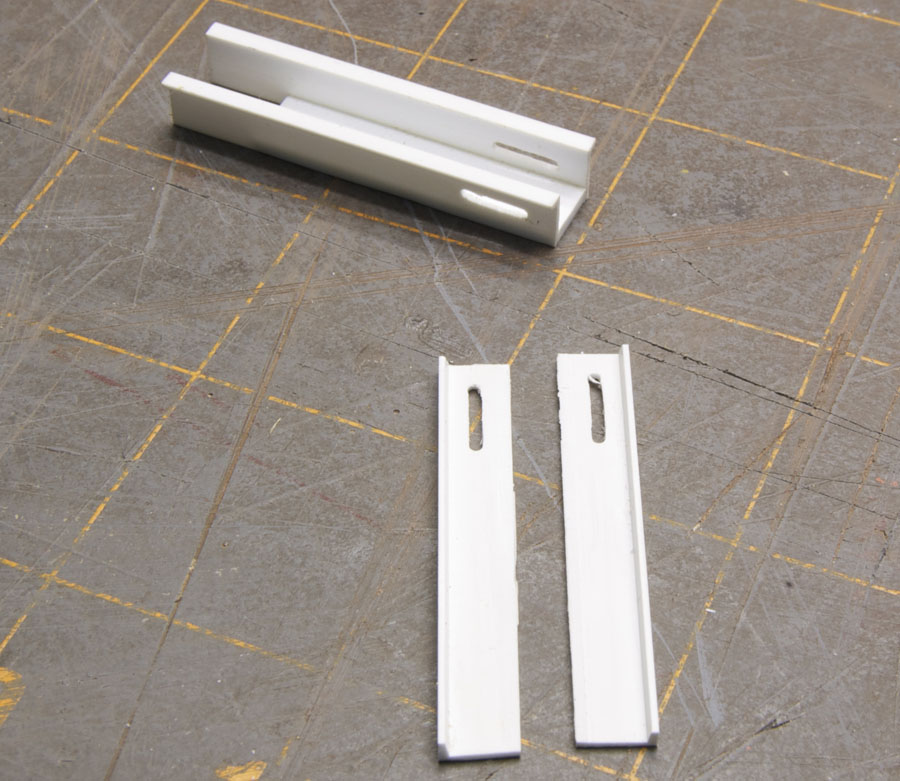
Finished pieces and extension
Made from scrap and leftovers, these jigs are practically free to make, provide repeatable results, save time in the long run and, most important, keeps me out of the ER. What more could you want? Hope this helps Greg.
Regards, Mike
PS: Okay, so I can’t read a calendar anymore and this post minus photos showed up a day early. Blame it on the meds.
Thanks Mike,
It does hlep. And gives me some ideas for milling some parts I need. I need to buy a drill press because lord knows I can’t hold a dremel straight and I definietely can’t hold my work straight either. Nice jig and it produces a nice result.
Greg Amer
The Industrial Lead
Thanks Greg. Happy to help. I can highly recommend the drill press. It’s been one of the best purchases I’ve made.
Mike