I’ve spent a lot of time over the years just looking at objects, trying to understand what their characteristics are. After you’ve done this long enough, you learn what your eye is drawn to as you notice certain details again and again.
The main driver of the covered hopper project is to eliminate the overly thick proportions and cross sections that are a staple of injection molded plastic. In the case of this car, there are many such compromises such as the gross thickness of the side sheets and the exterior post flanges.
As a modeler, I simply have to do things in a certain way and I’ve made my peace with that. I can’t do less and feel satisfied with the work. I could have left the posts alone but that would have made for more compromise. In the end, it made better sense to remove everything rather than work around out-of-scale proportions.
Context Makes a Difference
This decision supports my desire for greater realism in the model. One can argue that none of this really matters. The clichés we can all recite are that you won’t see such nuances and a little weathering can hide a multitude of sins, etc. etc. If the model were N scale I would agree with such sentiments. With quarter-inch scale however, details that are inconsequential in smaller scales are readily visible and they matter to me. Each scale has a context that influences the choices involved with it. What is practical and feasible in one scale doesn’t always translate to another, yet we tend to unilaterally apply the same standard to all. In my view, the actual context of a modeling scale matters more than we think.
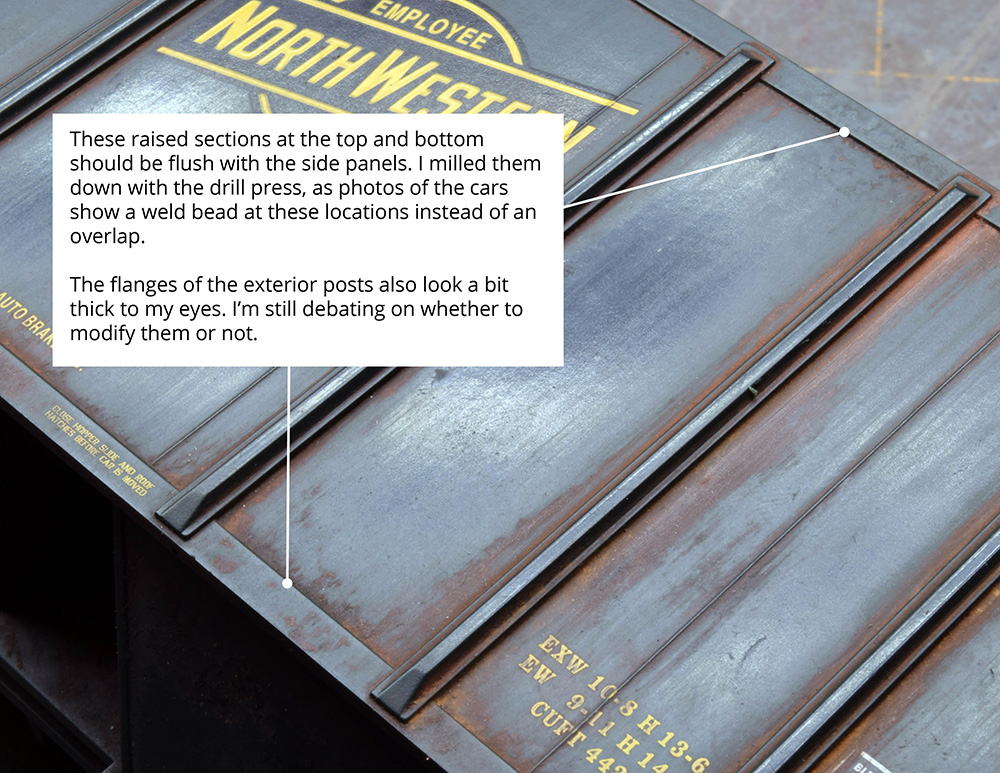
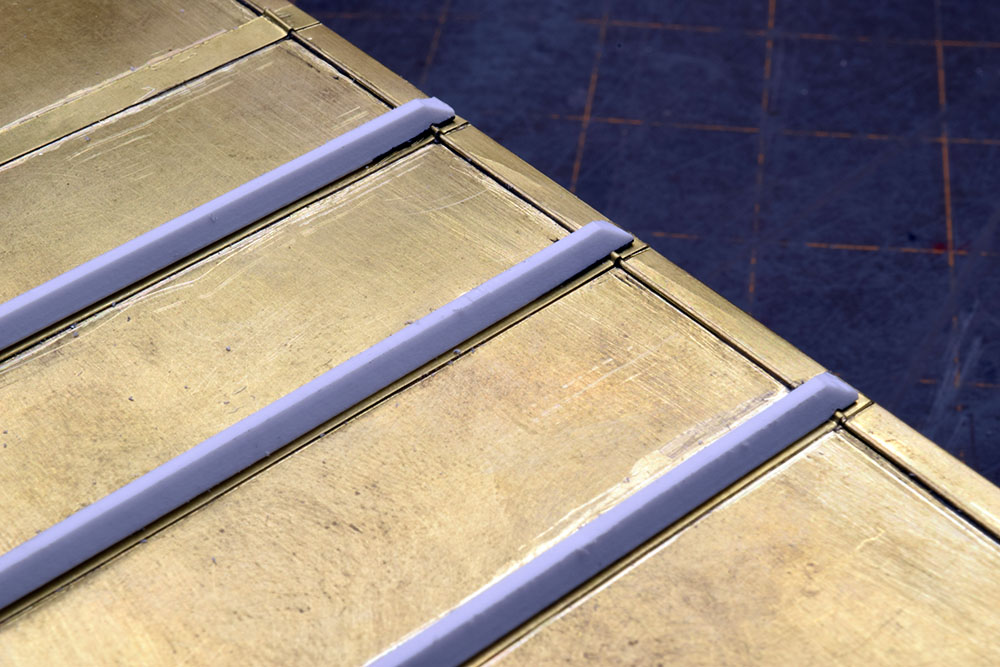
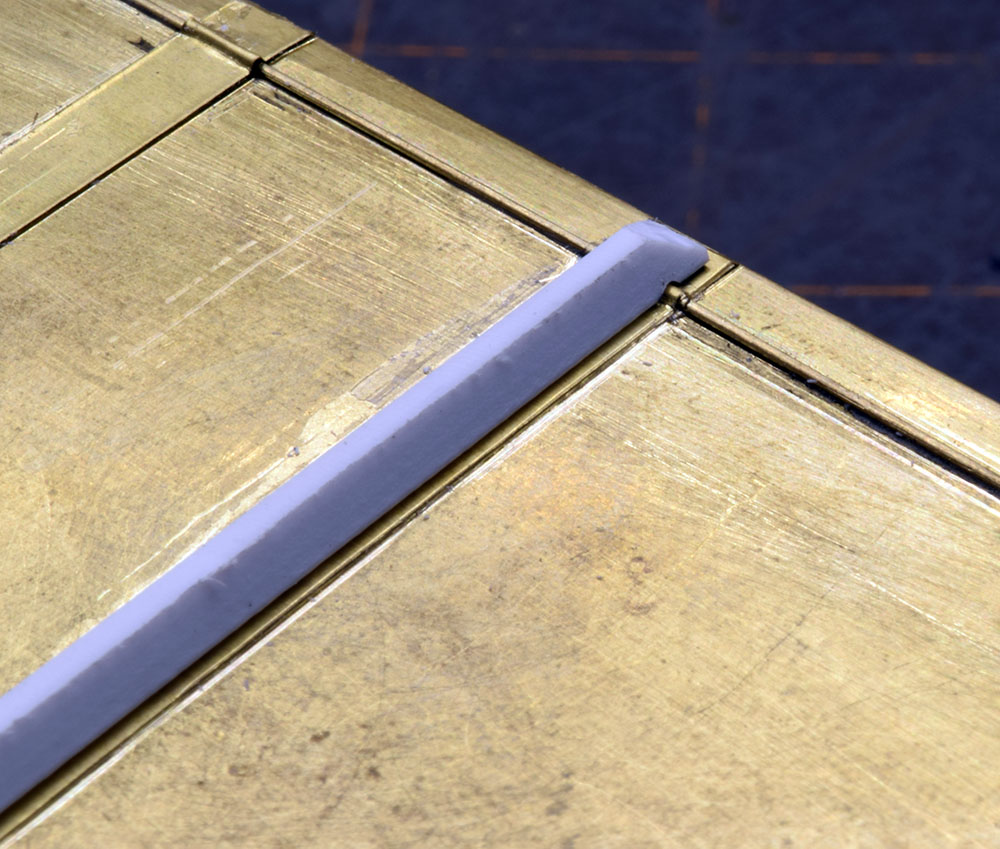
The text block in the photo above reveals my thinking. As you may recall, I milled away everything shown here down to bare plastic so I could cover the car in 0.005″ sheet brass for its thin cross section that is easily seen on each end. This also allowed me to correctly model other details like the weld bead shown below without having to work around out of scale elements.
Let The Subject Speak
Looking at an object is like listening with your eyes instead of your ears. There’s a visual conversation going on as you ask questions and the object reveals the answers. The more you look, and importantly, the more you put your preconceived ideas away, the more you’ll see the subject as it actually is.
To my eyes it wouldn’t be a faithful representation of a PS2CD covered hopper without the inherent delicacy in the cross sections and components seen in the full-sized car.
Learn to See Shapes
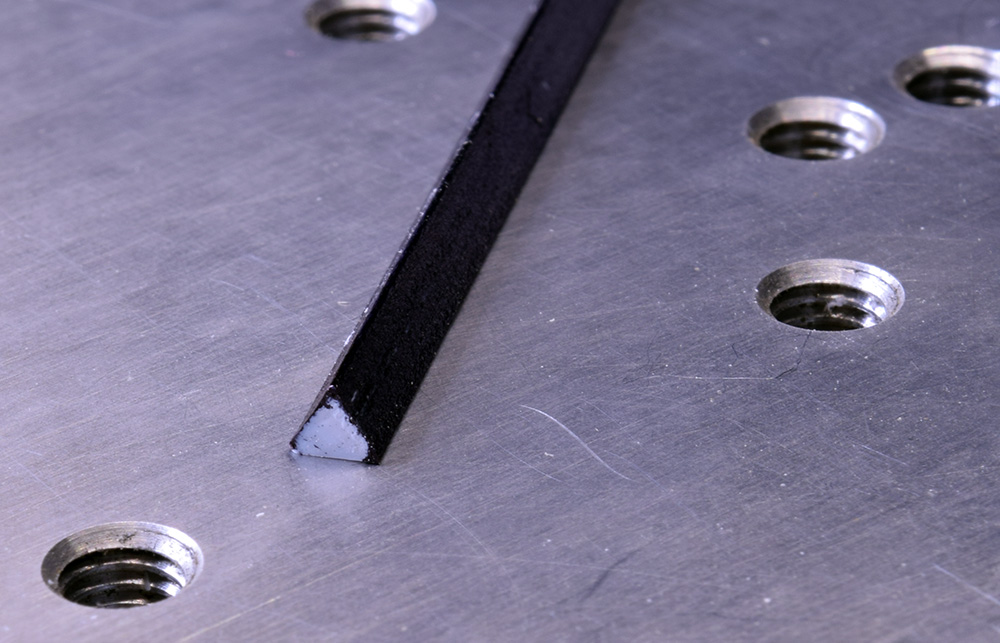
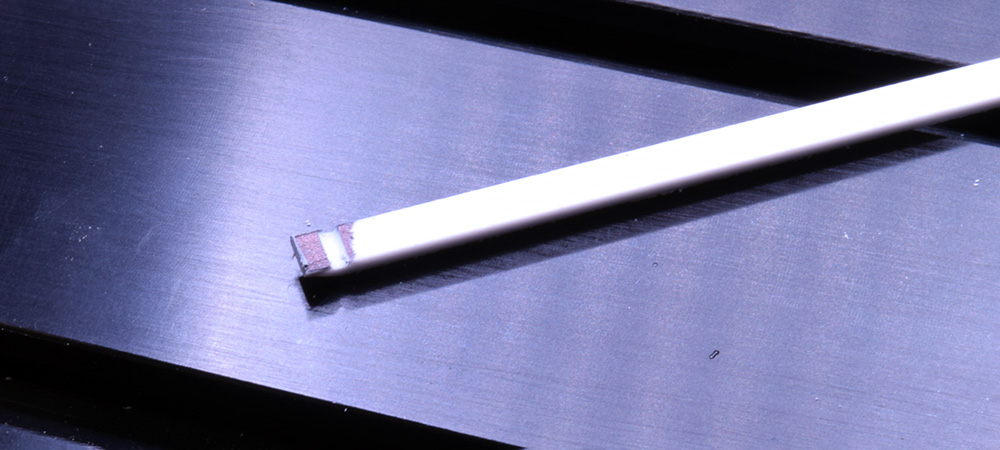
The X-posts start with a 0.125″ triangular styrene strip from Plastruct. This profile gives the basic shape for the post and only requires minor work to complete. The black coloring from a marker is only so the camera can pick out the shape more clearly.
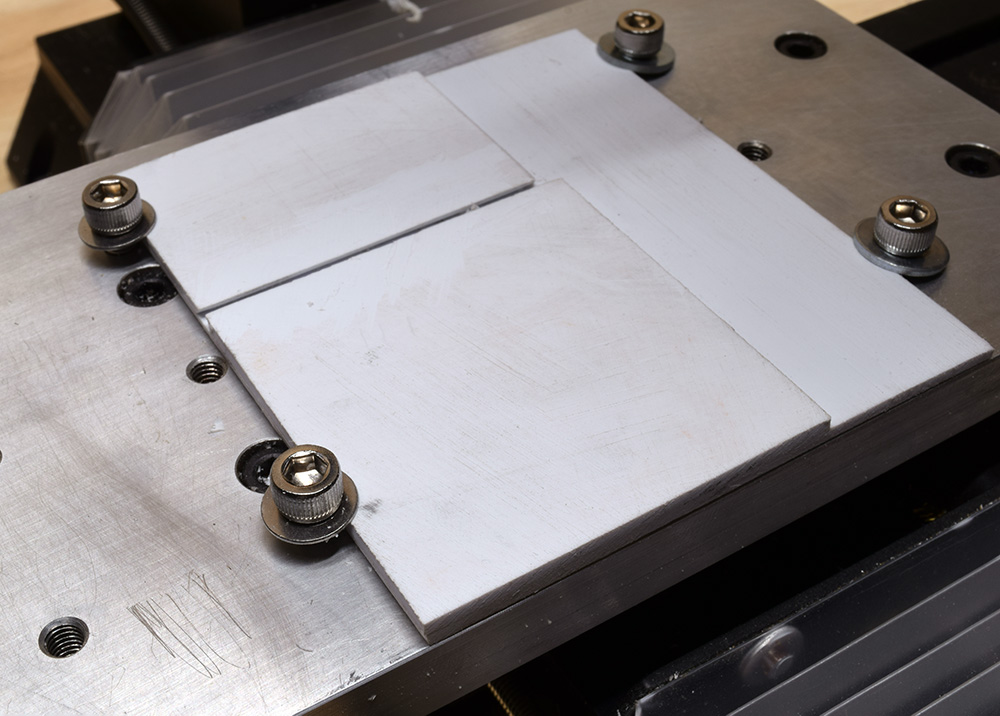
This shop built jig has a dovetail shaped slot that matches the profile of the triangular strip stock. This slot is formed by two pieces of 0.080″ thick sheet stock with a 30 degree bevel on one edge. The 0.080″ thickness of these sheets gives the finished dimension for the thickness of the X-post. In the photo below, I feed the strip by hand through the slot and past the cutter, which is off for the photo. I keep my fingers well away from the rotating bit and the guide jig is firmly clamped to the tooling plate of the mill, so I can use both hands to feed the stock through the bit.
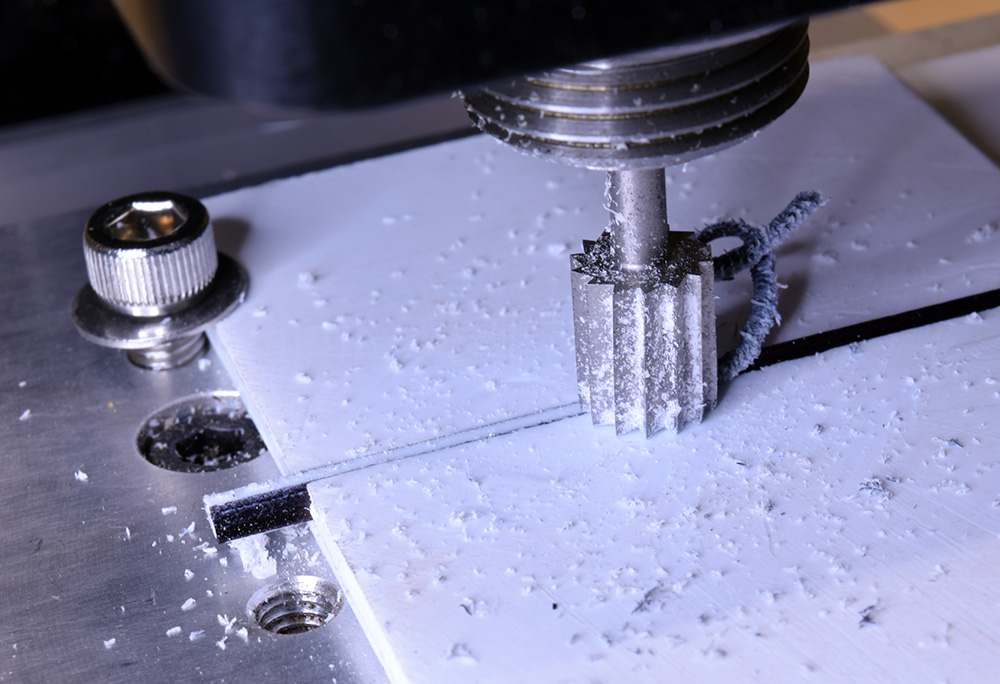
Please be aware that working with machinery like a vertical mill can be dangerous. I’m comfortable with the tools and methods I share here, and always wear eye and hearing protection. However, if you are inexperienced around power tools or something doesn’t feel safe to you then don’t do it! Find another way that you feel confident in using. Your personal safety in modeling like this is always your own responsibility.
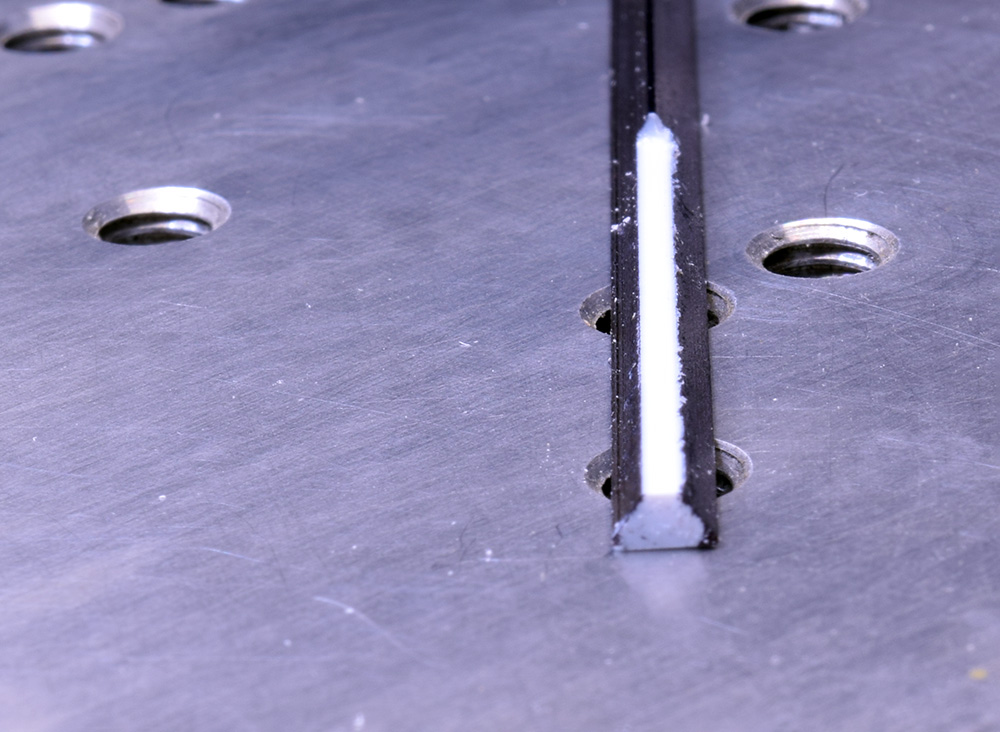
(Above) Step One of the post profile is done. Normally, the flat surface from the milling operation would run for the entire length of the strip rather than the short demo section shown here.
Step Two
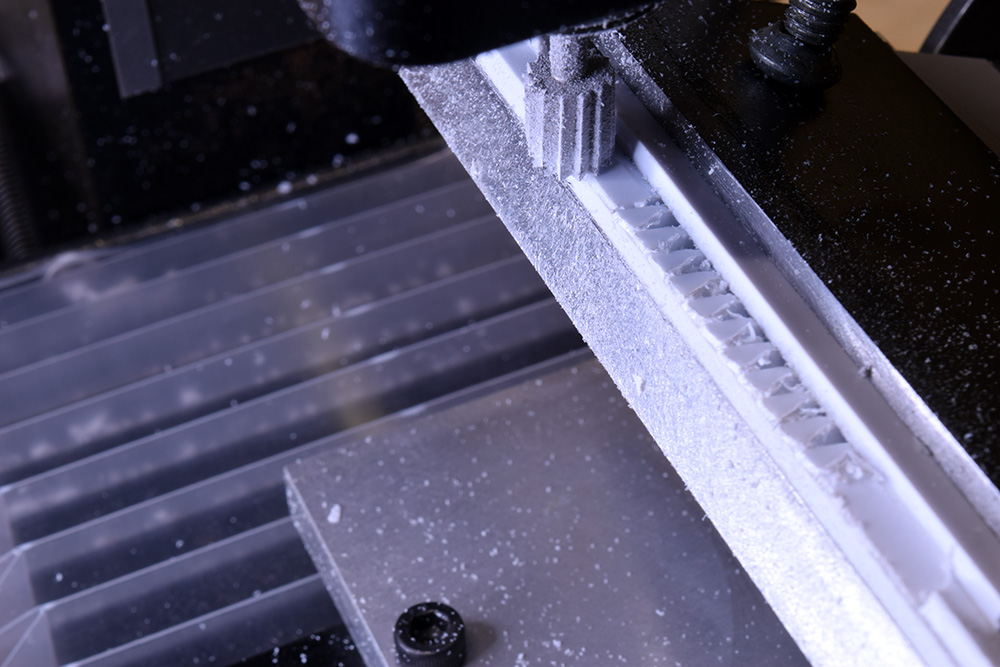
Each end of the posts has a beveled profile. When I have to do multiple pieces with a matching profile, I like to gang them together and make a single cut when possible. After cutting the blanks to length, I made a box from scrap styrene to securely hold all 11 posts for each side of the car in place. Out of the package these strips do vary slightly in size and I had to provide extra clamping force in the middle to ensure everything stayed where I wanted it to. I made certain the ends to be cut are square to the table and cutter. Once I was satisfied with the setup, I made the cuts. I reversed the posts in the jig and repeated the process for the opposite end. Once again, the machine is off for the photo.
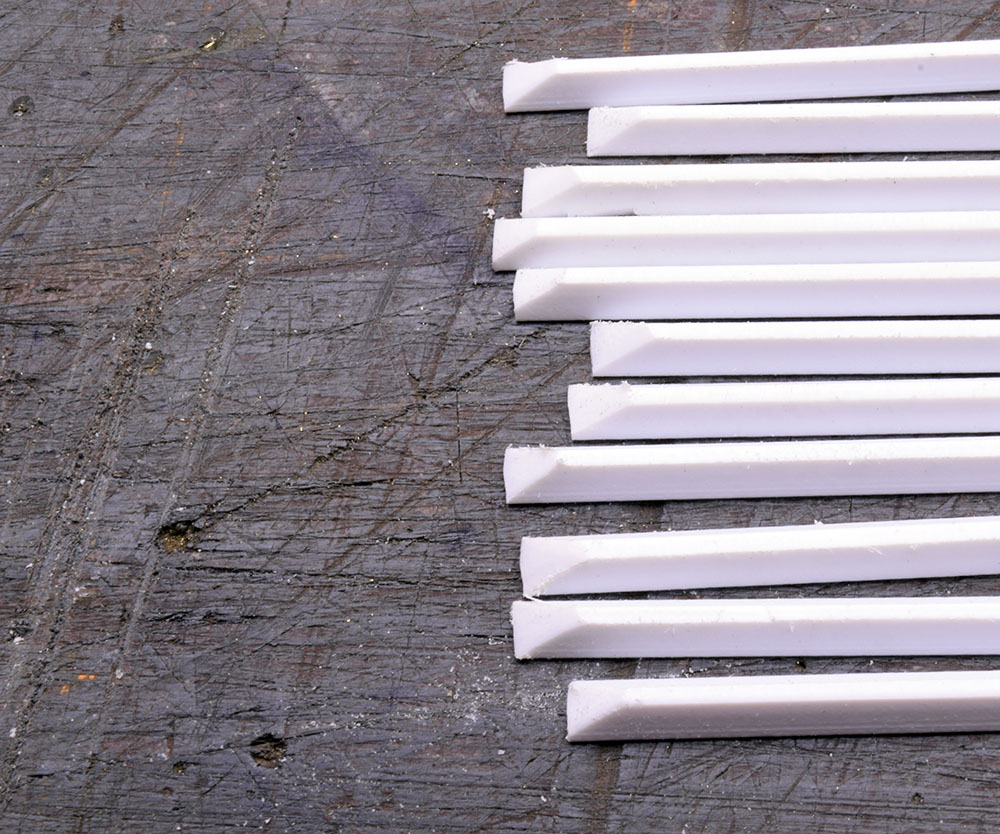
Although the process worked well, it wasn’t perfect and I still had a bit of clean up to do on the post ends. The results were good though and the system could be refined to produce better results.
Step Three
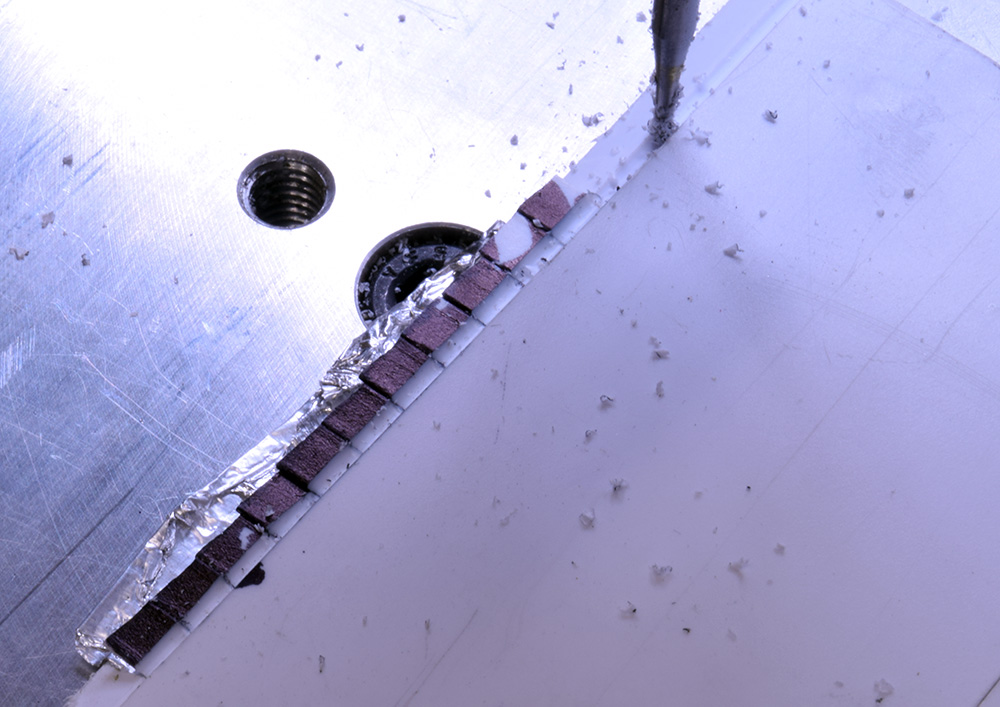
At the top of each post a notch is required on the back side to fit around the weld bead. I felt notching the posts would be simpler and more accurate than trying to remove the bead at each post location.
Once again, I ganged all the post blanks for each side together and milled this notch in all of them at once using a #106 round head engraving bit from Dremel. I had to sneak up on the depth of the notch gradually but once I had it dialed in, making the cut was simple and quick. I’m happy with the outcome (second photo below). Once again the black marker coloring is for contrast only.
If art has taught me anything it would be that once you learn how an object actually looks your perception of it changes and so have you, in that you can’t go back to being ignorant about it. The more I study freight cars, I’m no longer willing to settle for unnecessary compromises on a model when I know how things should look and have the ability to make it right.
I’m well aware that my working methods are convoluted and often rely on advanced machine tools like the mill. I also know that there are other ways to get these results and in the next installment, I’ll describe a simpler method for cutting the bevels on the end of the posts using nothing but a jig and an X-acto knife.
Regards,
Mike
This was absolutely the right read to start my day online with. Thank you.
You mentioned about learning to see with the eyes and you’re correct. It’s weird that it’s so hard but most things we see, we see with our memory and imagination so what we think we see is a composite of what’s there, what we think we remember we saw last time we saw something like this, and from this we compose an impression of what we think is in front of us now. Certainly, this clouds our work to reproduce not just the form of things but their colour and texture.
When we study something like this covered hopper it’s an act of translation but I think there’s space in this to gain an appreciation and respect for how the car is made. The real car is made by human hands just as our model is. Correcting our vision by learning to see rewards not just in accuracy in model making but also an appreciation for the person who made the real car. What challenges did they face and how did they attempt to resolve them? Their primary drivers are not unlike ours and often guided by the limitations of their tools and the material choices so there’s a connection between us that waits to be discovered? Are there places on that car body where the car builder did something beautiful because they could–even in the most utilitarian freight cars there’s often a design flourish that humanizes the cold steel box.
I love the way you describe this work. I can identify with your process and also see how I might approach it. Here on Prince Street I don’t have the same tools but your notes on your process invite me to see places where I can use what is comfortable and familiar in my hands as you did with what, in yours.
Thank you
Chris
Hi Chris,
What I’ve discovered with this build is a respect for the design that underlies any freight car. There is an elegant balance between structural integrity and excessive material that simply adds nonessential weight. The compound shapes of the discharge chutes are as beautiful as they are confounding to render for example. This car like many evolved in design as field conditions are noted and analyzed. Where can weight be shaved to increase payload capacity, where does the structure need to be increased for more reliability?
The model has also shown me how far removed commercial offerings are from the grace and design of full-sized cars. Both are commodities in the sense they were made in large numbers for a purpose and price point. Beyond that the similarities end quickly as the compromises inherent of the toy market come forward.
Mike
Mike,
That’s a really beautiful observation comparing the prototype to the model. That considers the model and the real freight car as two different things even though they are connected by being “of” the same thing. There is no connection between the real PS1 boxcar and the model PS1 boxcar beyond the identity “PS1 boxcar”. What fascinated me as a product of our conversation is how distinct those decisions are. Is it unrealistic to expect the model to bear a realism that is not inherited from the why and how of its design?
The design of the real freight car is itself an evolution guided by what we have used in the past. The freight car is not a unique member but only a component of an entire handling system from the point the shipment originates, through its movement, to the point where it is received. So many parts of the freight car’s design are influenced by things like how it is loaded or unloaded or what the road conditions are like through its journey. As a component of its system its design is also of that same system.
The same is true of the model freight car. Manufacturing guides decisions about how a model is designed. Things like generic coupler mounts or how a brand’s freight car trucks are designed guide the decisions about how the floor and “frame” are designed to suit those common elements. Moving up through the model car body each manufacturer has signatures guiding how it prefers to design a model which identify it as an Atlas car compared to how Hornby might tool exactly the same thing. Those practices guide how tooling is designed and are functional of the company in a kind of legacy way.
When we learn to draw or build models of what we see it changes our appreciation of what we have in our hands or eyes. As different things, the real thing and the model, anything they have in common is coincidence and only coincidence. As people interested in connecting these two things our work steps back from simply scaling dimensions to reconciling processes. Our models are better because they are more whole representations of one in the other and we are wiser because we paused to see what connects and how it does that.
Chris
I’m so turned on by this thread and, rereading it now, realised this too:
That relationship between the real thing and our model thing is just a coincidence but made different by our intent.
When Pullman, Trenton, or American Car & Foundry sets out to build a car their goal is to create a thing suitable for the work it is intended to do. They’re participating in the requirements negotiated with a client for that project and experience gained from the last time they built that type of railway car.
When we set out to make a model our starting point is wildly different. Our model cars are unlikely to ever enter true revenue service, carry any kind of load for a service, or perform any real work beyond satisfying our desire to have this thing in our collection. We look at what we need to complete the picture of our model railway and this railway car is part of those ingredients, that inventory, so we collect it. We set out to make a particular railway car and there’s that difference because of intent.
Trenton, Gunderson, or AC&F set out to make a railway car they can sell to a railroad who are only going to purchase it if it does the kind of work they need to do. They design the car as a generic thing and then christen it with a name. We model railroaders like the look of that thing so set out to build a copy of it. Trenton didn’t decide to make a PS1 boxcar they just needed to make boxcars. Kadee or Athearn starts from the position of wanting to make PS1 boxcars. I’m rambling but this too is a significant difference in who we are as modelmakers and how we work compared to what the real railroad is and how it approaches its work.
Chris