Modeling Track, Part One: Details Matter
Modern track may be homogenized in appearance but older track can have a wide range of details.
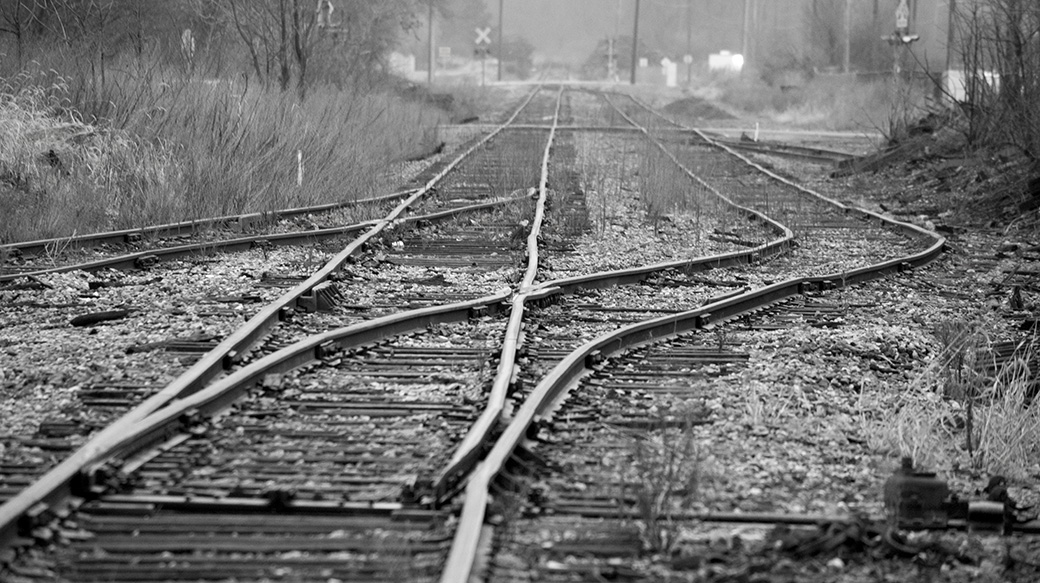
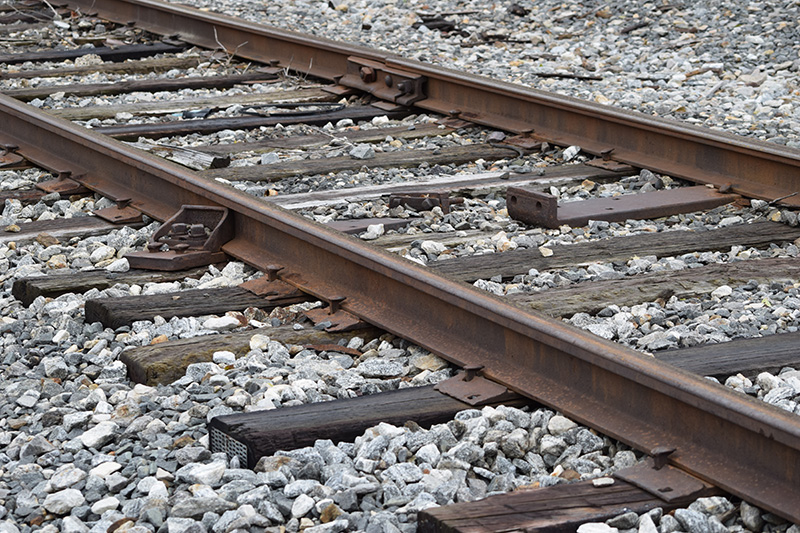
Consisting of a run-around, two sidings and using only four turnouts, this remnant of the PRR’s Fort Wayne Branch is a favorite place of mine to study vintage track up close and in-depth. Even though I’ve shot many photos here, I still find new things to see and learn from.
As part of the Pennsylvania Railroad’s westward expansion from Pittsburgh, the Grand Rapids & Fort Wayne Railroad provided access to northern Indiana and Michigan markets. GR-6 and 7 were the main freights out of Richmond to Fort Wayne, Indiana, where connections were made to Michigan and northwest to Chicago.
If memory serves, this track originally featured 100lb rail with 6×9” oak ties. While one might safely assume that upgrades and rail replacement have taken place over the years, my onsite observations indicate that sections of old rail are still around.
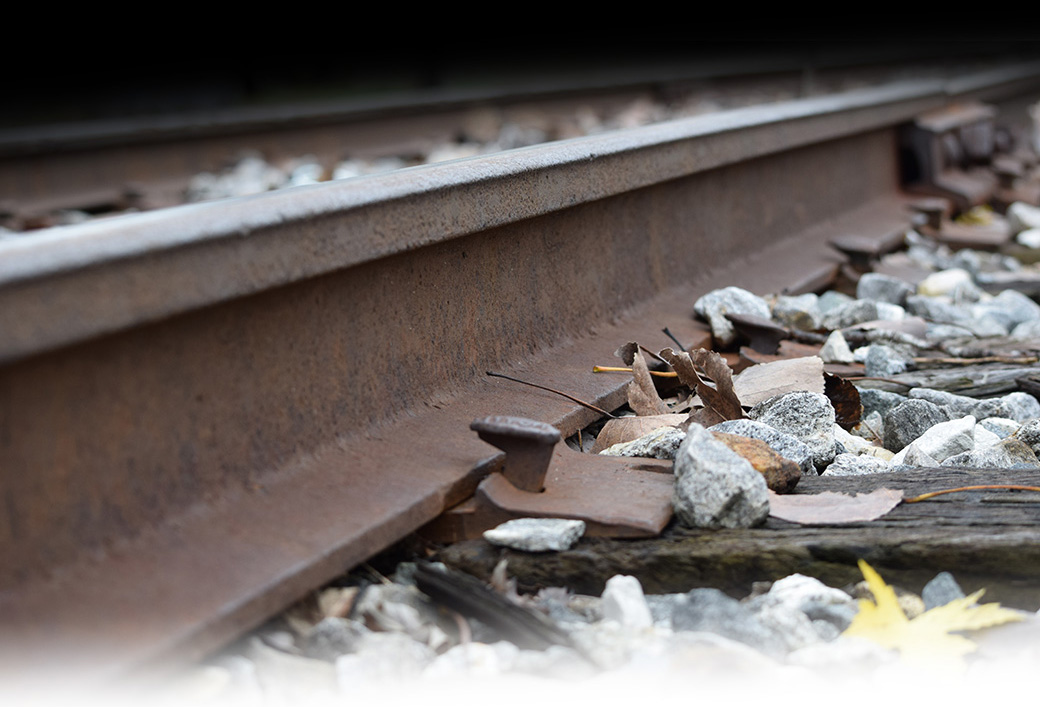
The 1,893 foot long run-around track is currently a mish-mash of joint bars and rail sections of varying length. I’ve noticed a number of curiosities here like this joint bar with the curled toe. I found a similar one in my copy of the 1921 Maintenance of Way Cyclopedia but it wasn’t an exact match. Still, I can’t help but wonder if it’s an original period detail. It’s clearly an oddity, like the cast guardrails on the branch route of the turnouts. The presence of newer joint bars nearby suggests sections of rail were changed or spliced in many times, although I can only speculate based on what I see.
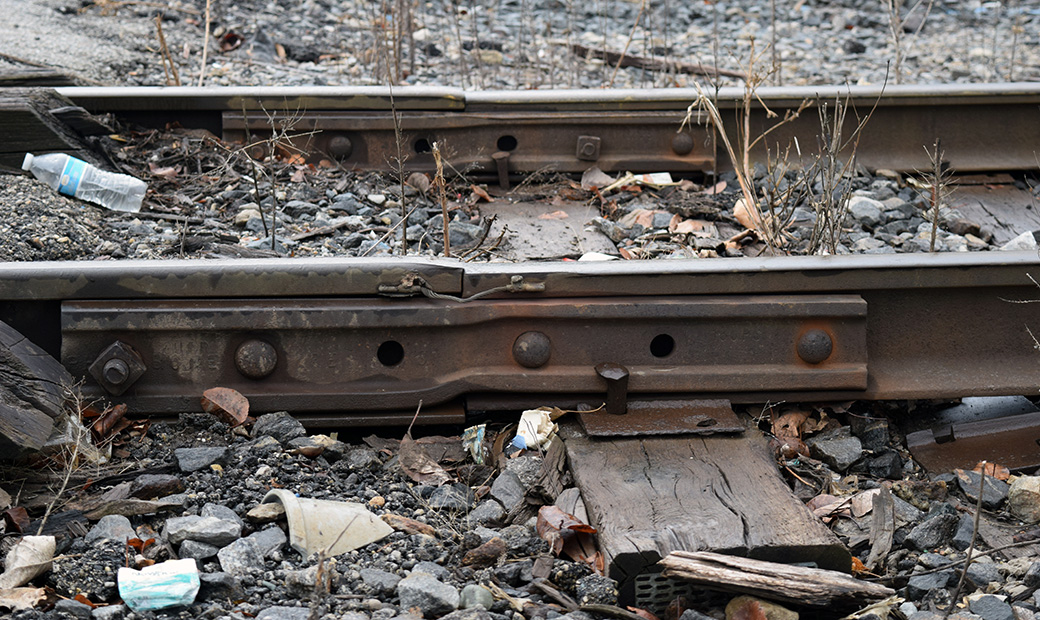
This stretch of track has quite a collection of joint bars. The majority are the four hole, full toe design like the one in the foreground. The oddities include the full toe design with the curled lip shown below, insulated joint bars for signaling purposes and simple connector plates.
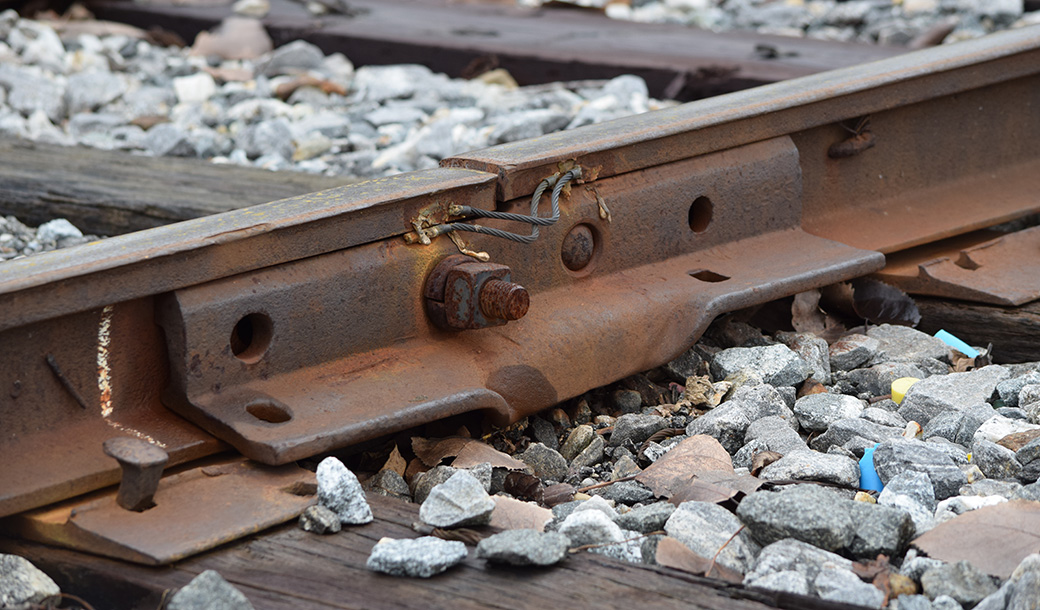
A walk down the tracks revealed things like this derelict gauge plate and two rail braces for a turnout that was here once. Its removal might account for all the odd sections of rail on this track. I also noted at least four different types of joint bars and numerous replacement ties. The prize winner however, had to be this cobbled together rail joint with an infill piece and broken rail head, all slated for repair as evidenced by the track inspector’s scribble.
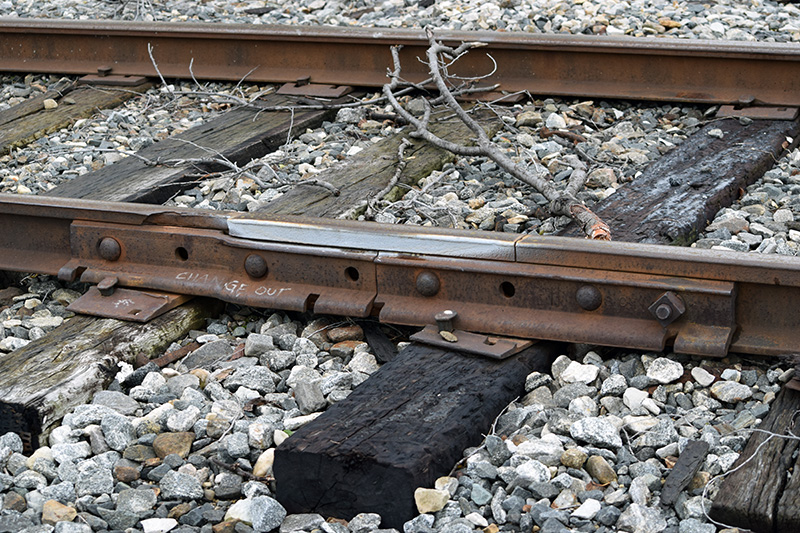
There are several factories that surround this track and this rail brace and gauge plate (top photo) on the run-around are all that remain of a turnout for the industrial lead to the adjacent factory. The prize of the day however was this funky rail joint (above) with infill piece and broken rail head. The chalk scribble says: “Change out.” Indeed!
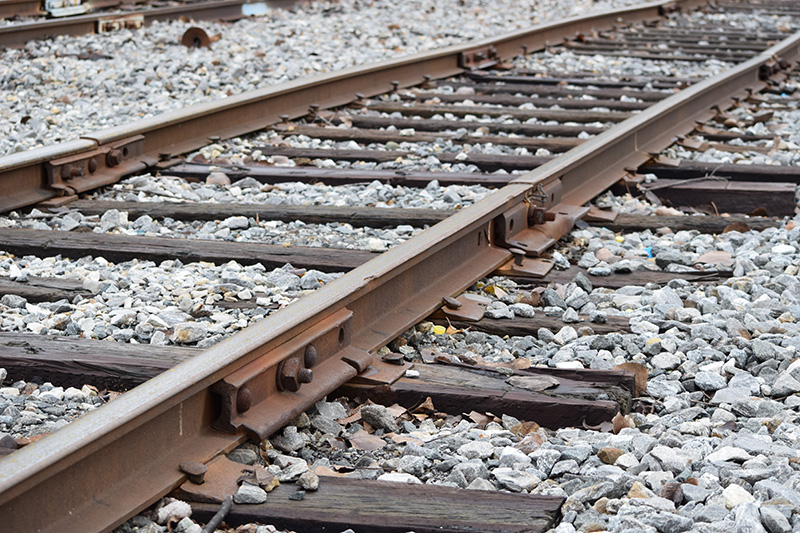
The use of heavier rail under grade crossings is another curiosity I’ve noticed in several places around town, especially where older track is involved. Once again, I’m only guessing but the use of heavy rail on both tracks suggests that it holds up better under the constant pounding of traffic. This is a busy street with cars and larger trucks coming and going all day. The beefier rail only extends for a few feet on both sides of the road where compromise joint bars transition back to the lighter 100lb rail.
Transitioning to heavier rail through grade crossing is a practice I’ve seen in several locations around town. The crossing at Sheridan Street features heavier rail similar to this example at 12th Street.
One Lesson
If there’s one primary lesson to convey it’s this: don’t just slap details everywhere. As much as I enjoy track modeling, it’s easy to get carried away and I would only emphasize details in select areas and, with a purpose in mind. There is a difference between details that tell a story and create an impact (like tieplates and four spikes per tie) and ones that turn everything into a cartoon caricature, such as junk piles scattered everyplace. It’s a very fine line between the two.
Modeling Ideas
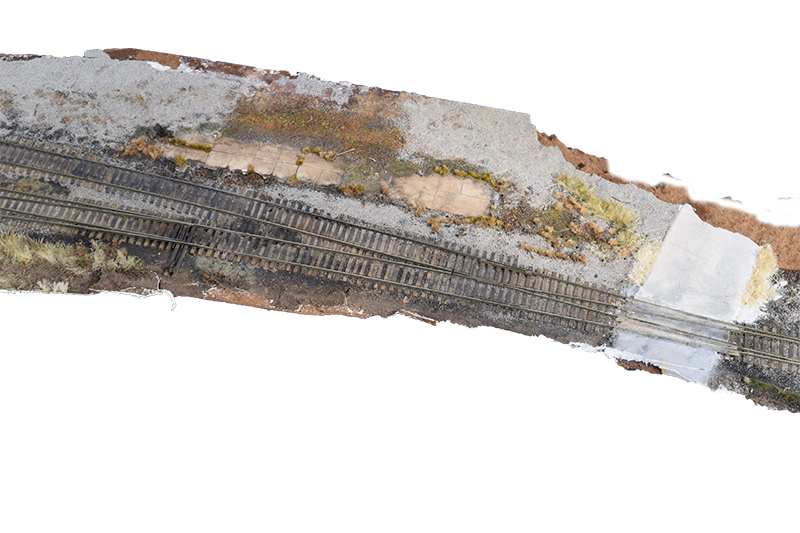
I salvaged several discrete track sections from the layout including this cluster of turnouts at the Mill Street crossing. This was my favorite area of the layout and some day I plan to create a cameo around this piece. At the time this represented my skill level and pleased as I am with how the track turned out, I feel there is room for improvement. As I’ve said before, I’m always looking at track and ways to model it better. Viewers will get a close look at this track and reworking a select few details inspired by the ones illustrated here will add just the right amount of extra interest with a small scene.
The remnant of the run-around is a good candidate for some lighter rail sections with compromise joint bars and maybe evidence of some tie work. Beyond that however, restraint is called for. It seems that the smaller the scene the greater the temptation to overload it with detail. I could go nuts in detailing this small section but I don’t want to add anything that requires repeated explanations to viewers. “Hey Mike, why are those two joint bars butted together? That’s not prototypical.”
I’m not being hypocritical here. Yes details matter but I want to create a hierarchy with the details of the scene and a visual resting place is as important as the center of interest. In fact, I now believe it’s more important. I’ve seen too many layouts where every square inch drips with excessive details. Make no mistake the work is top-notch but the volume of detail overwhelms you because there is no place for the eye to rest and absorb it all. Instead your gaze bounces everywhere, to the point one has to walk away and recoup a bit.
The principle to understand is the contrast between cluttered and spare. When one quality predominates, the contrast between them is what provides the emphasis and strength for both. It doesn’t take much to pull this off.
The longer I study track, the more I realize most modelers don’t even scratch the surface of it. In this series, I’m going to the original source for inspiration. The value in doing so is that you gain a deeper understanding along with the context of why things are as they are. This level of track modeling isn’t for everyone and never will be. It’s one of the many choices we get to make with the craft. I’m simply focused on the areas that bring me enjoyment and sharing them with others. In closing, I encourage you to take what you need from this series and leave the rest. Next week a look at cross tie modeling.
Regards,
Mike
Mike,
Very keen observations for someone who isn’t a railroader. It’s interesting to how “normal” these details look to me, but after spending time in the industry you pick up on these little details each day at work and assume that everyone notices them. For example in your lead photo, the left hand trailing turnout has no switch stand that I can see. If that’s the case, the point rail will be spiked close. Or notice how the grade crossing has the wood ends beleveled, so that dragging equipment doesn’t dig into the crossing.
I’m enjoying the series. Keep it up!
Craig
Thanks Craig. I’ve spent a lot of time around railroad tracks since I was a kid. Truthfully though, my understanding doesn’t come close to that of a seasoned professional like you and other pros who read the blog. I look from a modeler’s perspective of how can I do this, or is it practical to do this? I always want to be a student.
Mike