
PRR 71064
Among the many reasons I enjoy scratchbuilding and kitbashing is that I get to choose the standards I want to aspire to. After completing recent builds I now appreciate how each model is its own project, one that I can build quickly or extend for as long as I want. I get to share the work that inspires me via this blog and through The Missing Conversation, because I believe that encouraging you to become a more skilled and knowledgeable modeler makes for a stronger craft that benefits everyone.
Pennsylvania 71064
This model started as an Atlas O ready-to-run car from the 1970s. If memory serves, this model and its companions were the company’s first venture into quarter-inch scale. The model came with 3-rail trucks and crude knuckle couplers that were also truck mounted. Replacement trucks with 2-rail five-foot gauge wheelsets were sold separately and the body was ready for Kadee 805 coupler boxes. The hand grabs were molded on and the ladders and brake details were oversized. The coarse detailing aside, these cars made it a simple matter to have a nice piece of quarter-inch scale equipment up and running. I dabbled in O scale back then with a simple layout and really enjoyed the experience. I kept this car for forty years mostly for sentimental reasons.
Details make a difference
With an accurate car body as a foundation to build on, adding the appropriate details brings this antique up to contemporary standards. Along with those details, I added a pair of San Juan Car Co. trucks with Protocraft P48 wheels. The Kadee couplers were also replaced with Protocraft Type E and for once, I decided to leave the underframe alone this time. I’ve outlined the rest of the build in other posts, which are linked at the end of this one. The decision to backdate the layout to the 1960s renewed my enthusiasm for the project and I’ve completed the final details and weathering.
I freely admit that some of the details are probably inaccurate for this car and also, there is plenty of room for improvement in the workmanship. With that said, I am pleased with how the model turned out. It’s a beginner’s step in a long but enjoyable journey of freight car modeling.
I consider each build an opportunity to learn something new or improve my skill set. Among many lessons I learned with this project, the foremost is to embrace a challenge. The linkage from the brake wheel is a prime example of this. Initially I tried splicing parts from an Intermountain Railway Company brake set sprue. The outcome didn’t really satisfy me and since I had extra pieces to work with, I looked at different options.
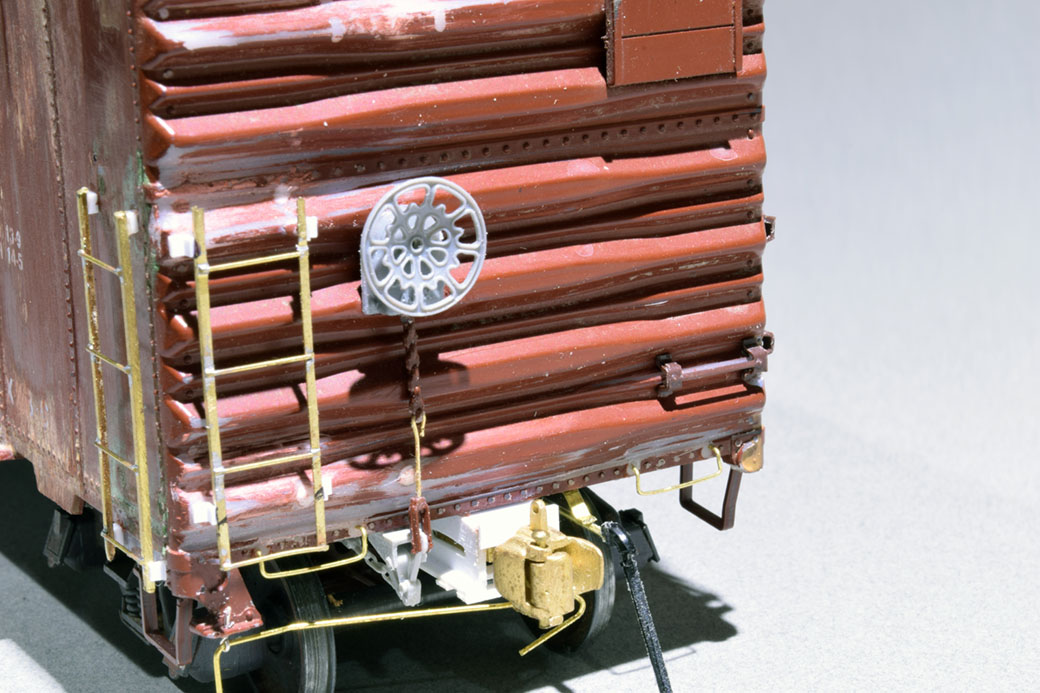
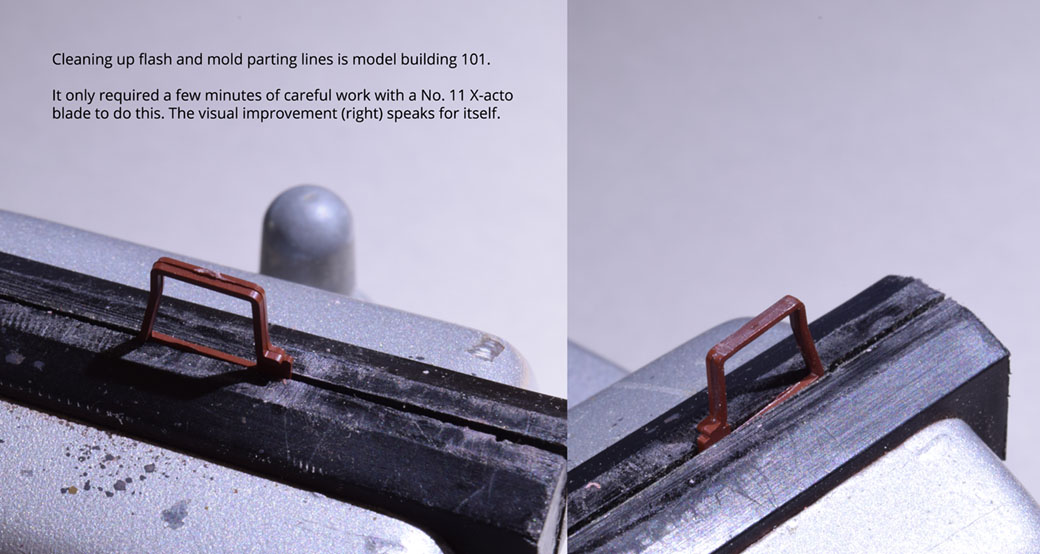
The Intermountain parts suffer from parting flash where the two-part molds don’t align properly. It’s especially bad on the ladder rungs, hand grabs and other round sections like the brake linkage. This flash can be removed if your’e careful but the risk of breaking the delicate parts is high. Instead of that I replaced the plastic rod with 0.015” brass wire. I cut off the clevis, put it in my vise and hand drilled the end with a #79 bit to accept the brass wire, which I secured with gel CA. I also cut off the chain that goes to the brake wheel housing and drilled out the bottom link so I could loop the other end of the wire through it (photo above). It sounds more complicated than it actually was and the results were very satisfying.
All the body work involved in the build meant I had to touch up the paint in several spots. I’ve squirreled away several jars of Floquil paint and had a color that was very close to the factory color. After the painting it was time to weather the car and put it in service.
Weathering is another area I’m just a beginner in. Like many, I tend to default to a limited set of techniques. I have several excellent guidebooks produced by the military guys that show me there is far more to a worn paint surface than we think. While a lot of their techniques aren’t appropriate for freight cars, there is still much to learn from their work.
Once again, I’m not offering this car as an example of the state-of-the-art modeling. It’s simply one step of many more to come and a baseline to gauge my progress against.
Regards,
Mike
Terrific work, Mike.
Last week I asked a question about how to get people “over the line”. I think that the closest we can get to is demonstrating that one doesn’t need to buy new brass, or hi fidelity multi-media kits to move one from the basics. As long as they are dimensionally sound, anything can be upgraded, and it can be a bit at a time. Replace the ladders, upgrade the grab irons, refine the brake wheel, etc, can all be done independently of each other and upgrading the wheels and trucks (maybe initially to finer wheels for 5′ gauge, P48 as an optional further step) can be done at anytime.
Part from the wheels and trucks, it only requires some wire, some styrene and some basic tools. Expenditure is minimal.
Thanks for the encouragement: I really must get down to some modelling myself…
Simon
Hi Simon,
Yes, rolling stock can always be detailed and upgraded without turning the process into a major burden. I’ve found that upgrading older models is a great practice for a new skill or to set a challenge for learning a new one. I’ve received the parts I was waiting on and have started the next car. I haven’t enjoyed myself this much in a long time. Time for you to have a go my friend.
Mike
Luckily I am about to have a few weeks where I should get some time to do these things – been a while since I did anything worth mentioning.
Simon